
Epson WF-2630 - Ink Replacement Guide
Make sure you have your replacement cartridges handy before you begin. You must install new cartridges immediately after removing the old ones.
If an ink cartridge is expended, you see a message on the LCD screen. Note which cartridges need to be replaced and press the OK button, then press the up arrow button.
- Turn on the printer.
- If you are replacing a cartridge before you see a message on the LCD screen, press the up or down arrow button to select Setup and press the OK button. Then select Maintenance > Ink Cartridge(s) Replacement and press one of the Start buttons.
- If you are replacing a cartridge before you see a message on the LCD screen, press the up or down arrow button to select Setup and press the OK button. Then select Maintenance > Ink Cartridge(s) Replacement and press one of the Start buttons.
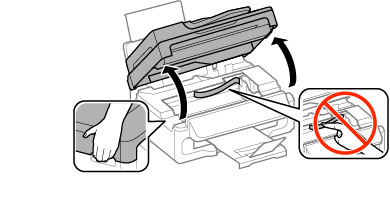
- Lift up the scanner unit.
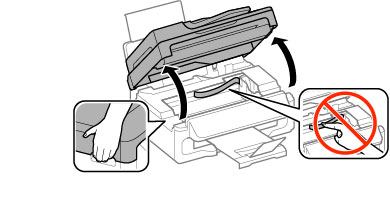
-
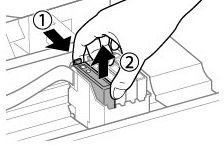
Squeeze the tab on the cartridge and lift the cartridge straight up to remove it.
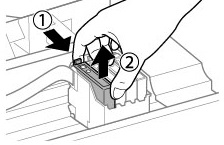
- Open the new cartridge packet.
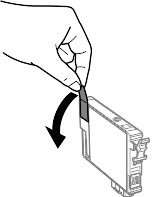
- Remove the yellow tape from the side of the cartridge
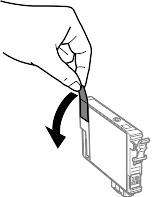
Do not remove any other labels or seals, or ink will leak. -
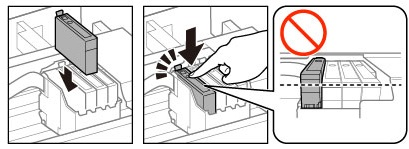
Insert the new cartridge into the holder and push it down until it clicks into place.
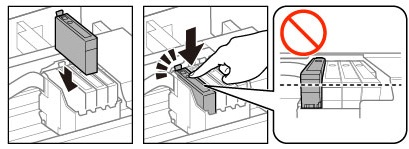
-
Lower the scanner unit.
-
Press one of the Start buttons. The print head moves to its home position and the printer starts charging the ink. When you see a confirmation message on the screen, ink charging is finished
No comments to display
No comments to display