Make sure you have your replacement cartridges handy before you begin. You must install new cartridges immediately after removing the old ones.
If an ink cartridge is expended, you see a message on the LCD screen. Note which cartridges need to be replaced and press the OK button, then press the up arrow button.
1. Turn on the printer. - If you are replacing a cartridge before you see a message on the LCD screen, press the up or down arrow button to select Setup and press the OK button. Then select Maintenance > Ink Cartridge(s) Replacement and press one of the Start buttons. 2. Lift up the scanner unit. [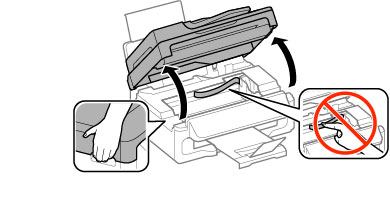](https://bookstack.pbr.org.au/uploads/images/gallery/2026-07/oAFimage.png) 3. Squeeze the tab on the cartridge and lift the cartridge straight up to remove it. [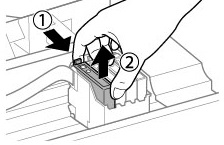](https://bookstack.pbr.org.au/uploads/images/gallery/2026-07/8pKimage.png) 4. Open the new cartridge packet. 5. Remove the yellow tape from the side of the cartridge [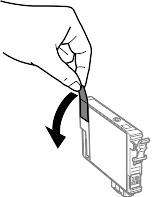](https://bookstack.pbr.org.au/uploads/images/gallery/2026-07/w0Cimage.png) Do not remove any other labels or seals, or ink will leak. 6. Insert the new cartridge into the holder and push it down until it clicks into place. [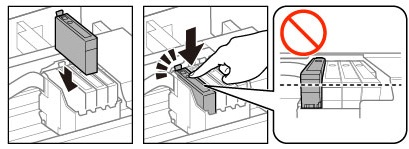](https://bookstack.pbr.org.au/uploads/images/gallery/2026-07/Bnximage.png) 7. Lower the scanner unit. 8. Press one of the Start buttons. The print head moves to its home position and the printer starts charging the ink. When you see a confirmation message on the screen, ink charging is finished