
Adjusting the Train Capacity (Manifest)
Overview
Use this procedure to change the capacity for general and single-journey passengers. This affects the four main legs: Belgrave–Lakeside, Lakeside–Gembrook, Gembrook–Lakeside, and Lakeside–Belgrave.
Do not manually edit these individual legs — changing the manifest will update them automatically.
Steps
Important Notes
Always right-click on the green manifest row, not an individual leg. Right-clicking a leg will only modify that single leg & will stop that leg getting updated max capacities via the manifest.
- This procedure does not affect the Belgrave–Gembrook Allocation (Return) leg. That must be adjusted separately — see the
Adjustingsectionthebelow.
Belgrave – Gembrook Return Management
The Belgrave – Gembrook Allocation guide.(Return) leg is a separate product and is not updated when you change the manifest capacity above. It requires its own procedure and has one critical extra step.
The key differences from the manifest procedure are:
Steps
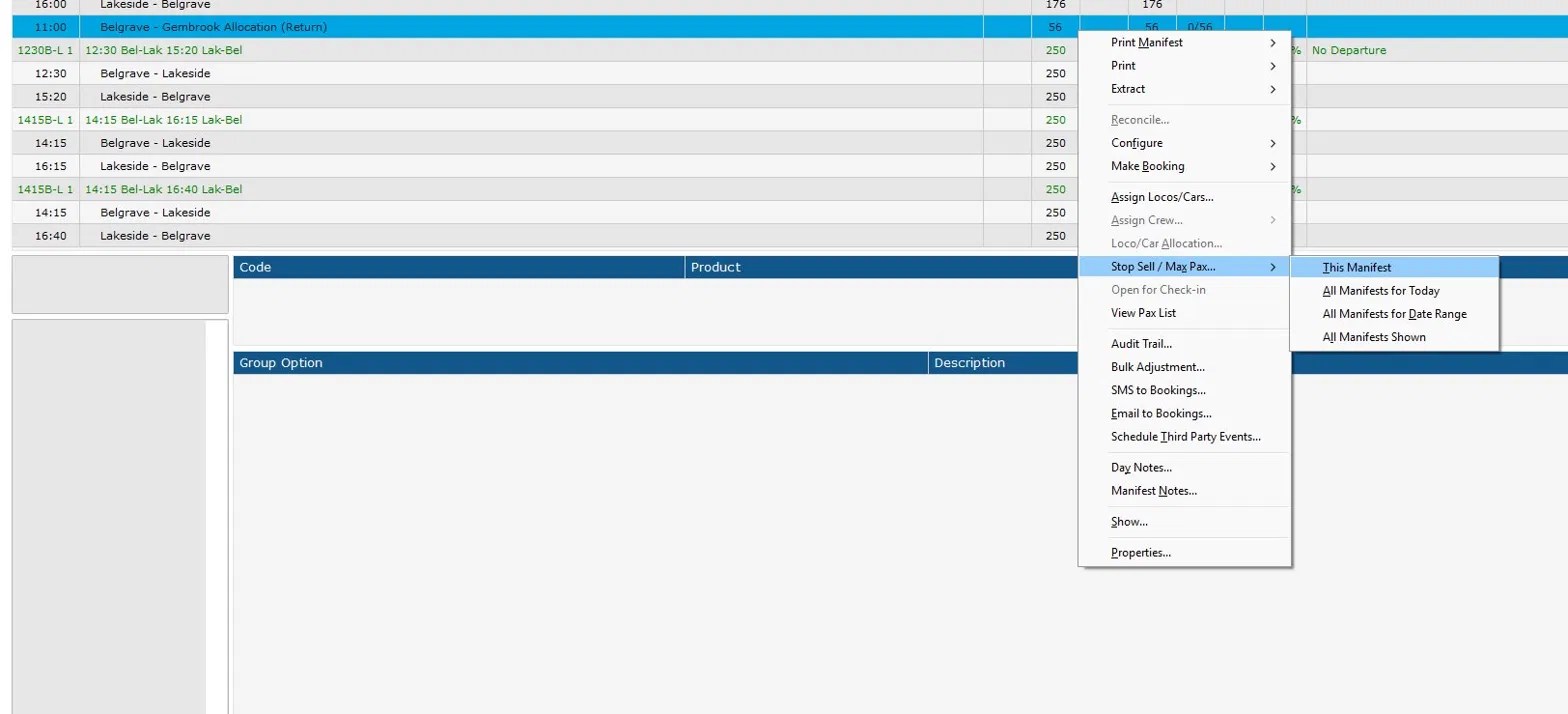
Hover over Stop Sell / Max Pax… and select This Manifest. In the dialog:
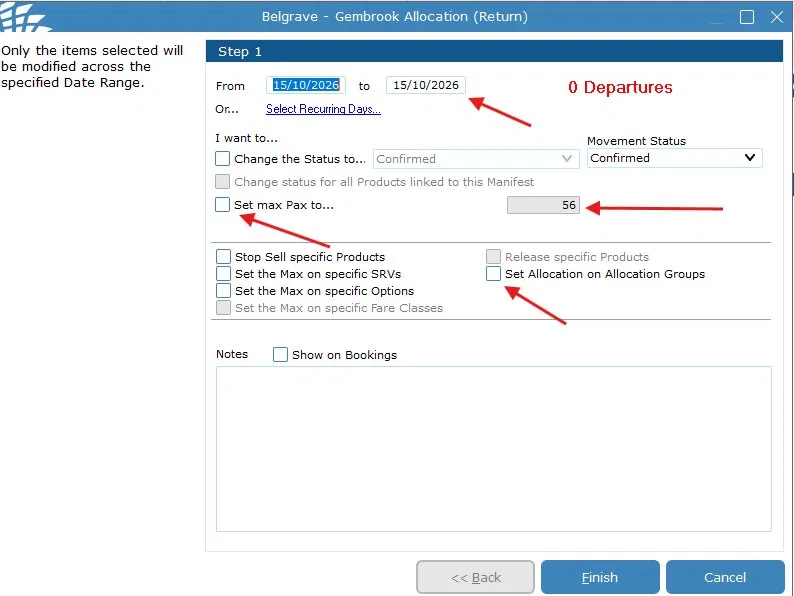
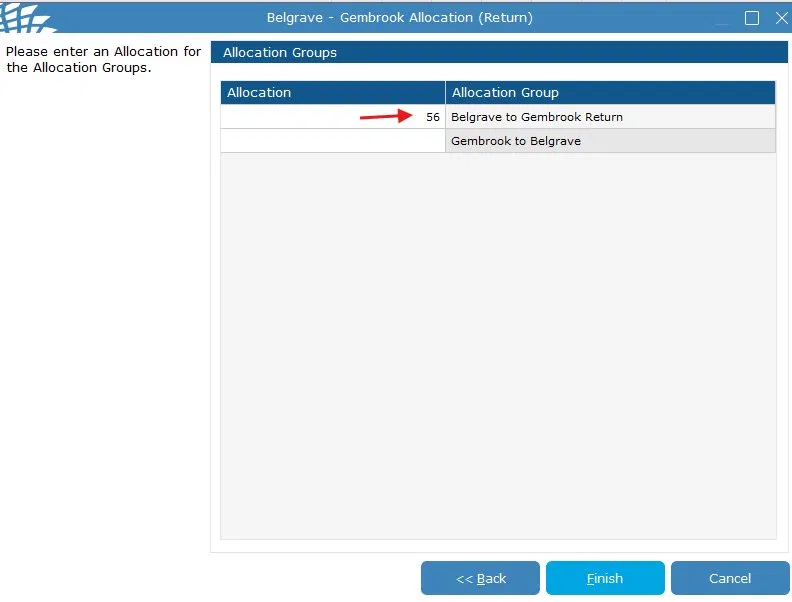
Click Finish. The Allocation Groups screen will appear. On the Allocation Groups screen, find Belgrave to Gembrook Return and set its Allocation value to the same number entered for max Pax in the previous step.
Click Finish to save. Does the entire train capacity also need to change?
If yes, adjust the manifest using the procedure above.
An example would be an extra carriage added specifically for Bel-Gmb.
Important Notes
The "Set Allocation on Allocation Groups" checkbox must always be ticked when changing this leg. Skipping it will cause a mismatch between the max Pax limit and the reserved seat allocation, which may result in overbooking.
Only update the Belgrave to Gembrook Return allocation group. Leave Gembrook to Belgrave blank unless specifically instructed otherwise. This leg's capacity does not change automatically when you adjust the main manifest — both procedures must be run independently if both values need updating.