Cisco Secure VPN Deployment via PDQ
This is setup to Install, Configure and Setup the VPN with one click. The user will still need to be added into the appropriate AD Groups for access.
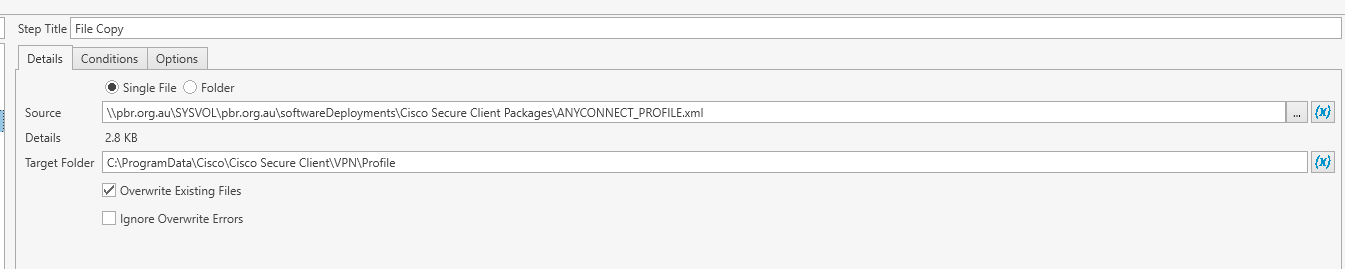
XML Files can be located on AUX-B1 at \\pbr.org.au\SYSVOL\pbr.org.au\softwareDeployments\Cisco Secure Client Packages
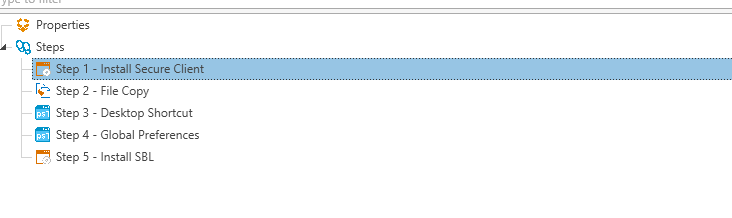
Steps as follows
- Install Cisco Secure Client VPN
- Copy AnyConnect profile xml over to deployed device
- Copy/create desktop shortcut on device with Powershell script
$Source = '\\pbr.org.au\SYSVOL\pbr.org.au\softwareDeployments\Cisco Secure Client Packages\Cisco Secure Client.lnk' $Destination = 'C:\users\*\Desktop\' Get-ChildItem $Destination | ForEach-Object {Copy-Item -Path $Source -Destination $_ -Force -Recurse} - Copy/Create Global Preference folder in VPN folder structure with Powershell Script
$Source = '\\pbr.org.au\SYSVOL\pbr.org.au\softwareDeployments\Cisco Secure Client Packages\preferences_global.xml' $Destination = 'C:\ProgramData\Cisco\Cisco Secure Client\VPN' Get-ChildItem $Destination | ForEach-Object {Copy-Item -Path $Source -Destination $_ -Force -Recurse} - Install SBL module