# User Management
Documentation on management of end users (Staff/Vols) inside of CustomLinc
# Custom Linc Password Change
This article will show you how to change your password in Custom Linc
1. Open Custom Linc. At the top right, hit the drop-down arrow and select "Change Password". [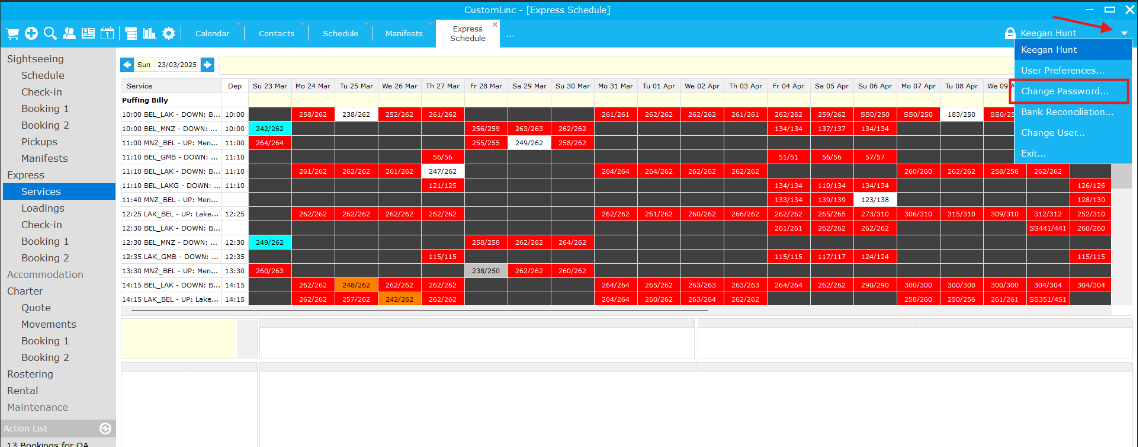](https://bookstack.pbr.org.au/uploads/images/gallery/2025-03/rXwimage.png)
2. Enter your old password, followed by your new password. [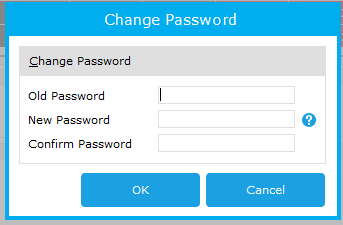](https://bookstack.pbr.org.au/uploads/images/gallery/2025-03/OTDimage.png)
# Creating a New User / CustomLinc
This procedure details the steps required to add a new user to the CustomLinc system. This will typically occur when a new employee commences with the organisation. Before account set up can take place an approved new user request must be submitted via the IT helpdesk.
The CustomLinc user set up process is divided into two parts, adding an individual to the service provider and converting the individual to a user.
**
1\. Adding the Individual to the Service Provider**
1. From within the CustomLinc client click the Contact Search button
[](https://bookstack.pbr.org.au/uploads/images/gallery/2025-07/6qFimage.png)
2. Change the dropdown to ***Service Provider*** and click magnifier button[](https://bookstack.pbr.org.au/uploads/images/gallery/2023-01/AWPimage.png)
3. From the returned list, highlight ***Puffing Billy***
[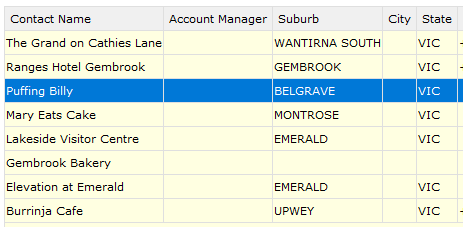](https://bookstack.pbr.org.au/uploads/images/gallery/2023-01/g3Rimage.png)
4. Click the **+** button and select ***Individual***
[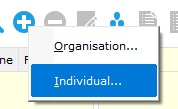](https://bookstack.pbr.org.au/uploads/images/gallery/2023-01/CsSimage.png)
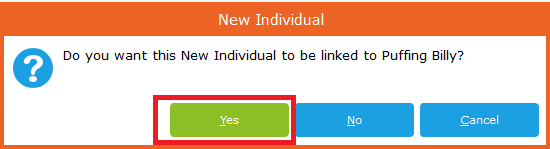
5. When prompted to confirm whether you'd like to add a new inividual to Puffing Billy, click Yes
[](https://bookstack.pbr.org.au/uploads/images/gallery/2023-01/LJZimage.png)
6. Enter the information for the individual and click ***Ok*** [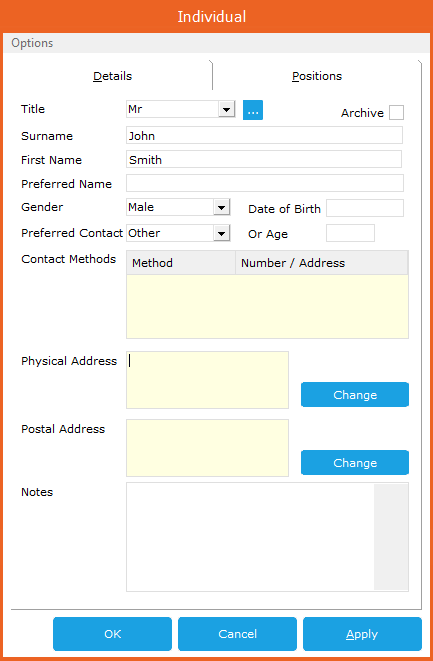](https://bookstack.pbr.org.au/uploads/images/gallery/2023-01/Tatimage.png)
7. When asked if you would like the individual to be added as a concierge click ***No***
**The record for the individual has now been added against the Service Provider.**
**2. Convert the Individual to a User**
1. From the contacts windows, right click the new individual record, move the pointer to ***Configure As*** and select ***User* [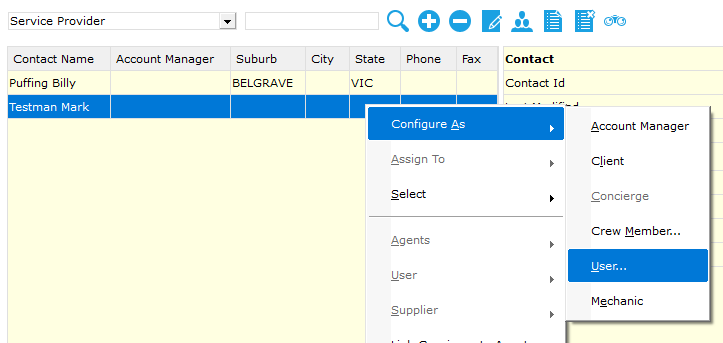](https://bookstack.pbr.org.au/uploads/images/gallery/2023-01/wPhimage.png)
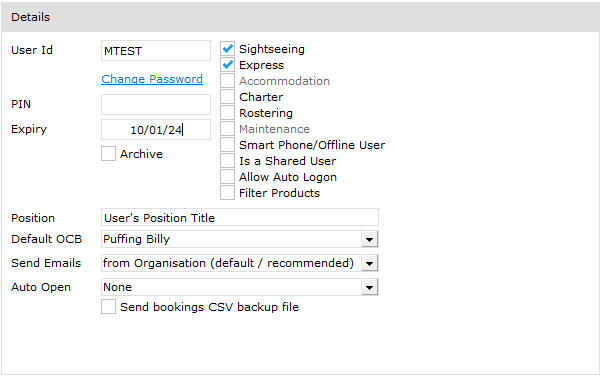
2. From the User Details window enter the details of the user account.
To set the password click the blue ***Change Password*** text. A password field will be displayed that the user's password can be entered into. If the user is not with you at the time of setting a password, use a generic password for now, the user can change their password once logged in.
User Id is the first letter of the first name and the full surname
[](https://bookstack.pbr.org.au/uploads/images/gallery/2023-01/8yeimage.png)
Tick the applicable role for the user and select the applicable Op Centre Brand (OCB). In most cases the OCB will be ***Puffing Billy***
[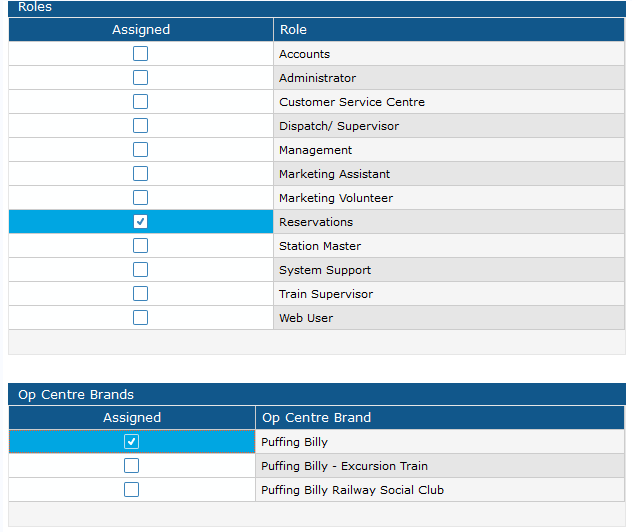](https://bookstack.pbr.org.au/uploads/images/gallery/2025-07/FAAimage.png)
3. Click the ***Ok*** button
**The user account has now been created and the user will be able to log in**
# Adding RFID - Custom Linc
This article will show you how to add an RFID tag to a user's account in Custom Linc.
1. Firstly, you will have to convert the staff member to a crew member. Search the user in Custom Linc. Right click the user and select "Configure as > Crew Member". [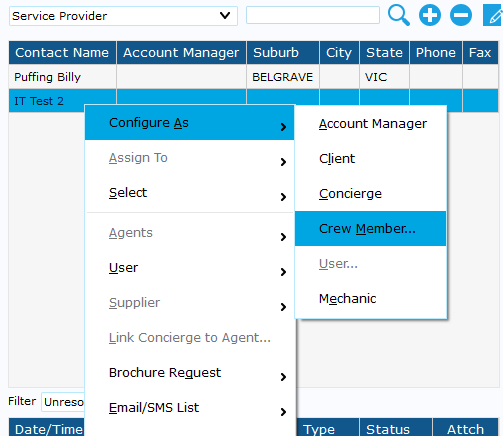](https://bookstack.pbr.org.au/uploads/images/gallery/2025-07/puRimage.png)
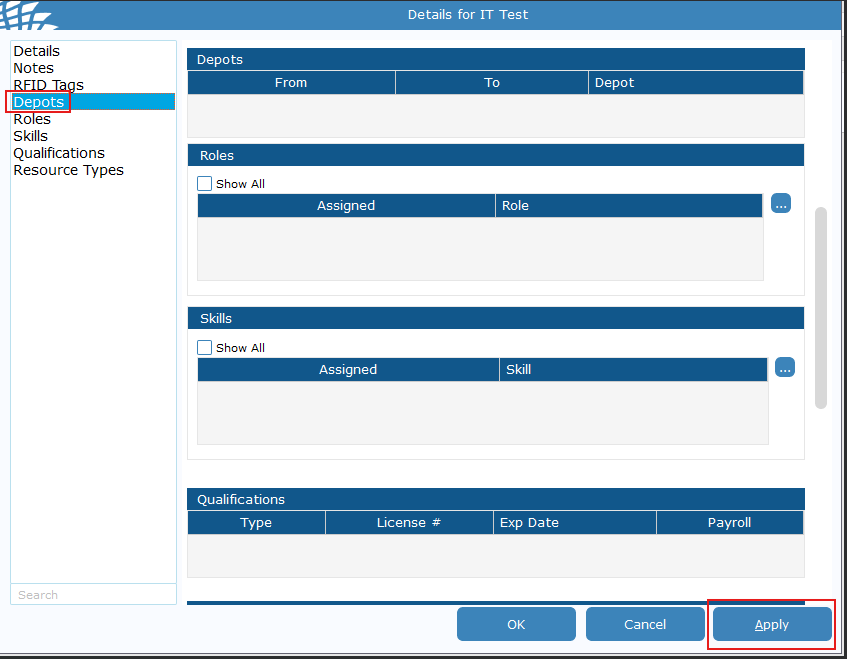
2. This box will open up. Click "Depot" on the left-hand side and click "Apply".
[](https://bookstack.pbr.org.au/uploads/images/gallery/2025-09/jRyimage.png)
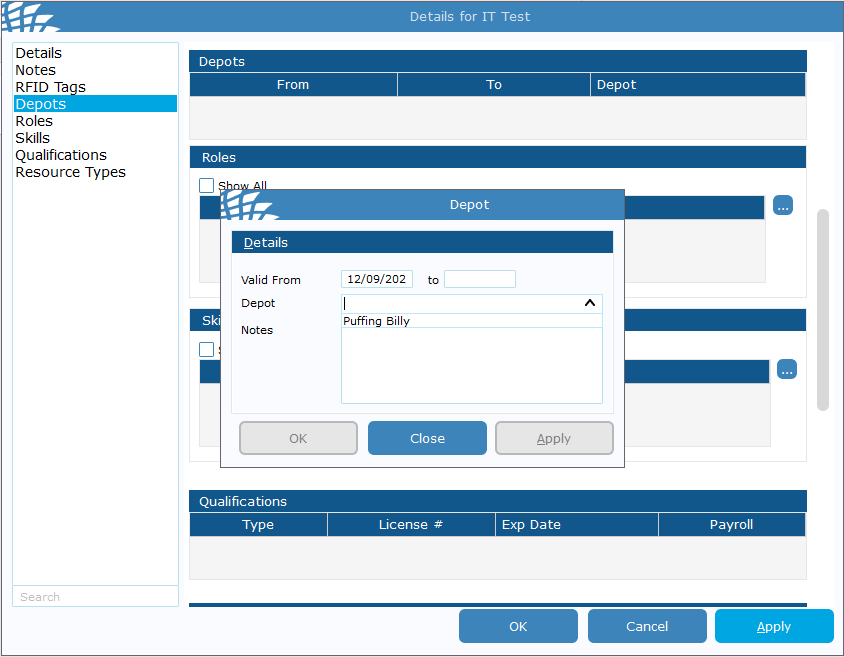
3. This box will appear, in "Depot", select "Puffing Billy". hit apply and then close.
[](https://bookstack.pbr.org.au/uploads/images/gallery/2025-09/xOAimage.png)
4. In the left column head to "RFID Tags", right click in the empty space under "RFID No" and click add. [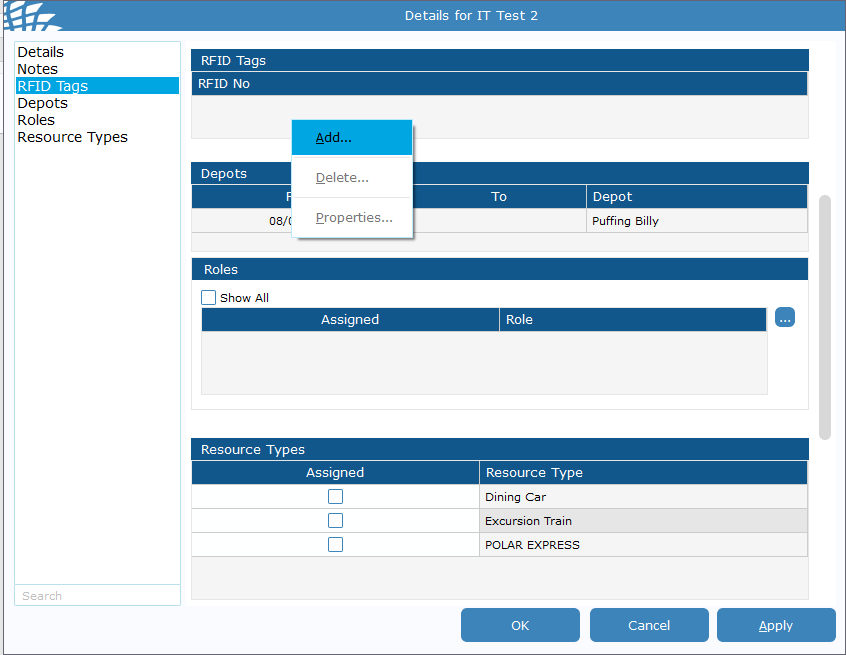](https://bookstack.pbr.org.au/uploads/images/gallery/2025-07/R3Fimage.png)
5. This will show a box with tag no, when clicked into the dialogue box, swipe the RFID tag onto the RFID reader you are assigning to that user. Then hit ok. [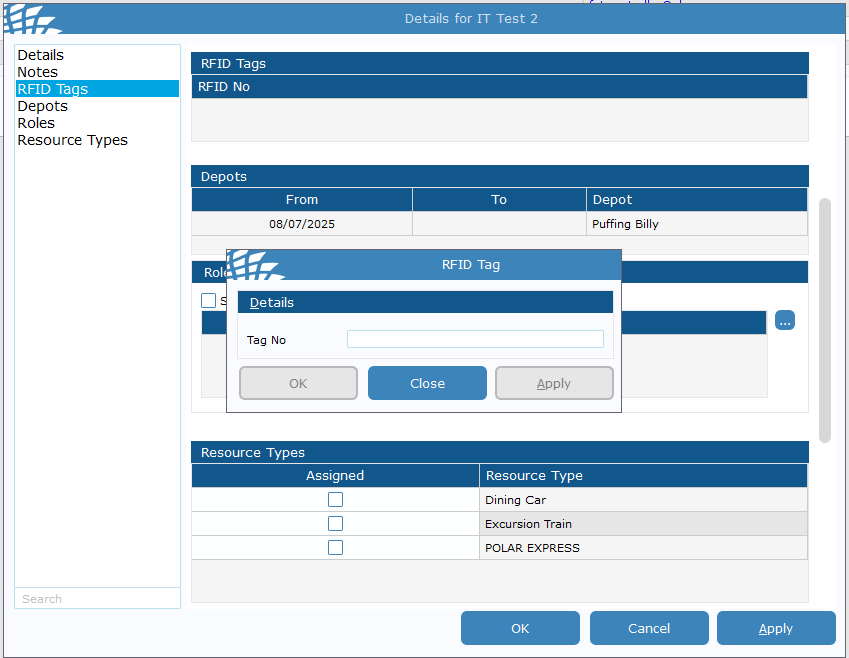](https://bookstack.pbr.org.au/uploads/images/gallery/2025-07/KYtimage.png)
**For users with a generic password such as SM's or Booking Clerks using RFID, you will also need to remove the Password Expiry.**
1. Go back to the **contact search** page, find the user you are editing and double click the **Contact Type** area
[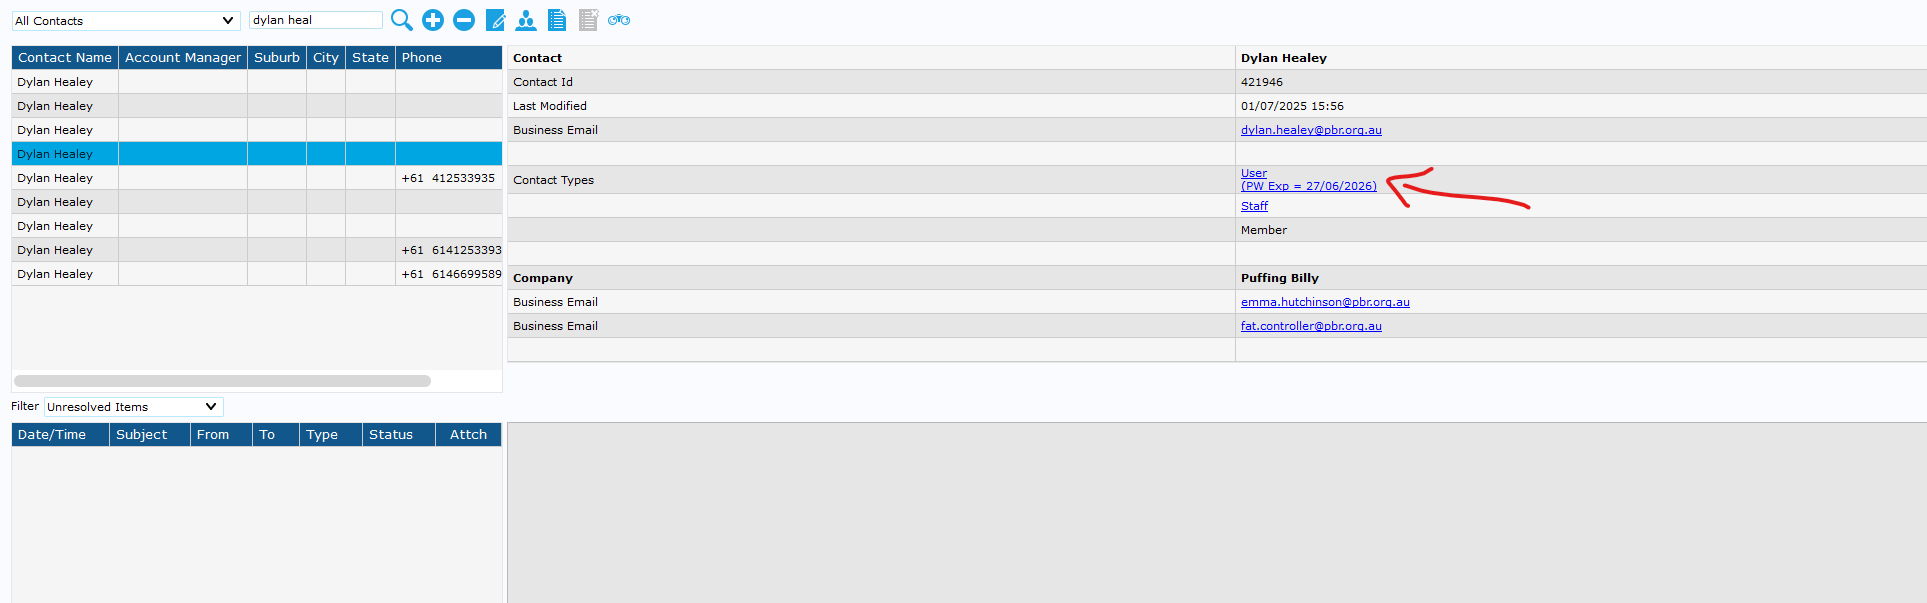](https://bookstack.pbr.org.au/uploads/images/gallery/2025-07/okoimage.png)
2. **Highlight** the expiry date and **delete/backspace** to remove, then hit **apply**.
[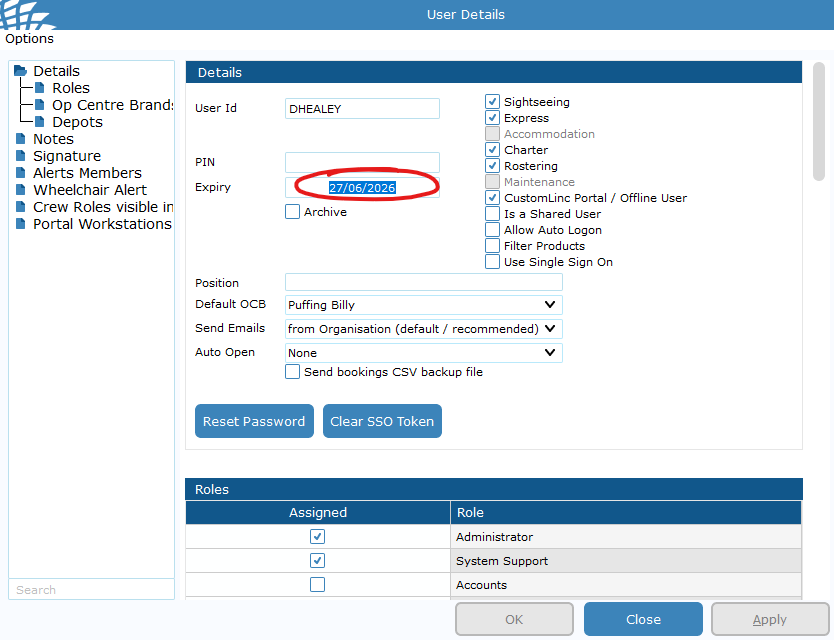](https://bookstack.pbr.org.au/uploads/images/gallery/2025-07/JzCimage.png)
3. To confirm this has been done you can see the expiry date no longer shows under Contact Types[](https://bookstack.pbr.org.au/uploads/images/gallery/2025-07/BeTimage.png)
4. **Please leave a Note under the user to note they have an RFID attached.**
[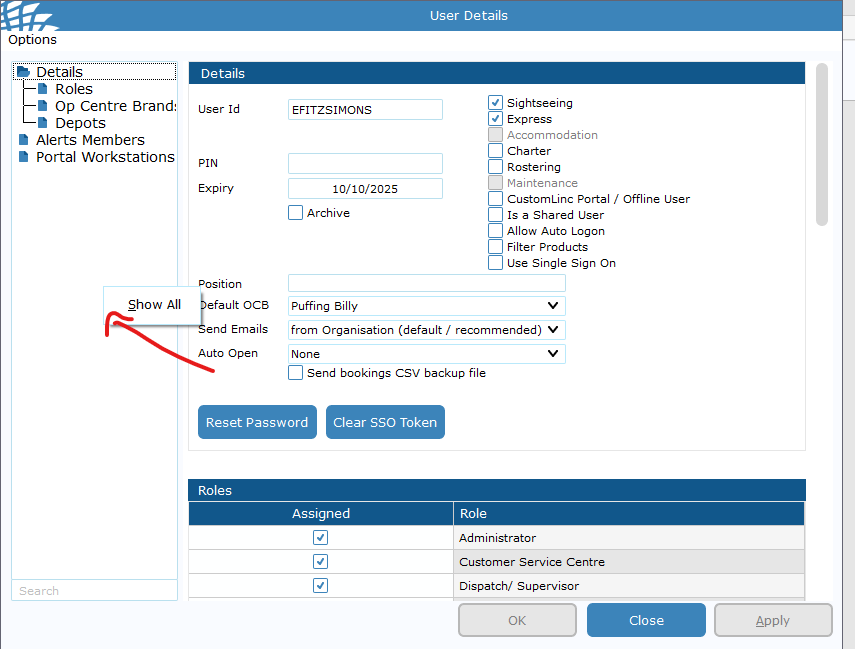](https://bookstack.pbr.org.au/uploads/images/gallery/2025-07/27Vimage.png)
[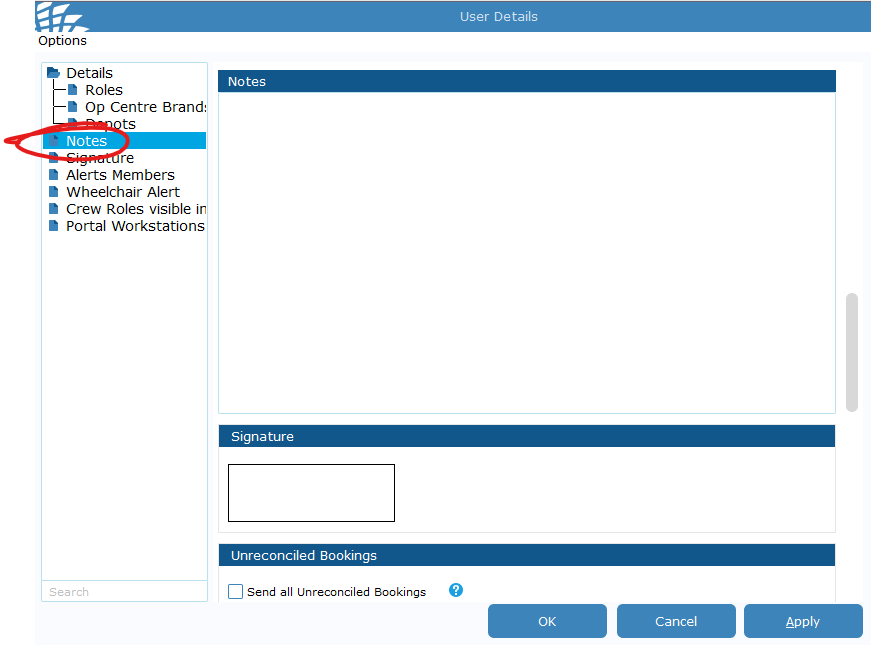](https://bookstack.pbr.org.au/uploads/images/gallery/2025-07/OSlimage.png)
5. The user can low login using RFID.
# Removing RFID - CustomLinc
This article will show you how to remove an RFID tag from a user.
1. Open Custom Linc, select "Contacts" and search for the desired person to remove the RFID tag from. [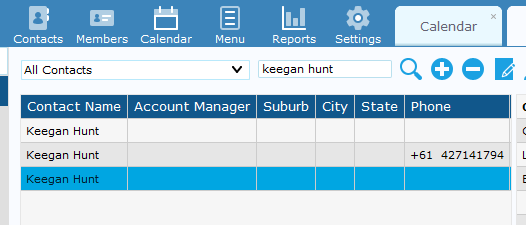](https://bookstack.pbr.org.au/uploads/images/gallery/2025-07/qZBimage.png)
2. Click on the user's name to open the menu on the right and select "staff". [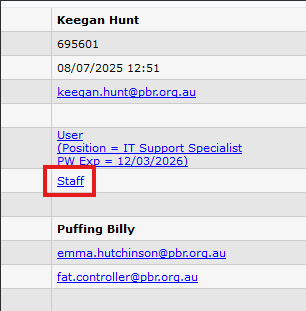](https://bookstack.pbr.org.au/uploads/images/gallery/2025-07/Aevimage.png)
3. Click on RFID tags, right click on the RFID number and select delete. Then click ok in the bottom right. [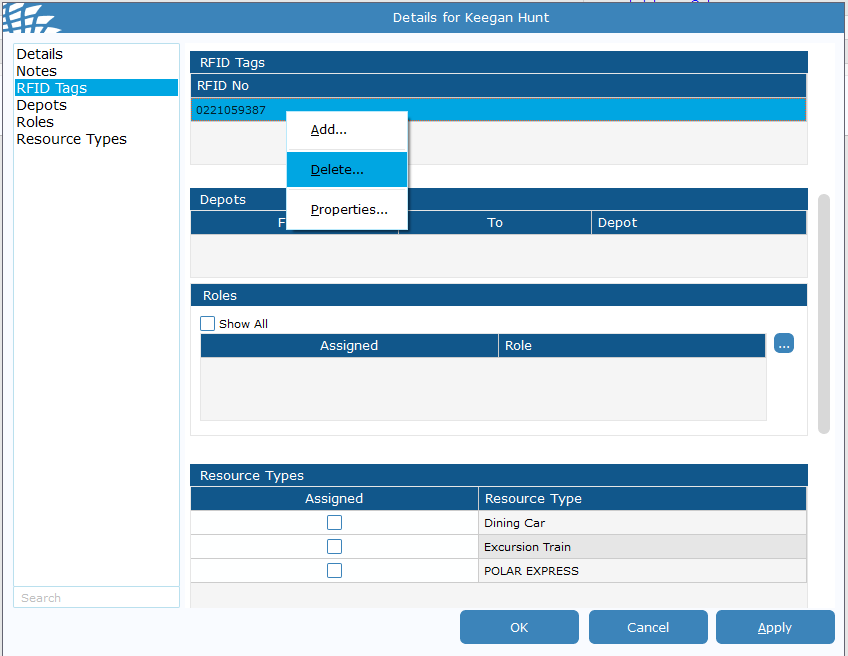](https://bookstack.pbr.org.au/uploads/images/gallery/2025-07/Xtgimage.png)
4. RFID has now been removed.