RTHV
RTHV Setup
- Forwarding Shared Mailboxes to Multiple Emails
- Create a Dynamic M365 Group
- Creating M365 account in the M365 Admin Portal
- Adding non domain account to Email group
- Adding a domain (@RTHV) user to an M365 group
Forwarding Shared Mailboxes to Multiple Emails
It is possible to forward shared mailboxes to multiple users personal emails via a distribution list.
Though this is not an ideal work around and users would be better served by connecting the shared mailbox to their phone or laptop, there may arise times in smaller organisations where users would rather receive emails directly to their organisation email or in RTHV's case their personal.
In this use case the flow is Shared Mailbox > DL > Users Org Email > Users Personal Email.
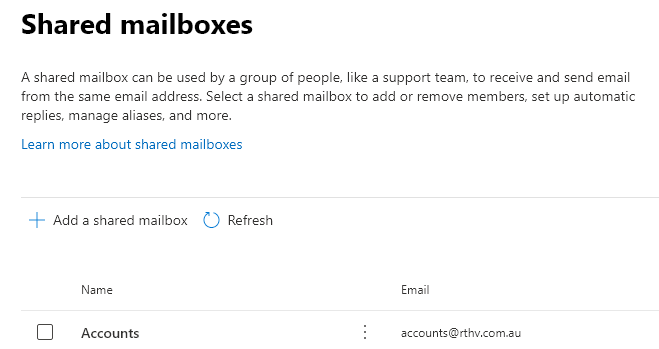
- First create a Shared Mailbox

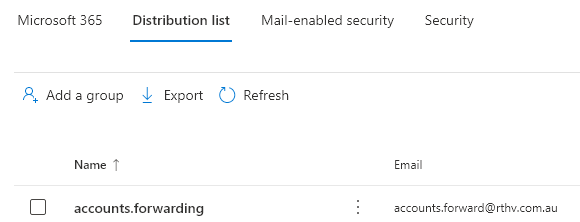
- Then create a distribution list with the users receiving the forwarded emails as members of the DL. Make sure to give the DL an applicable name, in this case accounts.forwarding.

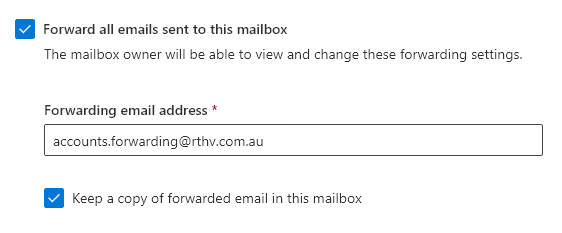
- Go back to the Shared Mailbox you created, open the details, find Email forwarding and edit

- Add the new DL email you just created to the forwarding email address section and save

- At this point accounts shared mailbox will receive the mail, as well as any member of the DL.

Create a Dynamic M365 Group
You cannot use Dynamic SG for SharePoint access for groups. In this case you need to create a M365 Dynamic Group Instead. This is useful for having an ALL users, All Staff so on, once they are onboarded.
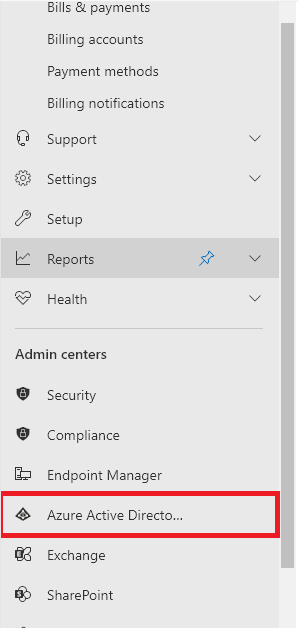
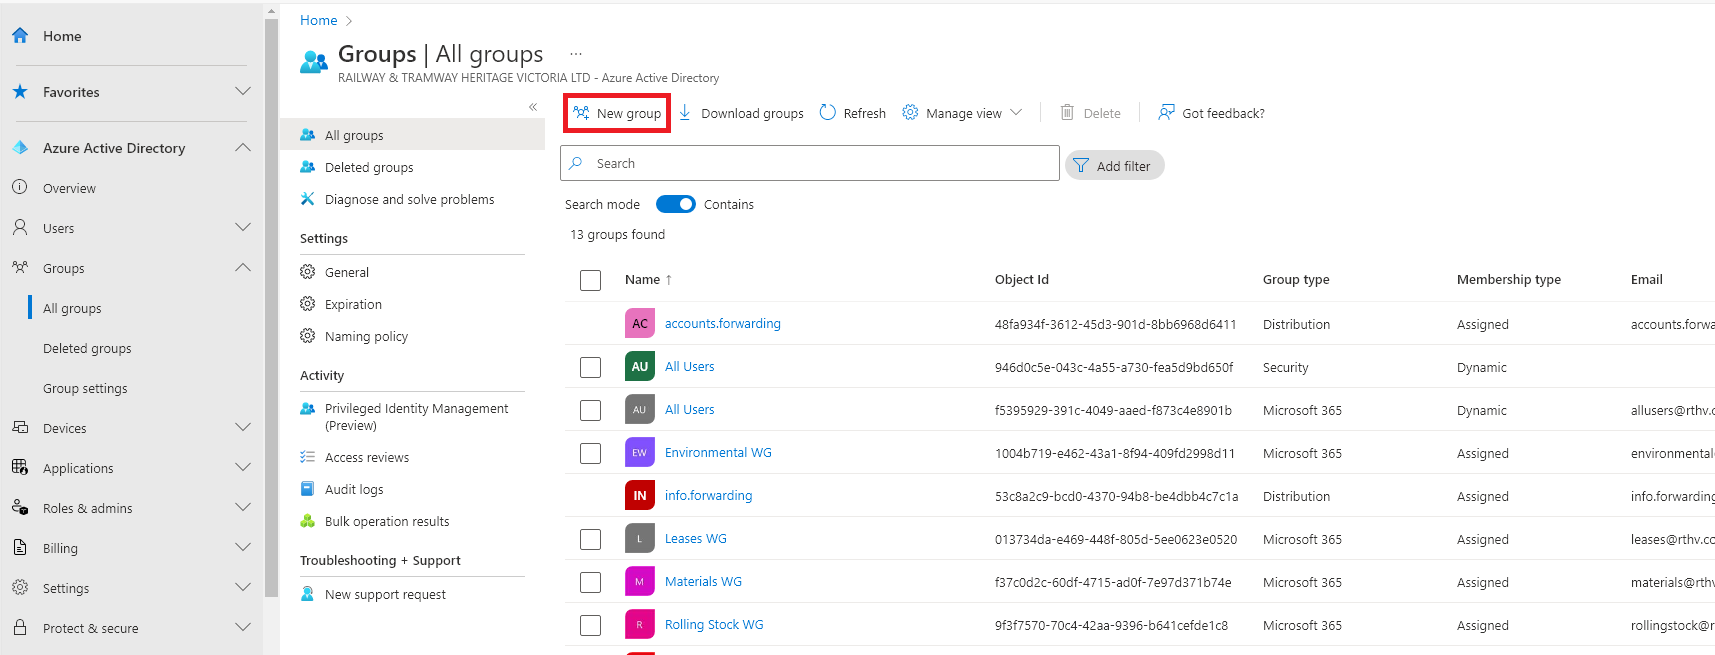
- Go to AAD Admin Centre

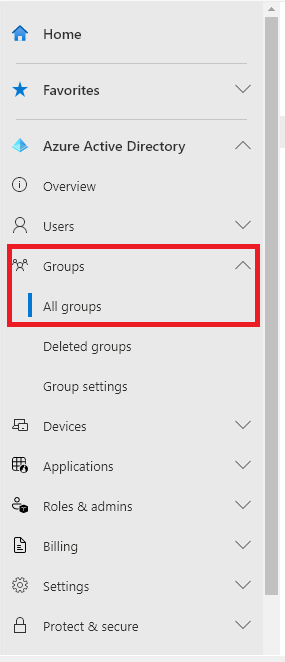
- Go to Groups > All Groups

- Select New Group

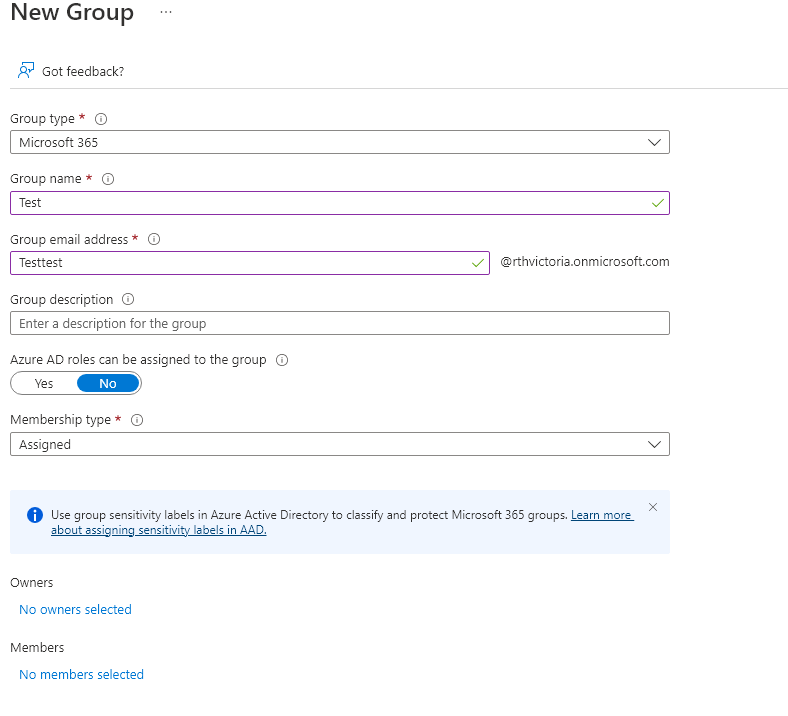
- Change group type to Microsoft 365

- Fill in the details as you wish. Don't worry that the Group Email Address may show as a .onmicrosoft.com address, it will change to the default domain through 365 eventually.
- Click Create and it will take you back to the All Groups page
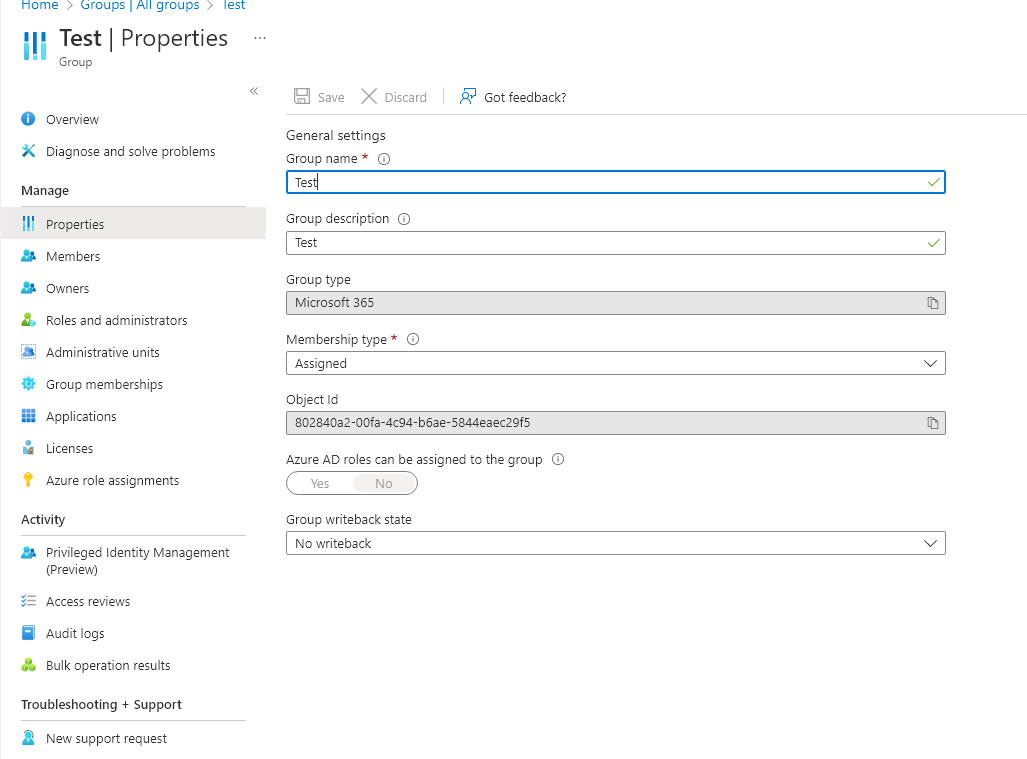
- Select your group and go to Properties

- Membership Type to Dynamic User then select Add Dynamic Query
- You can find a lot of information on the types of queries you will have to include here: https://learn.microsoft.com/en-us/azure/active-directory/enterprise-users/groups-dynamic-membership
Common ones are:
All users- user.objectId -ne null this includes Users, Guest Users, Shared Mailboxes and Groups.
All users except guest users (user.objectId -ne null) -and (user.userType -eq "Member")
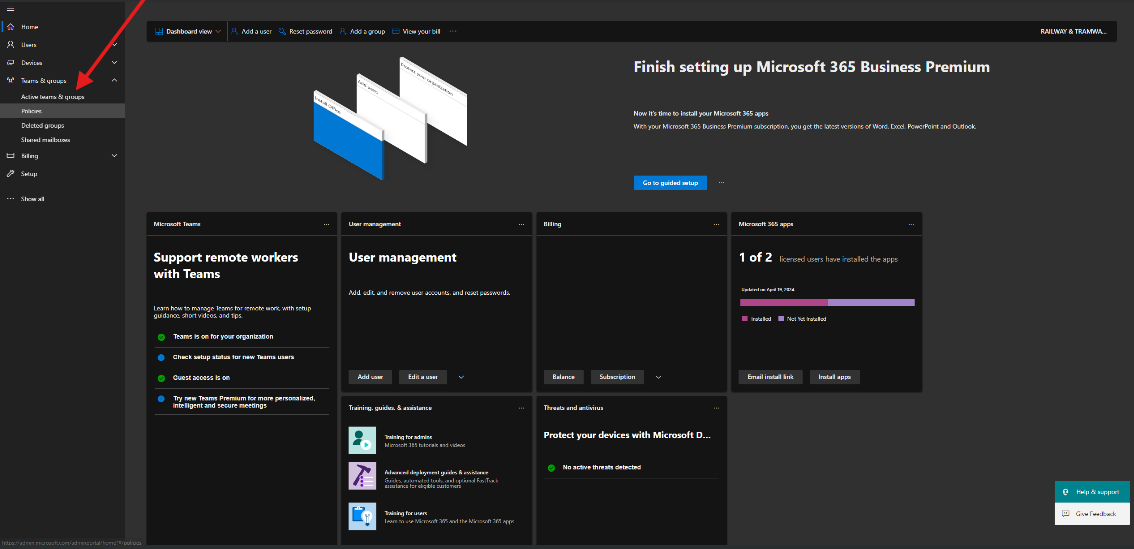
Creating M365 account in the M365 Admin Portal
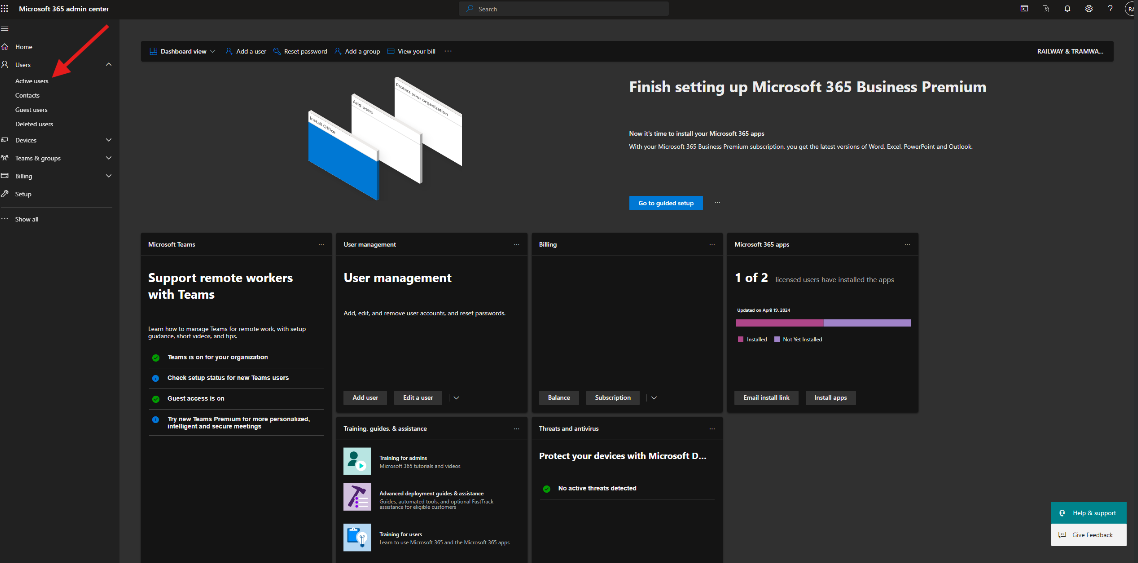
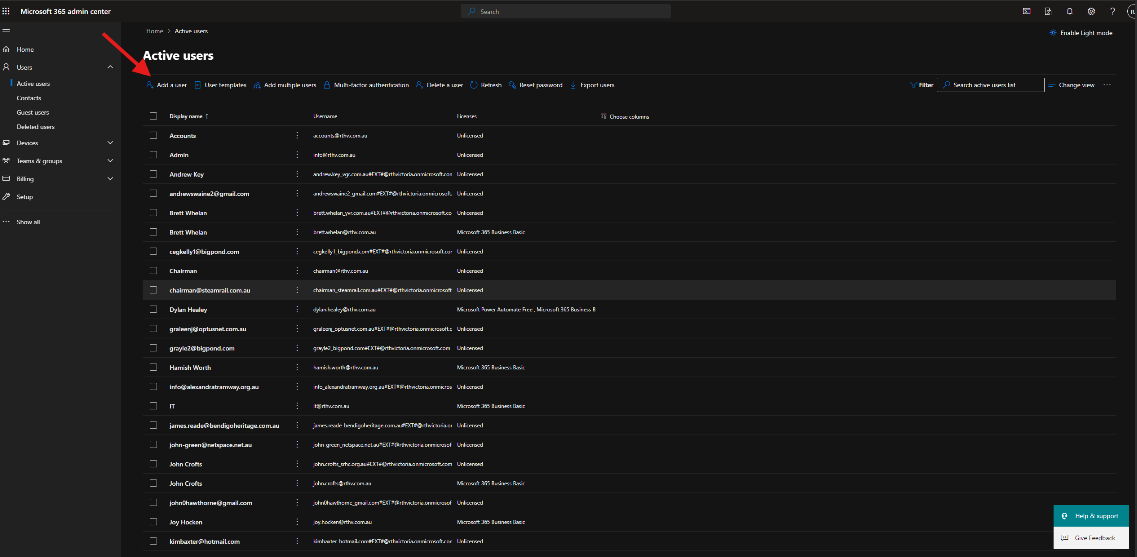
- First you must login to the M365 admin center with an account with admin rights to be able to create a user. Navigate to "users" on the left hand side and select "Active users"

- Select "Add a user" in the top left.

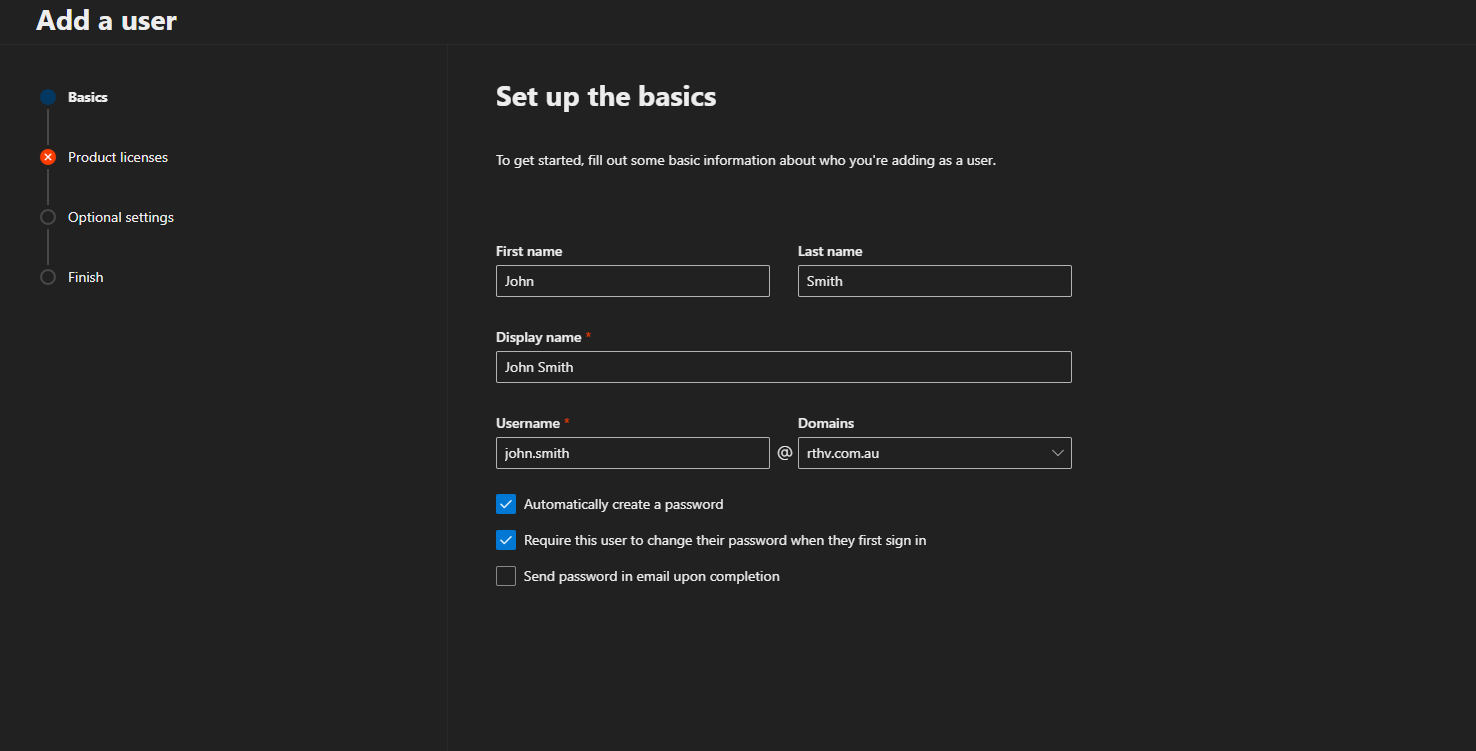
- Enter the name of the new user, with the username being what there email will be. Tick "automatically create a password" and "require this user to change their password when they first sign in". Then click next at the bottom of the screen.

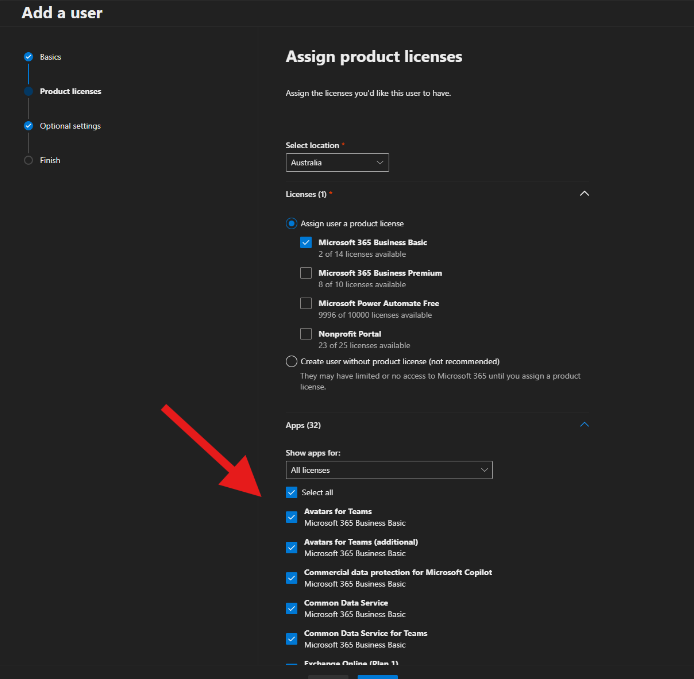
- This will take you to the "assign product licenses" page. Depending on what the user will need access to, depends on what license they will need.
The differences of note that are relevant for RTHV are outlined below for each license type.
Business Basic gives the user a license to access Office 365 apps such as Outlook, Word and Excel online at office.com.
Business Premium gives the user a license to access Office 365 Desktop Apps, these are programs that are installed on your PC.
Business Basic can easily be used for most users, unless there is a genuine reason for a premium license due to the cost difference.
Once a license is chosen you can see what apps are accessible with that license.

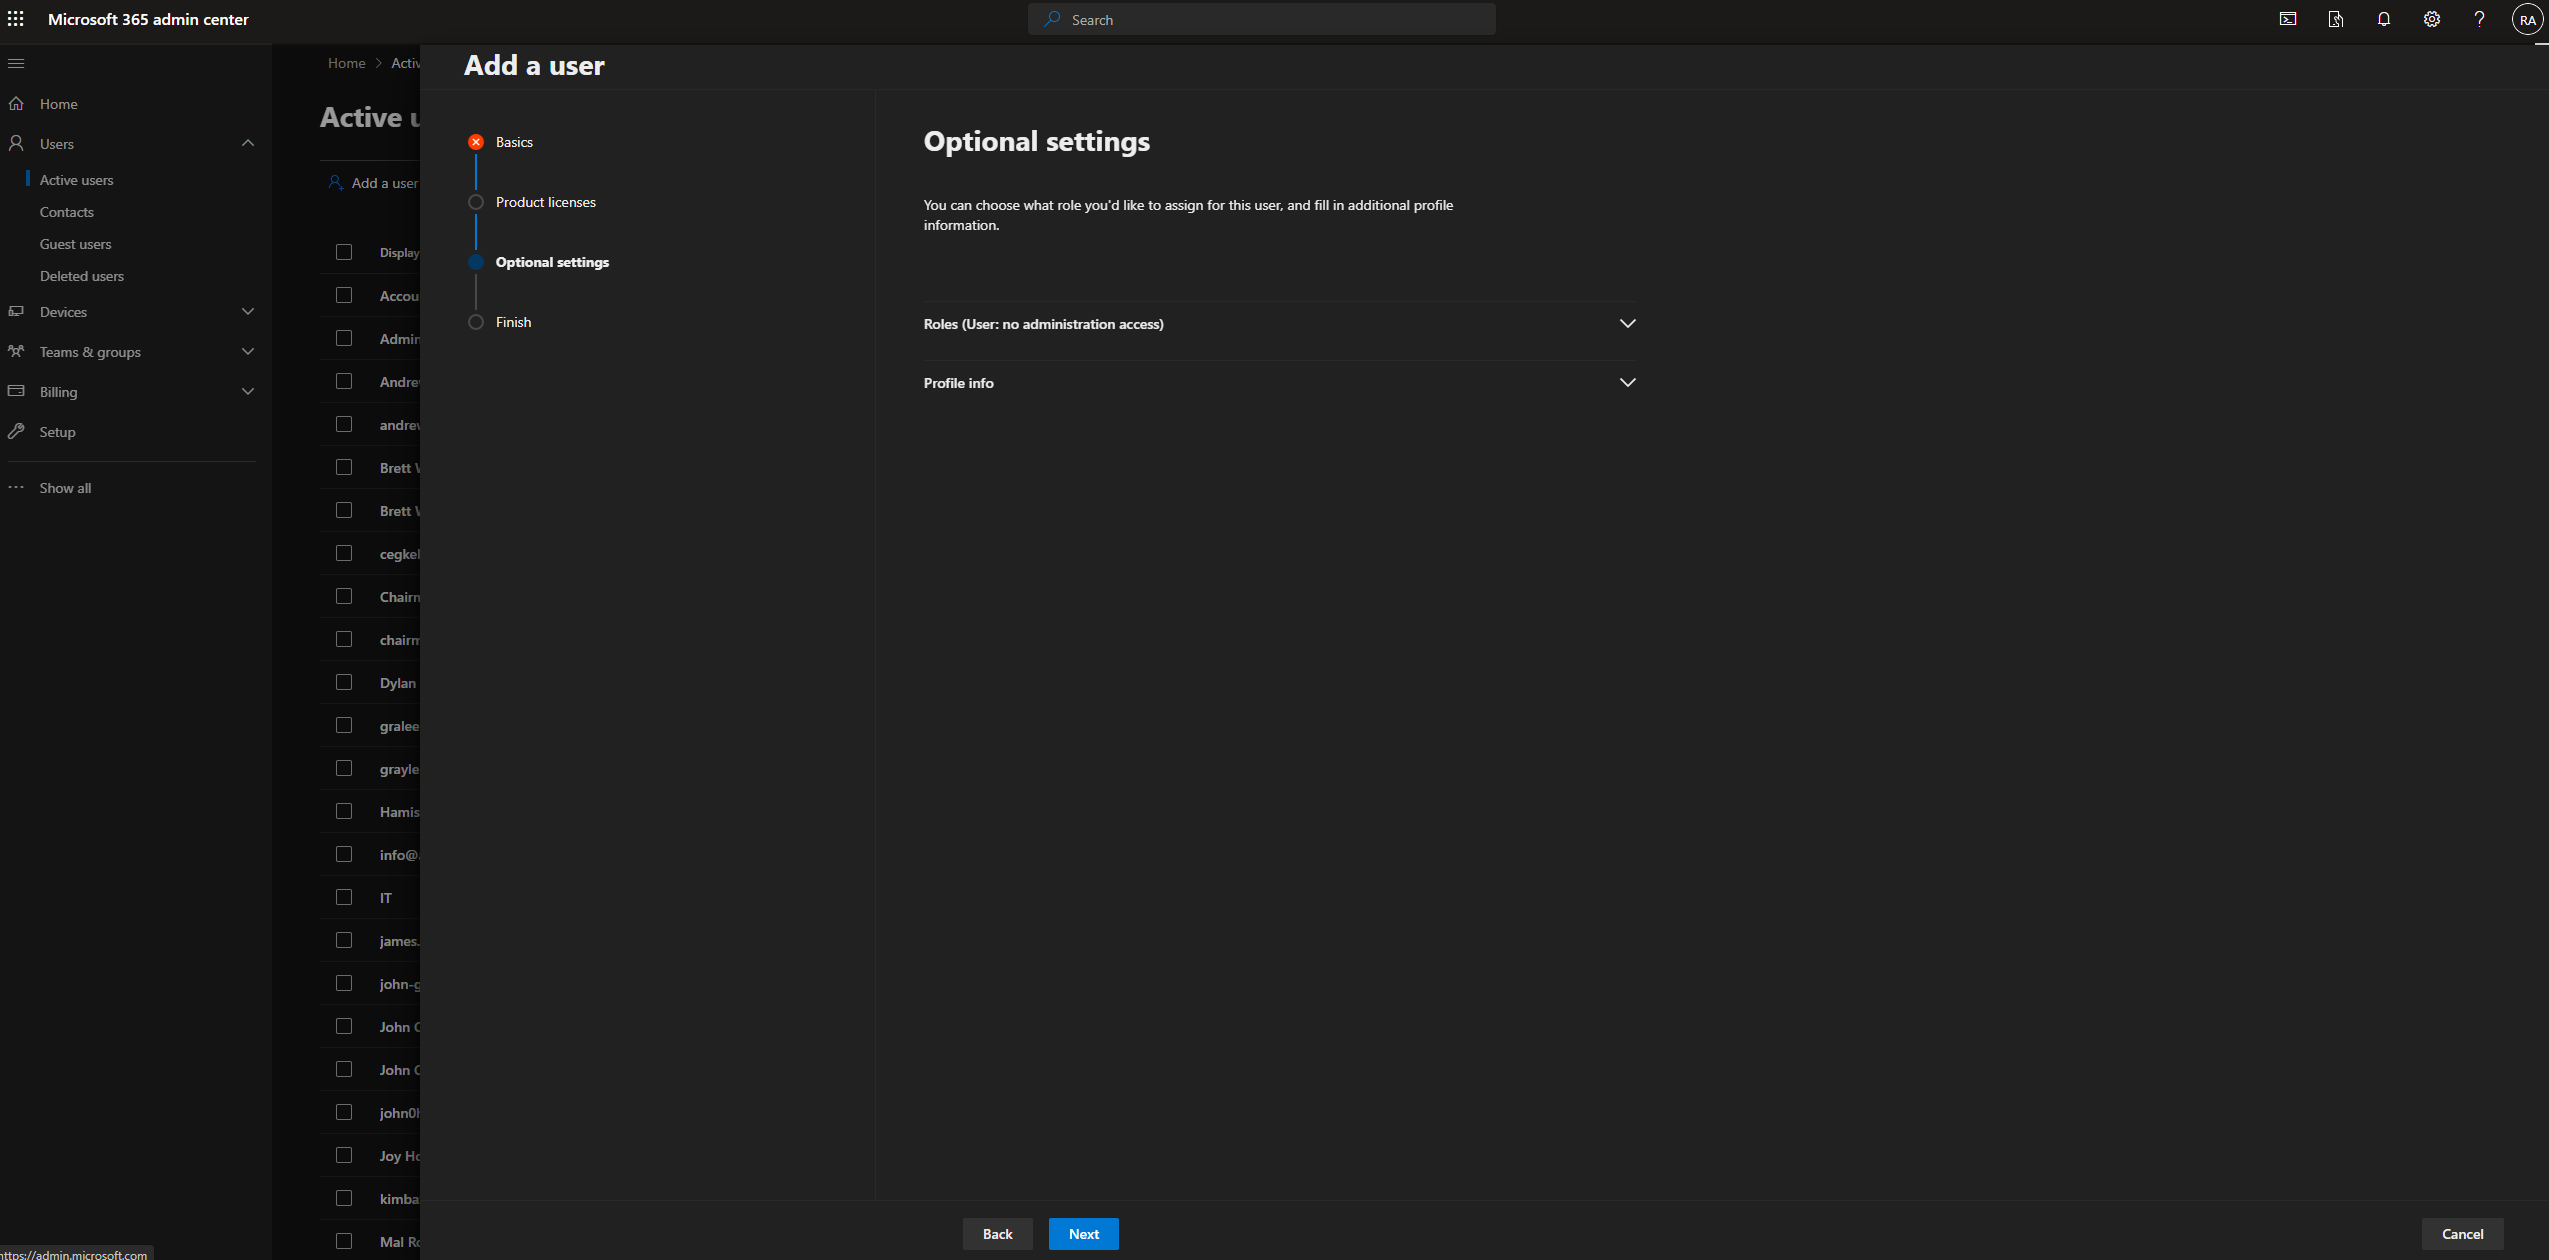
- The next page is "optional settings". Under "roles", you can choose if the user will have admin center access or not. Under profile info is information about the user.

- Review page you will have a chance to review and edit and errors.
- Lastly will be a confirmation that the user has been added to active users. This is also where you can see the automatic password for the user when they first sign in. Once signed in they will be prompted to enter a new password, this will be their own password that only they know for continuous access.


Adding non domain account to Email group
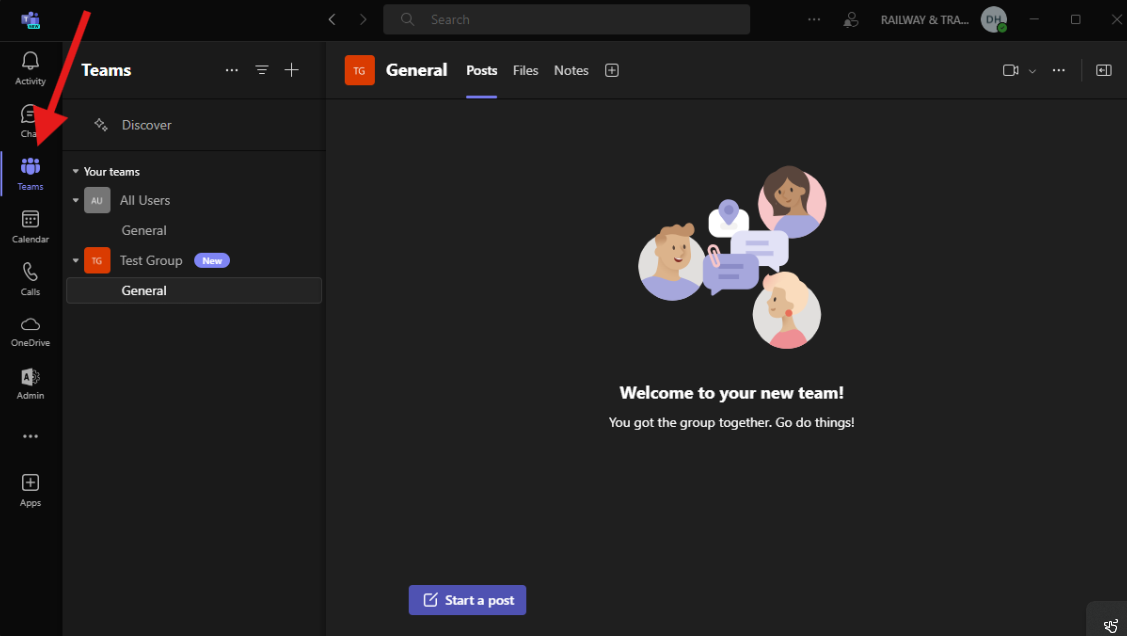
- Adding a non domain account to an email group has to be done in Microsoft teams. In teams, navigate to the "teams" tab.

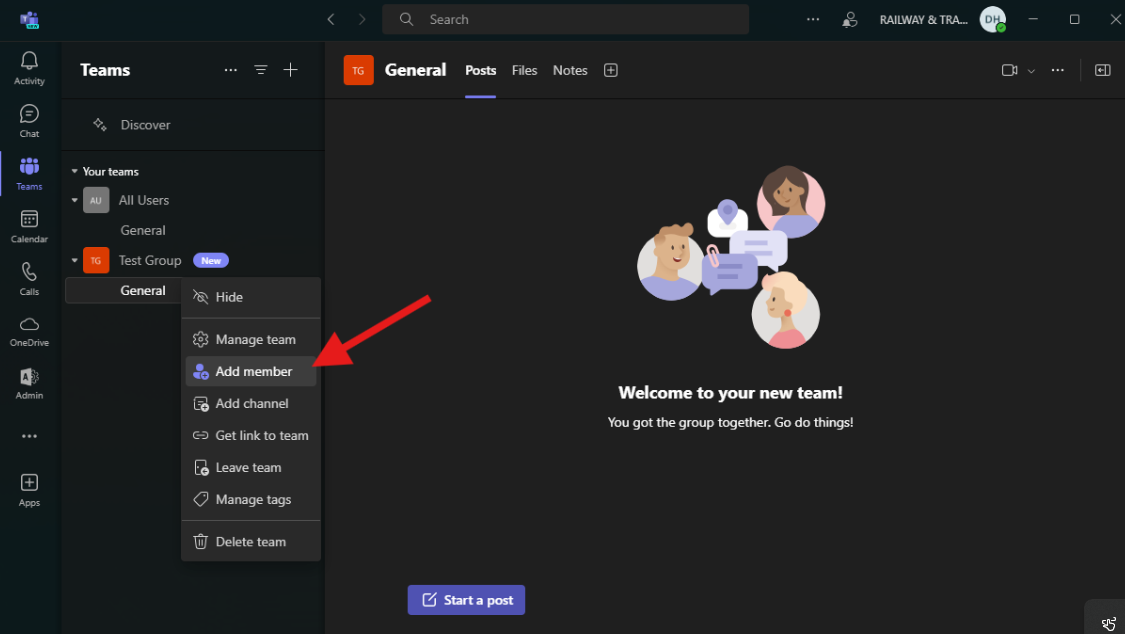
- Find the group you want to add the user to and click the 3 dots. (hover over the group with your mouse so the 3 dots appear).

- Click "add member".

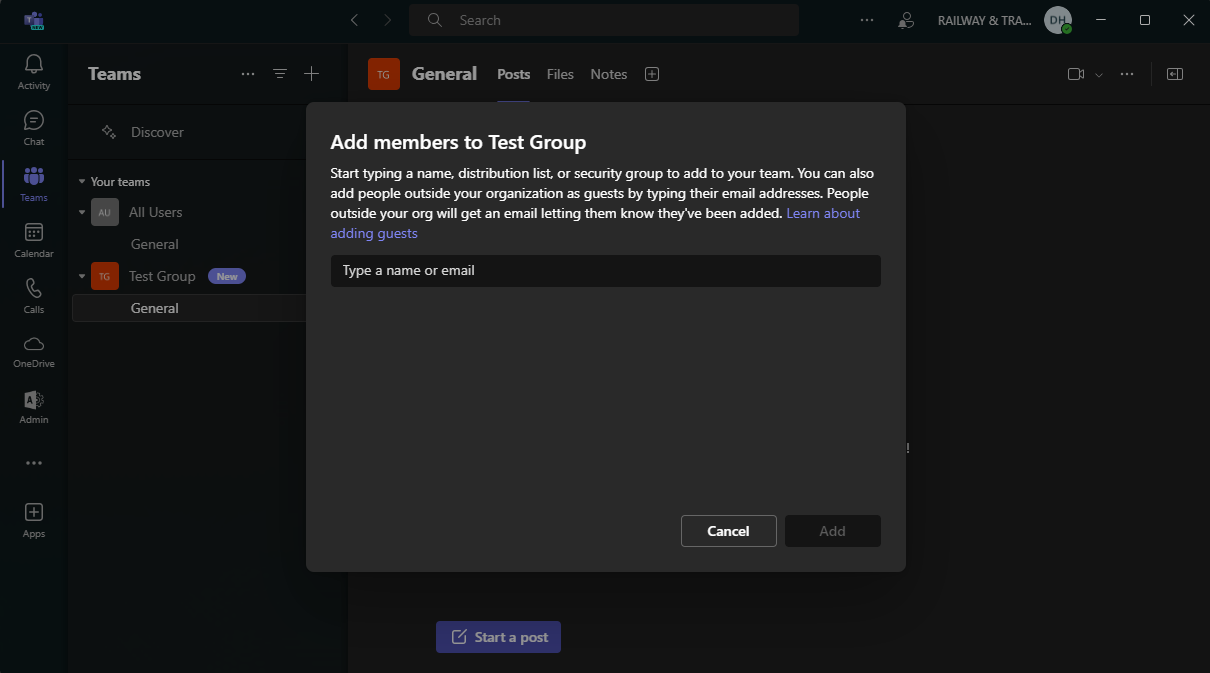
- Type the email of the user you would like to add. This will add them as a guest to your domain. They will get an email saying they have been added.


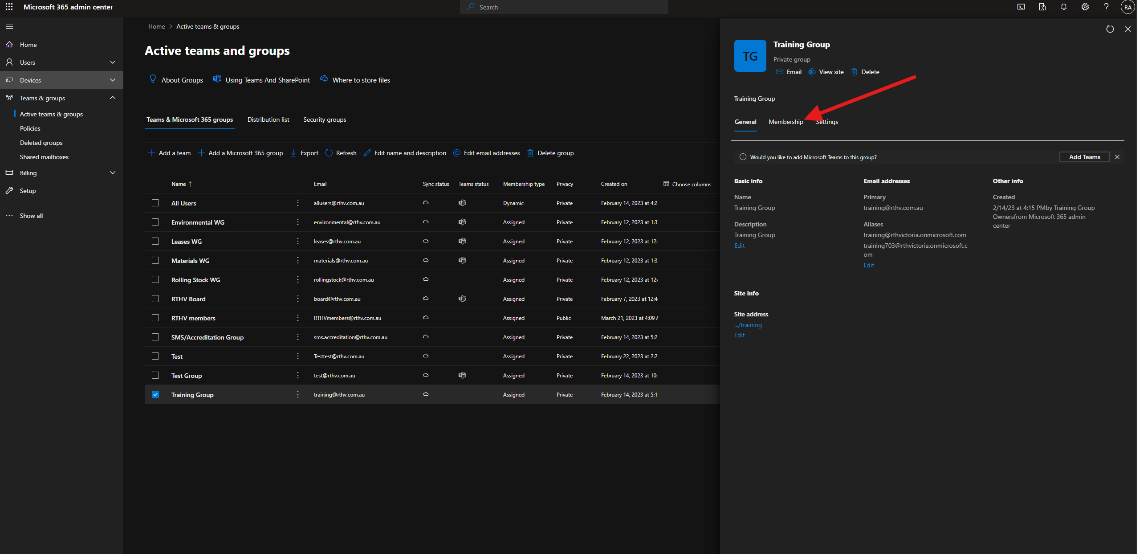
Adding a domain (@RTHV) user to an M365 group
- Open the M365 admin center portal. Navigate to "Teams & Groups" on the left hand side and select "Active teams & groups".

- Find the group you would like to add the user too and select it. Click on the membership tab.

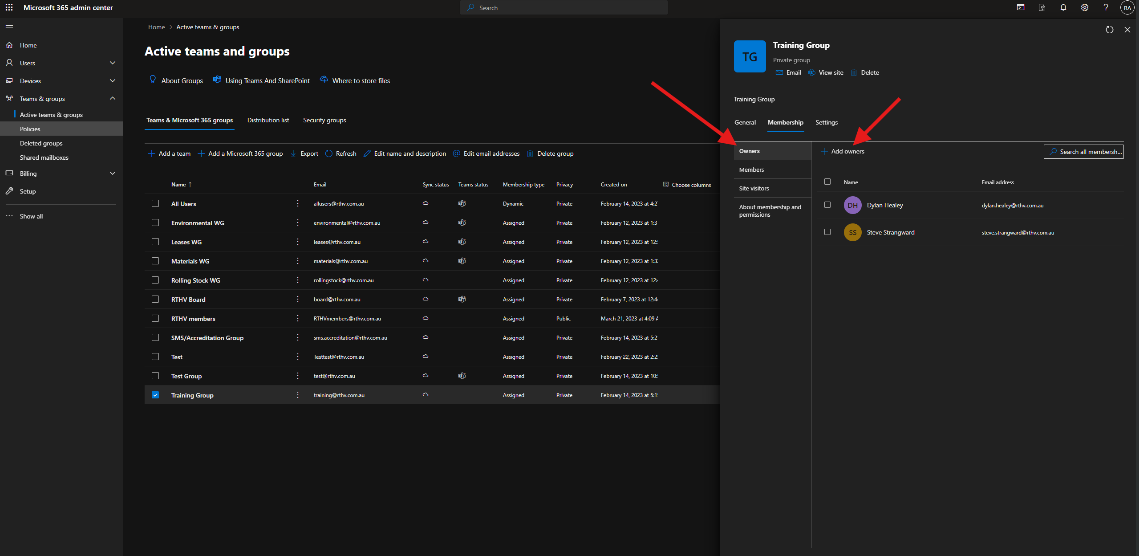
- If you would like to add them as an owner, click on "Owners" and "+ Add owners". If you want to add them as a member do the same but in the "Members" tab. Owners have admin access for the group and should be limited to a few users that require this access.

- You can then enter either the name or email address of the user then click "Add" at the bottom of the page.