By default, all user's calendars are set to **Can view when I’m busy.**
## Step-by-step guide 1. Open **Outlook.** 2. Click on the **Calendar icon** in the bottom left hand side of the screen. [](https://bookstack.pbr.org.au/uploads/images/gallery/2022-10/y2limage.png) 3\. Click on the **Share Calendar** icon located at the top of the screen. Select the **Calendar** option from the drop-down menu. [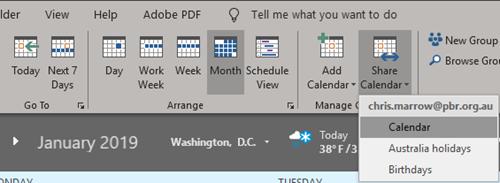](https://bookstack.pbr.org.au/uploads/images/gallery/2022-10/8dsimage.png) 4\. Click the **Add** button to share your calendar with a user. [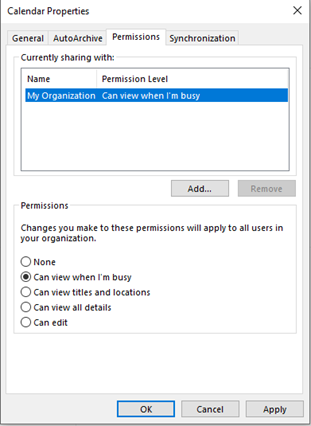](https://bookstack.pbr.org.au/uploads/images/gallery/2022-10/TM7image.png) 5\. The Address book will appear. Search for the user’s name and click **Add** then **OK.** If you want to share your calendar with multiple people continue adding the names before clicking **OK**. [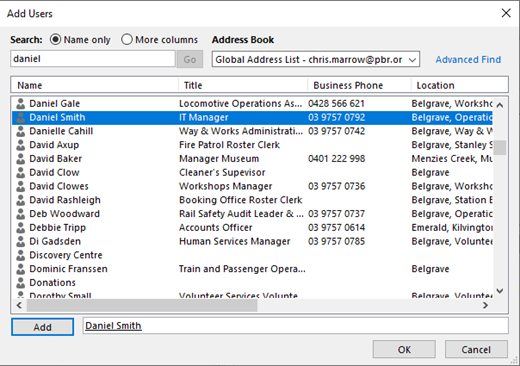](https://bookstack.pbr.org.au/uploads/images/gallery/2022-10/1Skimage.png) 6\. Select the user’s name to adjust what permission level they will have when viewing your calendar. **Permissions:** **Can view when I’m busy-** People you share with can only see the times you have blocked out as busy. **Can view titles and locations-** People you share with can see only title and location of a meeting or appointment. **Can view all details-** People you share with can see all details, including description or attendees. **Can edit-** People you share with can view, edit and delete meetings or appointments. **Delegate-** Delegates can view, edit and delete meetings or appointments. Delegates can also create and respond to meeting requests on your behalf. [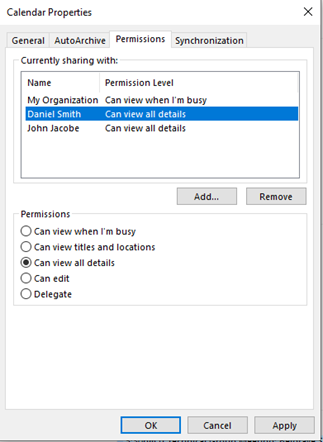](https://bookstack.pbr.org.au/uploads/images/gallery/2022-10/F7Kimage.png) 7\. Click **apply** when you’ve selected the relevant permissions for the user/users. 8\. Once the user has been granted permission, they will be sent an email asking to accept the calendar invitation. Once they’ve clicked **Accept** the calendar will be added to their **Shared Calendars** on the left hand side of the screen.Follow the below steps if the user didn’t receive an email or the calendar didn’t appear.
1. The user receiving the shared calendar can go to their Calendar in outlook, click on Add Calendar and select From Address Book. [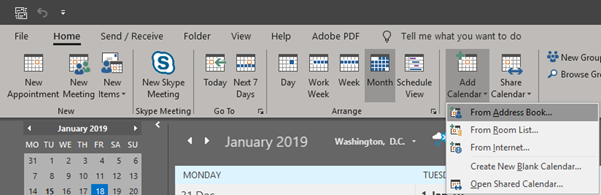](https://bookstack.pbr.org.au/uploads/images/gallery/2022-10/W4zimage.png) 2\. Enter the users name and click **OK**, you can add multiple users if needed. The Calendar will then appear under **Shared Calendar** on the left hand side of the screen. [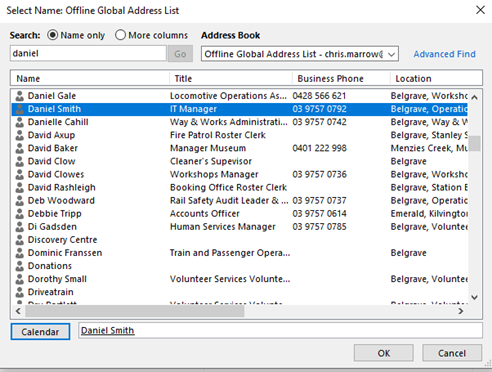](https://bookstack.pbr.org.au/uploads/images/gallery/2022-10/skUimage.png)