Accessing OneDrive (Desktop)
- Signing in / Syncing OneDrive
- Creating a Folder in OneDrive
- Removing Access to a Folder/File
- Sharing Folders & Files
Signing in / Syncing OneDrive
Step-by-step guide
- Search for Onedrive in Windows and open the app.

- The OneDrive icon will appear in the right-hand corner of the taskbar. Click on it to open OneDrive.

- Sign into OneDrive with your PBR credentials.

- Click Next.
- Make sure Sync all files and Folders is selected and then press Start sync.

- Click through any remaining screens. Once done your files will sync to OneDrive.
-
Open File Explorer in Windows. You will now be able to see the folder under OneDrive - Puffing Billy Railway located in the left-hand menu.

Be aware that when you create, modify or delete files in the folder it is automatically synced to OneDrive.


Creating a Folder in OneDrive
Step-by-step guide
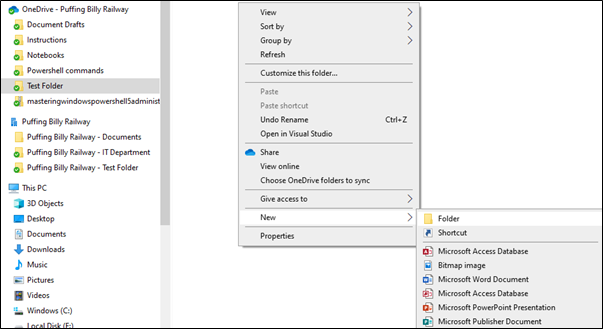
- Navigate to the OneDrive folder where you would like to create the new Folder. Right click and select New-Folder.

- Enter in the folder name.


Removing Access to a Folder/File
Step-by-step guide
- Navigate to the Folder/File and click on Share.

- Click the three dots in the top right-hand corner and select Manage Access.

-
Click on the X to remove access to the folder/file.
This will remove access to all users you have shared the folder/file with. If you wish to remove only certain users, you will need to do this in the web version of OneDrive. Please see Removing Access to a File (Web).

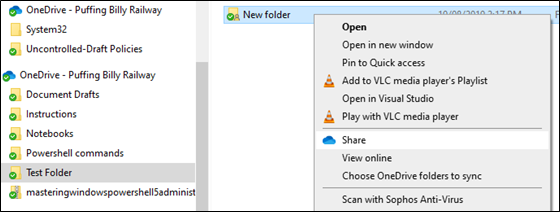

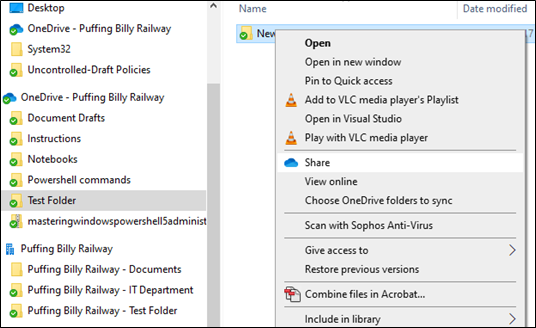
Sharing Folders & Files
Step-by-step guide
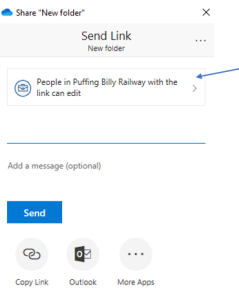
- Navigate to the folder/file you wish to share, right click the folder/file and click on Share.

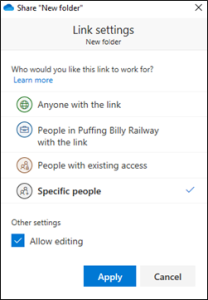
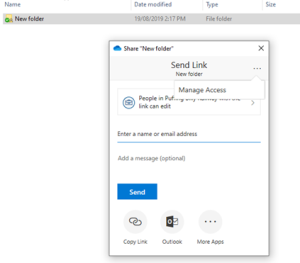
- Select who you would like to have access to the folder/file.

- For example, if you wish to share the folder/file with only specific users you can select Specific people. By default, the user will have editing access. Untick Allow editing if you wish the user/s to only have read access. Click Apply when done.

-
Enter in the user’s name and click Send. The user will receive an email letting them know they now have access to the folder/file.
If you share a folder it will share all folders and files within that folder. You will need to do each folder or file individually if you only want certain items to be shared.