# Adding RFID - Custom Linc
This article will show you how to add an RFID tag to a user's account in Custom Linc.
1. Firstly, you will have to convert the staff member to a crew member. Search the user in Custom Linc. Right click the user and select "Configure as > Crew Member". [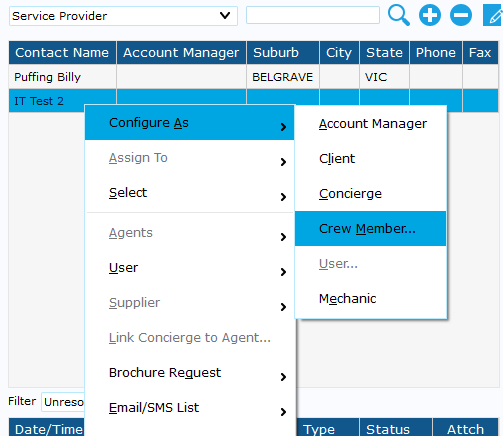](https://bookstack.pbr.org.au/uploads/images/gallery/2025-07/puRimage.png)
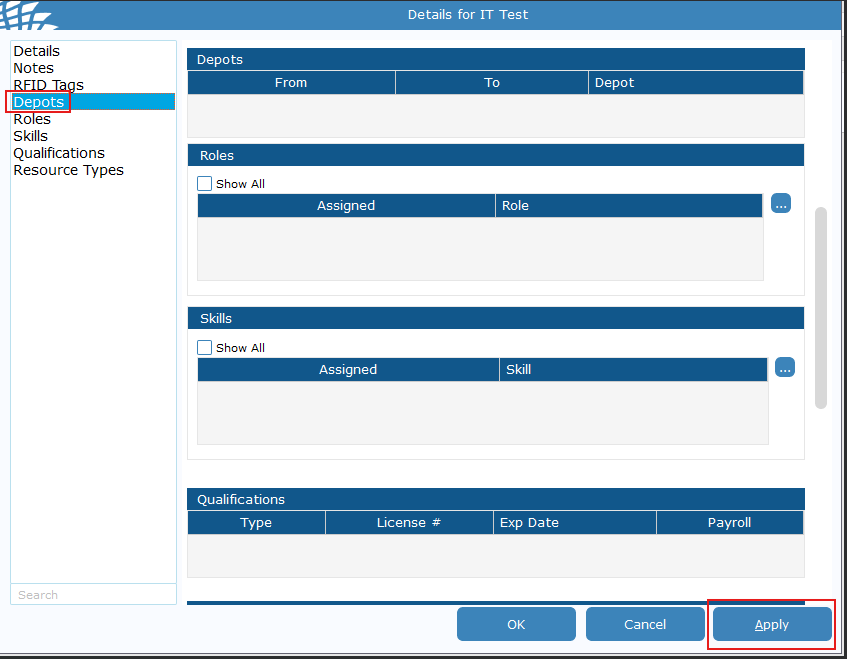
2. This box will open up. Click "Depot" on the left-hand side and click "Apply".
[](https://bookstack.pbr.org.au/uploads/images/gallery/2025-09/jRyimage.png)
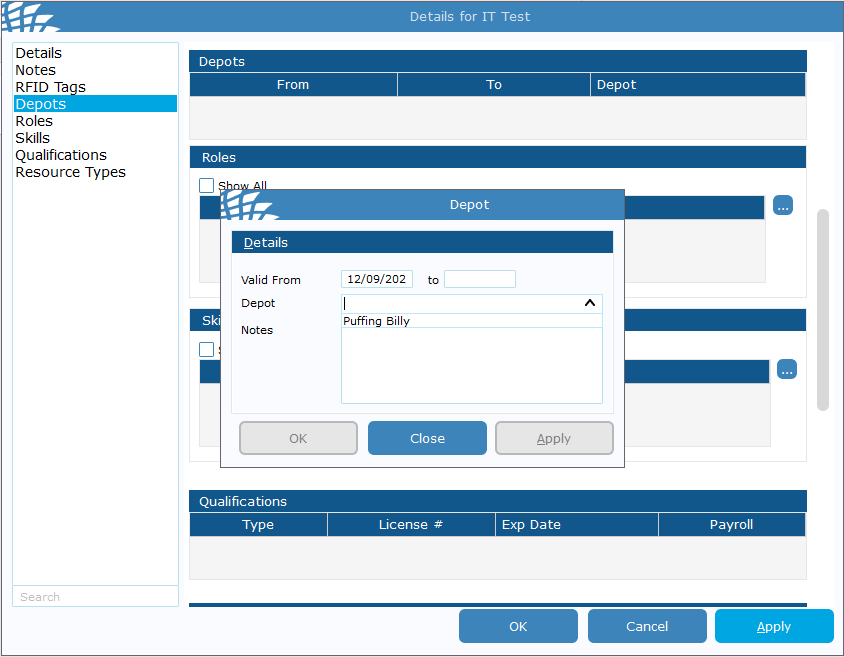
3. This box will appear, in "Depot", select "Puffing Billy". hit apply and then close.
[](https://bookstack.pbr.org.au/uploads/images/gallery/2025-09/xOAimage.png)
4. In the left column head to "RFID Tags", right click in the empty space under "RFID No" and click add. [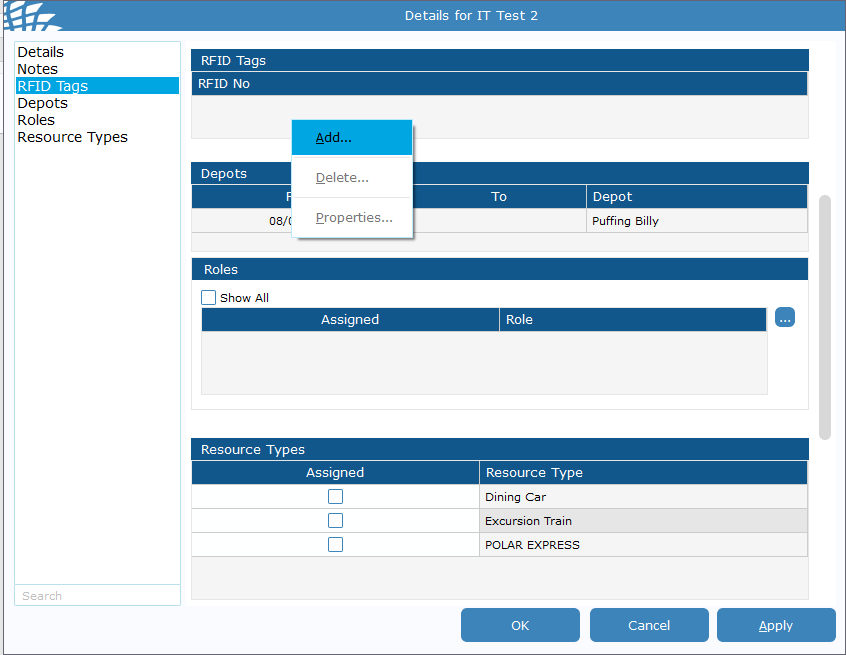](https://bookstack.pbr.org.au/uploads/images/gallery/2025-07/R3Fimage.png)
5. This will show a box with tag no, when clicked into the dialogue box, swipe the RFID tag onto the RFID reader you are assigning to that user. Then hit ok. [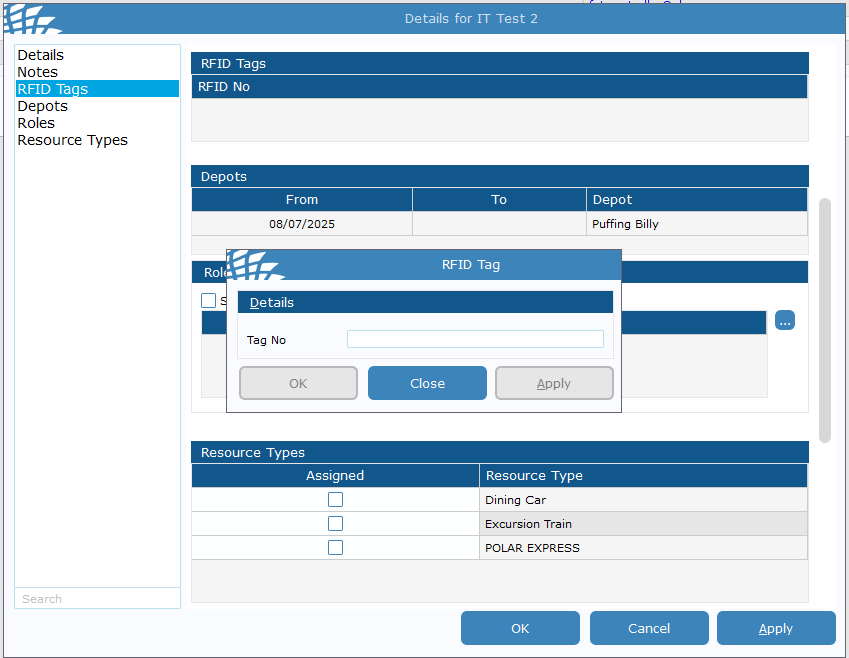](https://bookstack.pbr.org.au/uploads/images/gallery/2025-07/KYtimage.png)
**For users with a generic password such as SM's or Booking Clerks using RFID, you will also need to remove the Password Expiry.**
1. Go back to the **contact search** page, find the user you are editing and double click the **Contact Type** area
[](https://bookstack.pbr.org.au/uploads/images/gallery/2025-07/okoimage.png)
2. **Highlight** the expiry date and **delete/backspace** to remove, then hit **apply**.
[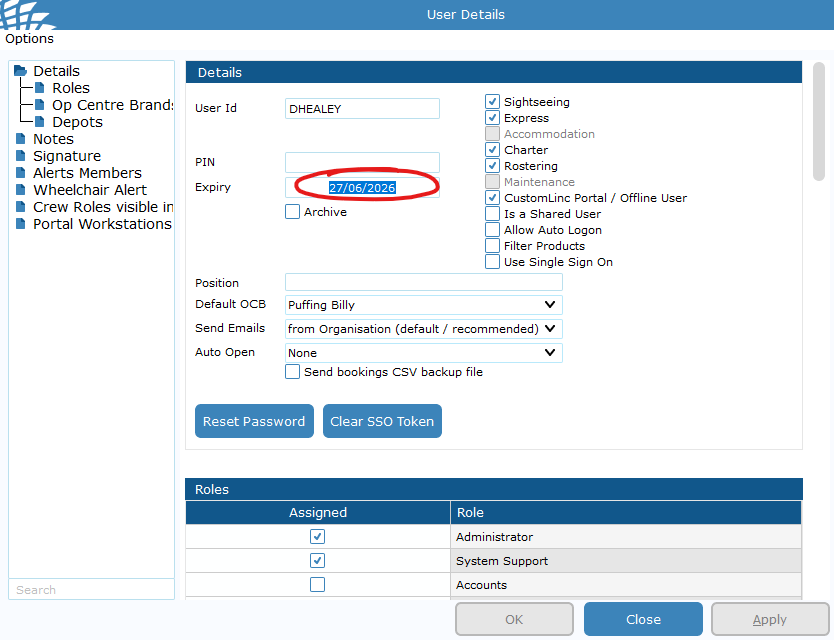](https://bookstack.pbr.org.au/uploads/images/gallery/2025-07/JzCimage.png)
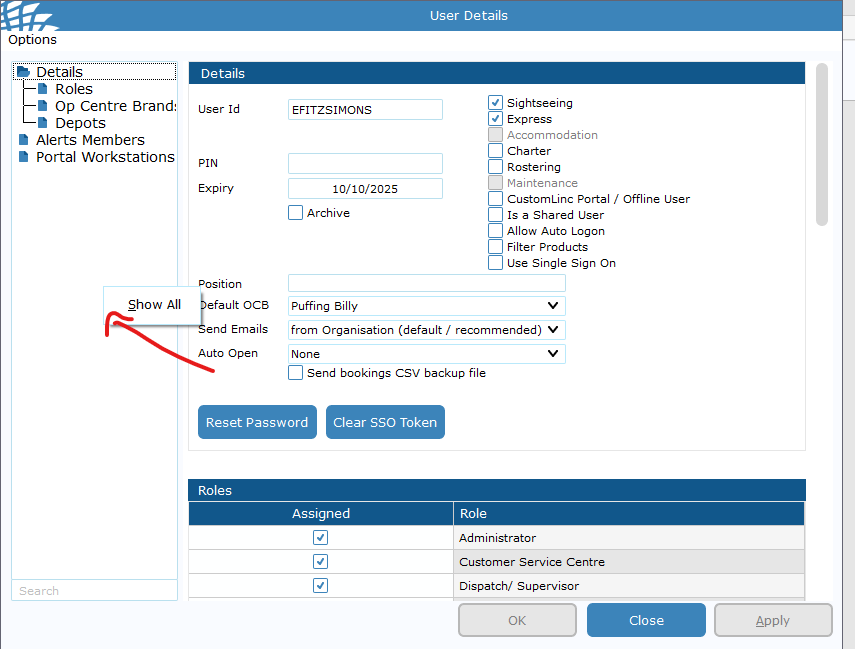
3. To confirm this has been done you can see the expiry date no longer shows under Contact Types[](https://bookstack.pbr.org.au/uploads/images/gallery/2025-07/BeTimage.png)
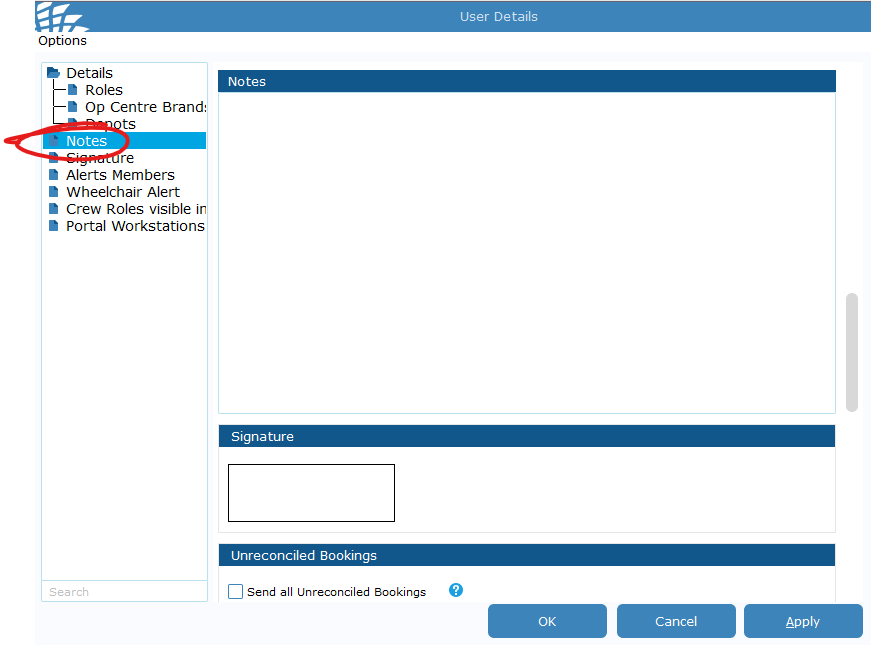
4. **Please leave a Note under the user to note they have an RFID attached.**
[](https://bookstack.pbr.org.au/uploads/images/gallery/2025-07/27Vimage.png)
[](https://bookstack.pbr.org.au/uploads/images/gallery/2025-07/OSlimage.png)
5. The user can low login using RFID.