The workstation you are trying to do this from needs to be setup to sell tickets via 'Quick Ticket' if the POS option in step 1 is not visible. Please contact IT and request for access.
**Currently the booking made will not receive a Carriage Allocation. Please confirm there is room on a carriage prior to booking.**
1. Open CustomLinc and click POS in the top left. [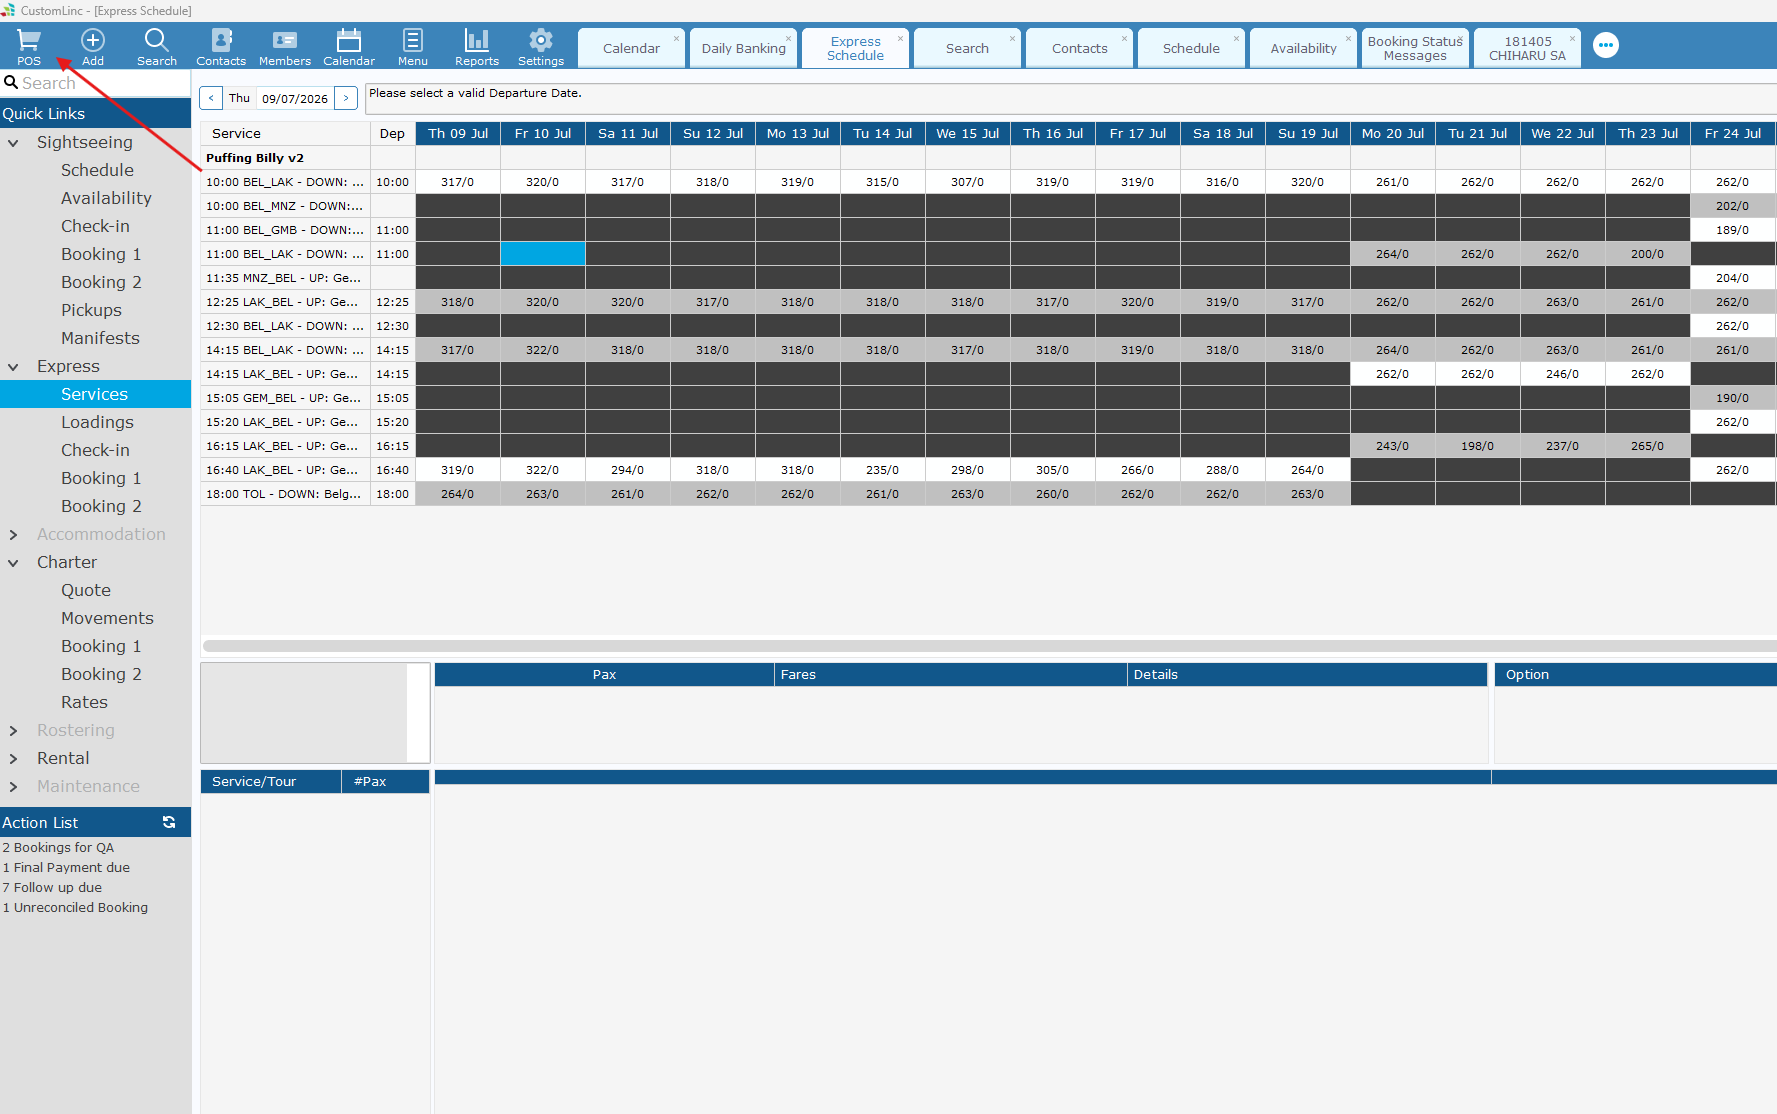](https://bookstack.pbr.org.au/uploads/images/gallery/2026-07/YTwimage.png) 2. Select the Date and the Departing Location [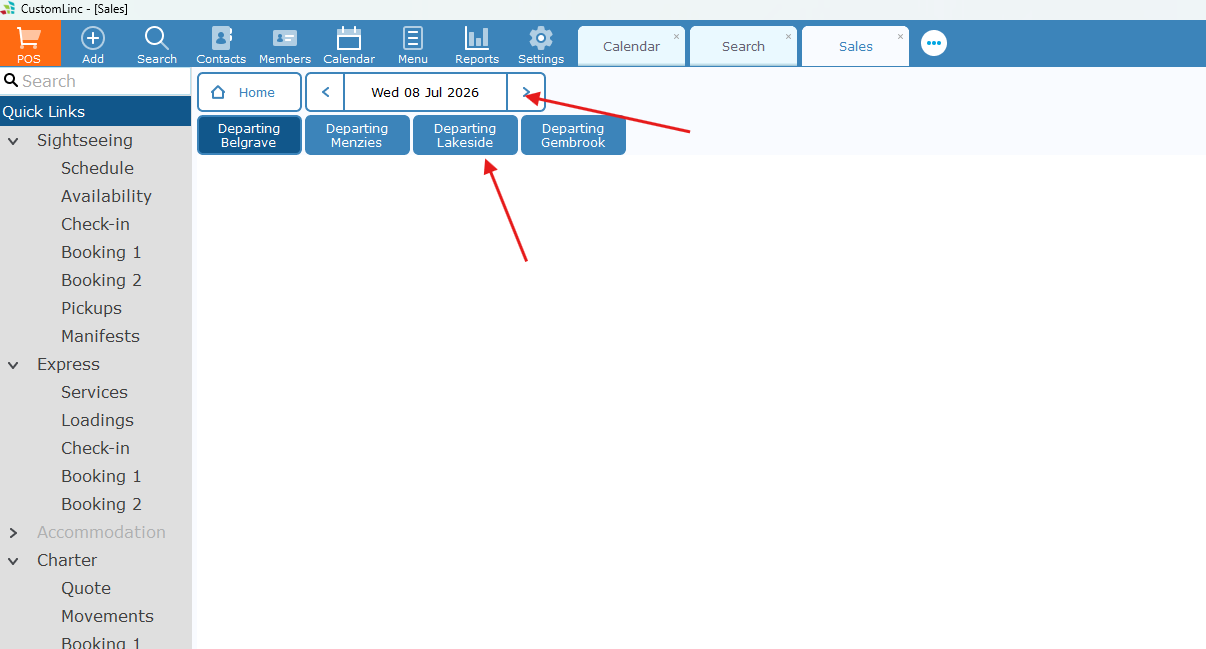](https://bookstack.pbr.org.au/uploads/images/gallery/2026-07/hvHimage.png) 3. here you'll see the Type of Journey, The available seats & the fares available. [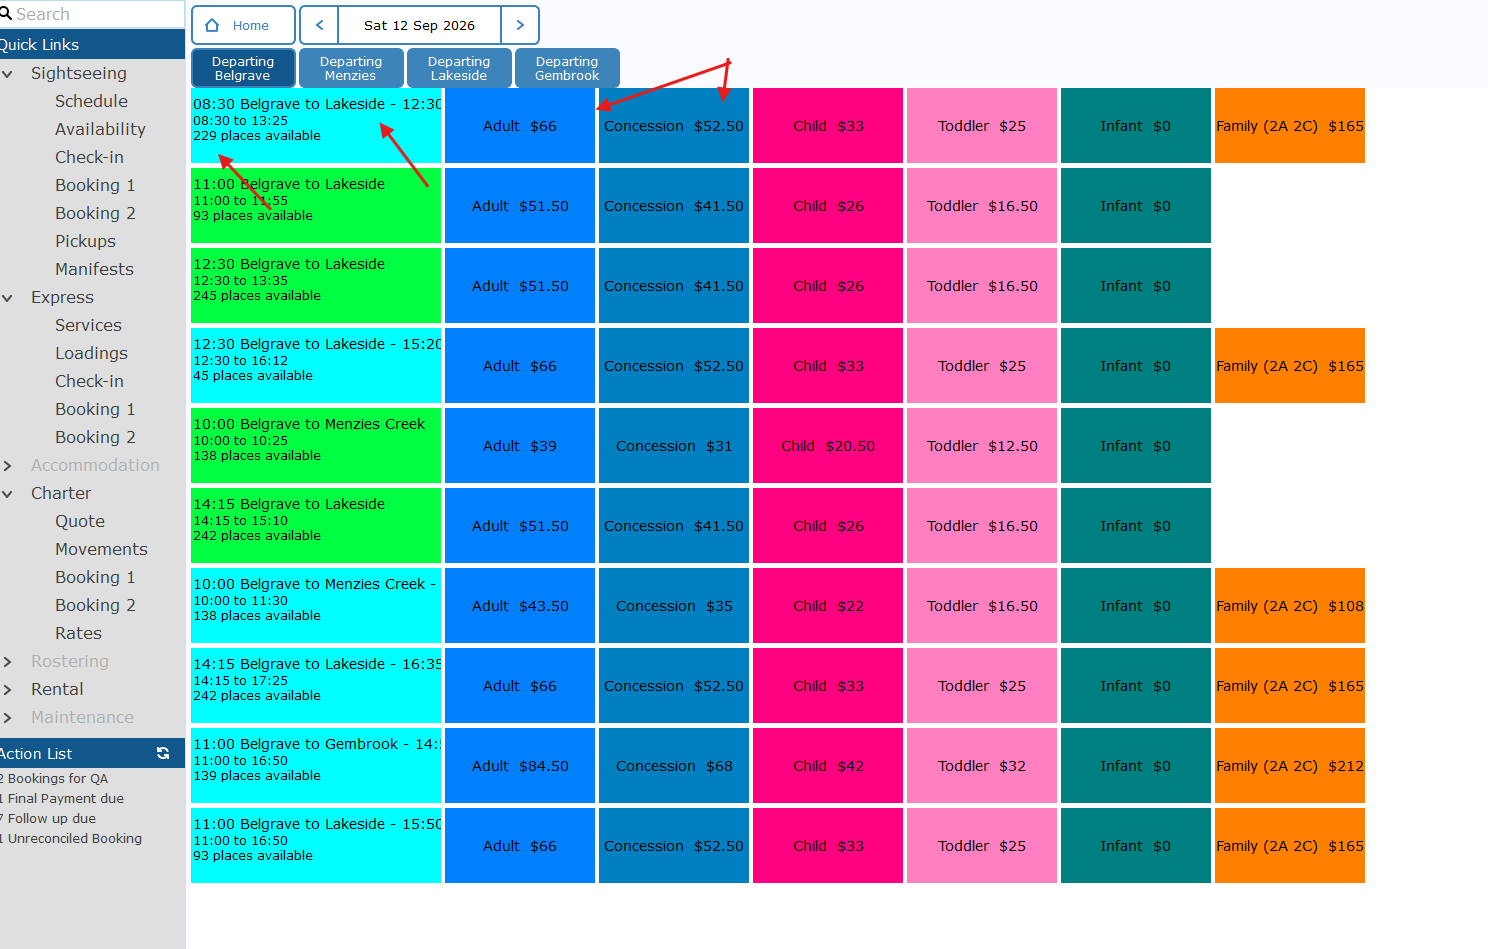](https://bookstack.pbr.org.au/uploads/images/gallery/2026-07/qH1image.png) Currently Return products are coloured Light Blue Single Way products are coloured Green 4. Click on the appropriate fare(s) for the product. You will see it populate the fares on the far-right side. [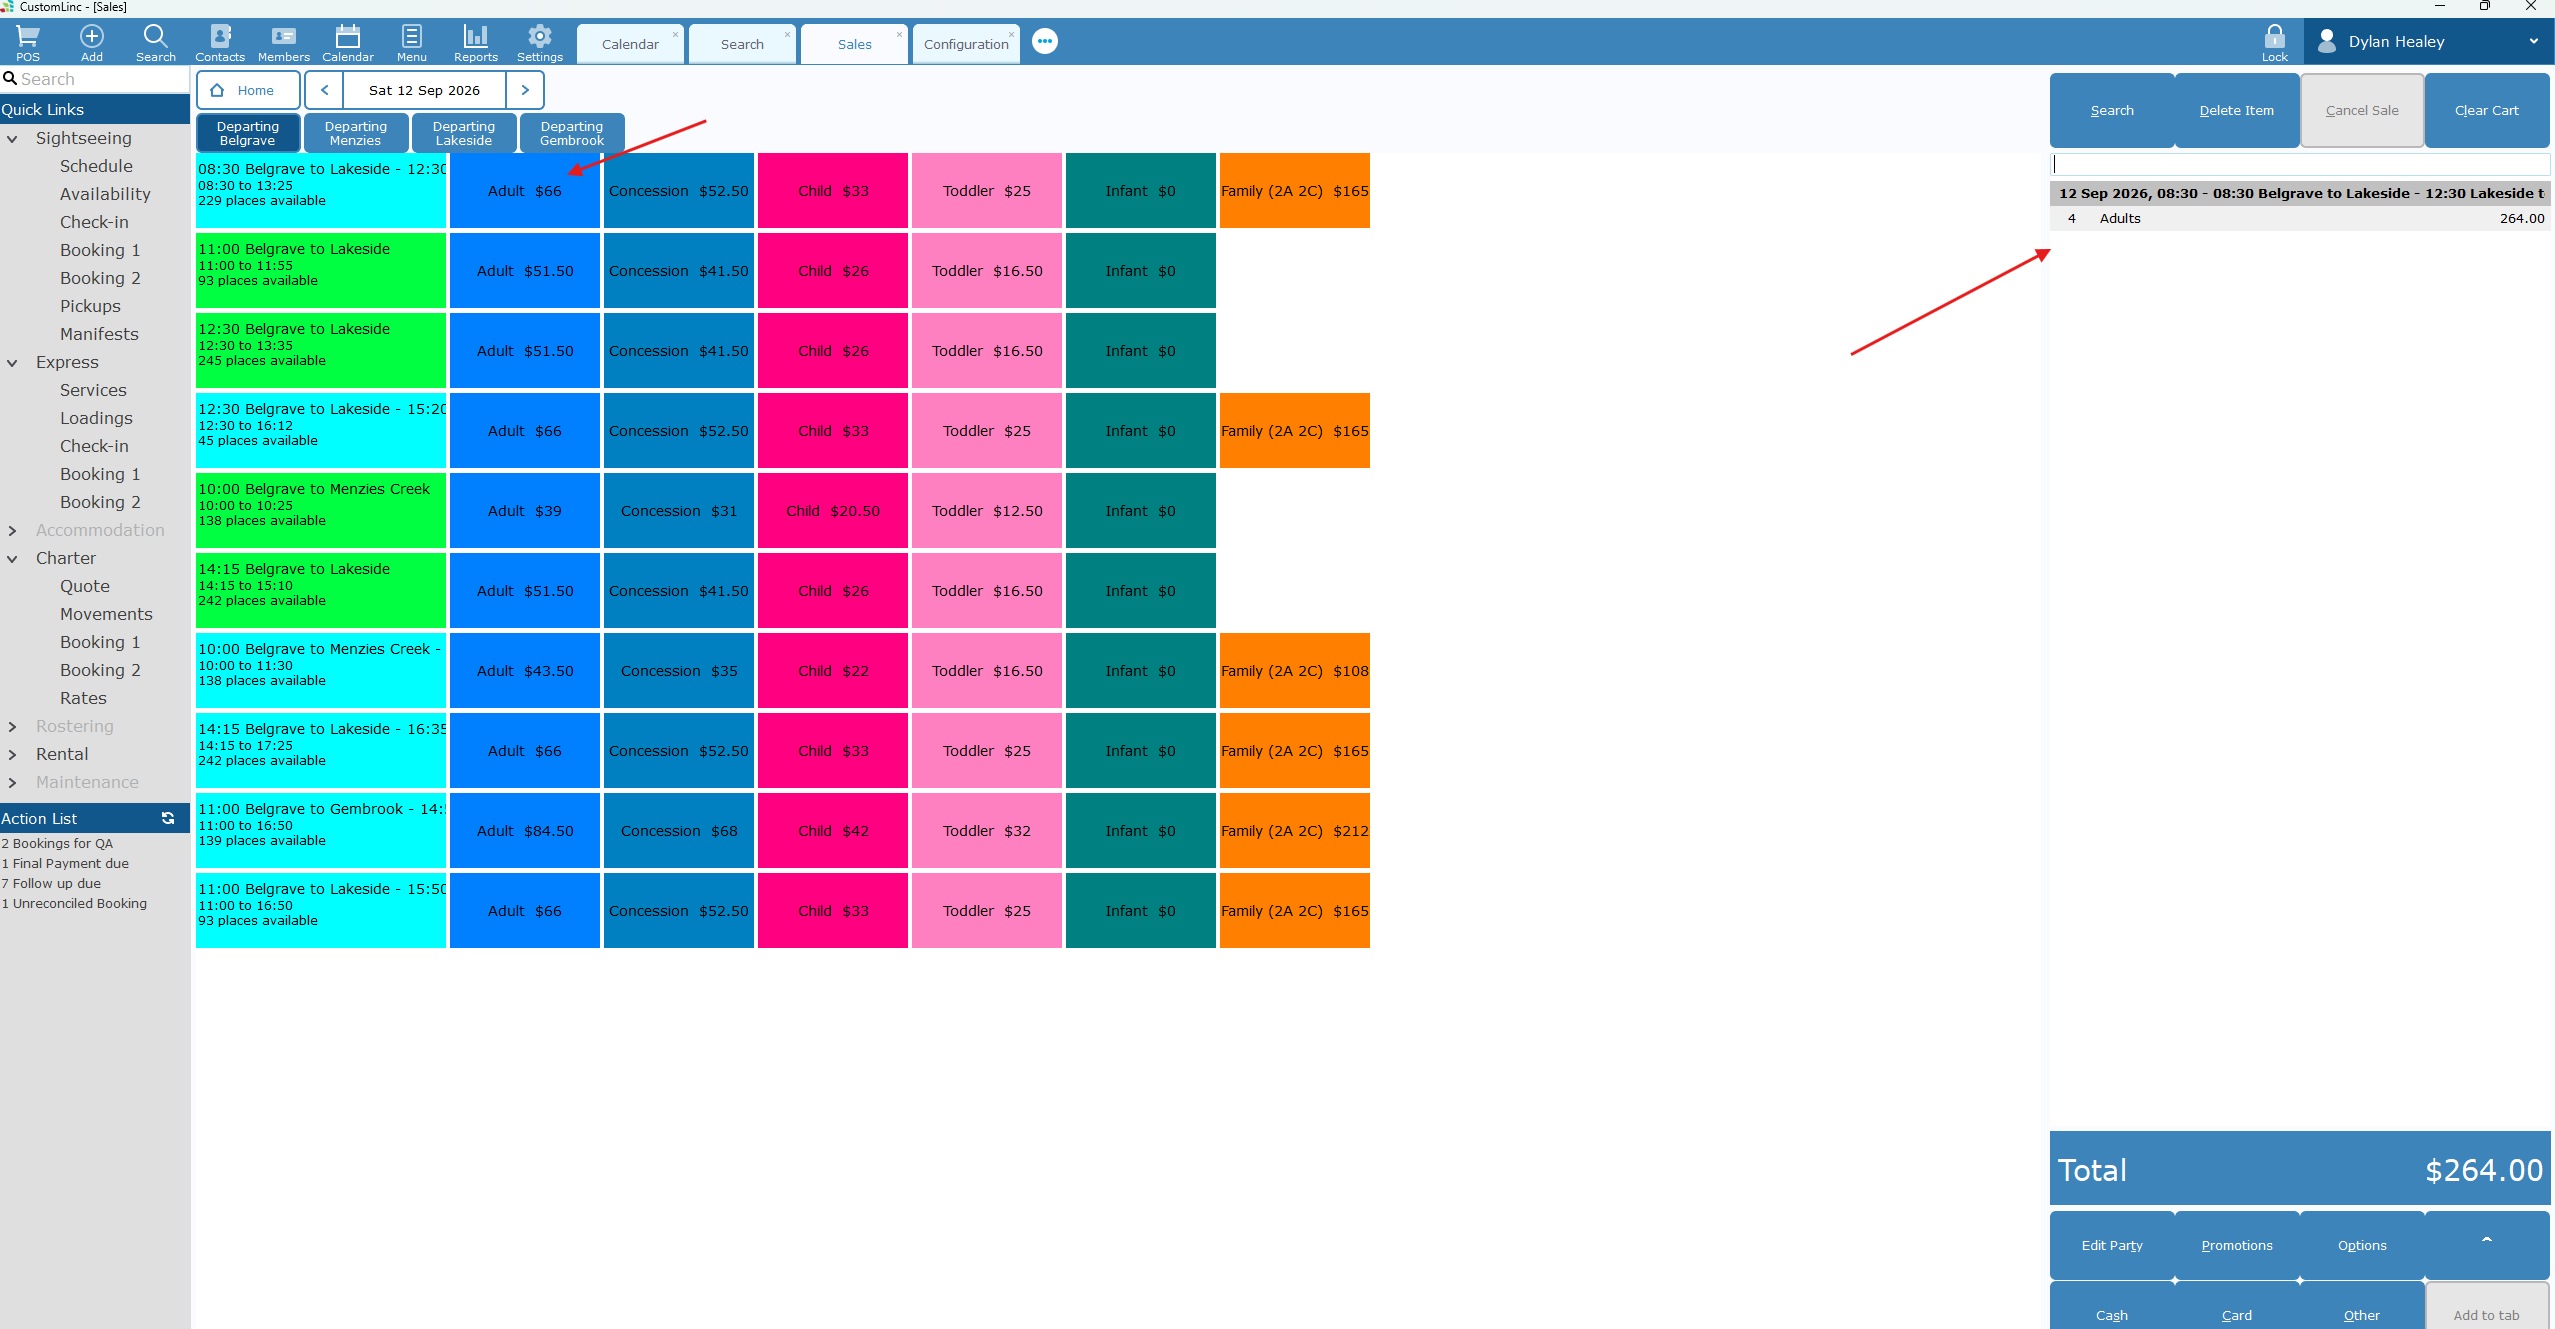](https://bookstack.pbr.org.au/uploads/images/gallery/2026-07/6V2image.png) 5. Click **Card** in the bottom right. [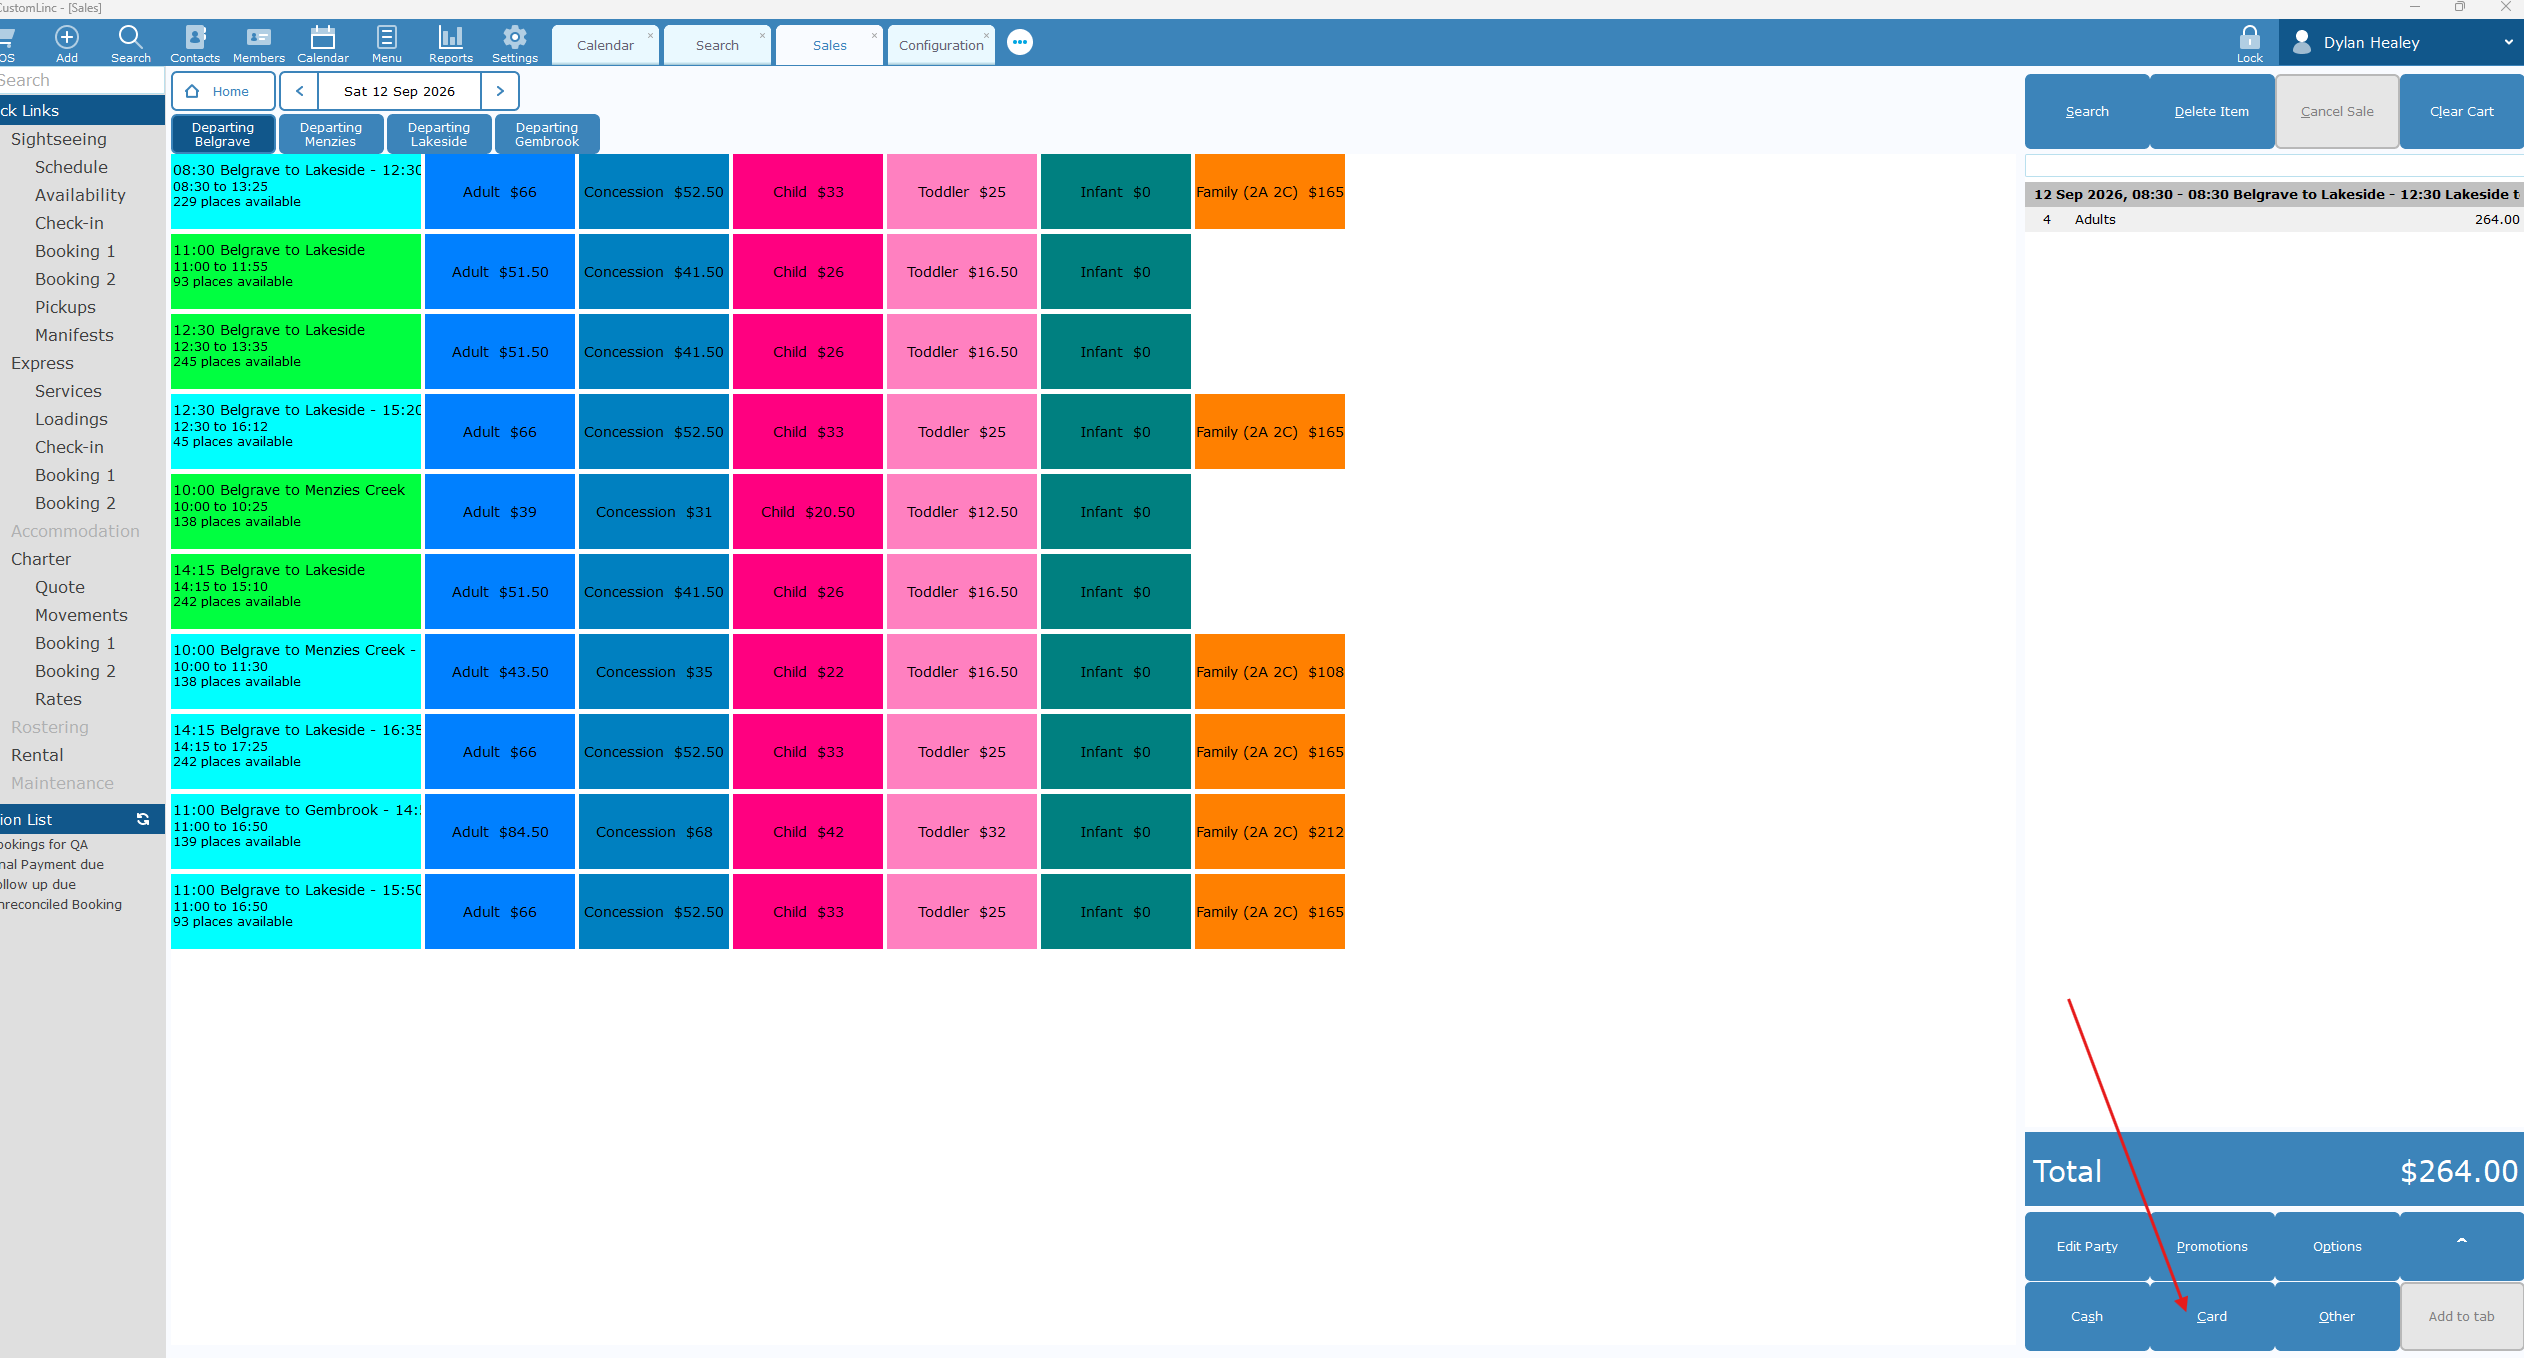](https://bookstack.pbr.org.au/uploads/images/gallery/2026-07/dXximage.png) 6. Select **Walk Up** for the Channel & Source. Click **OK.** [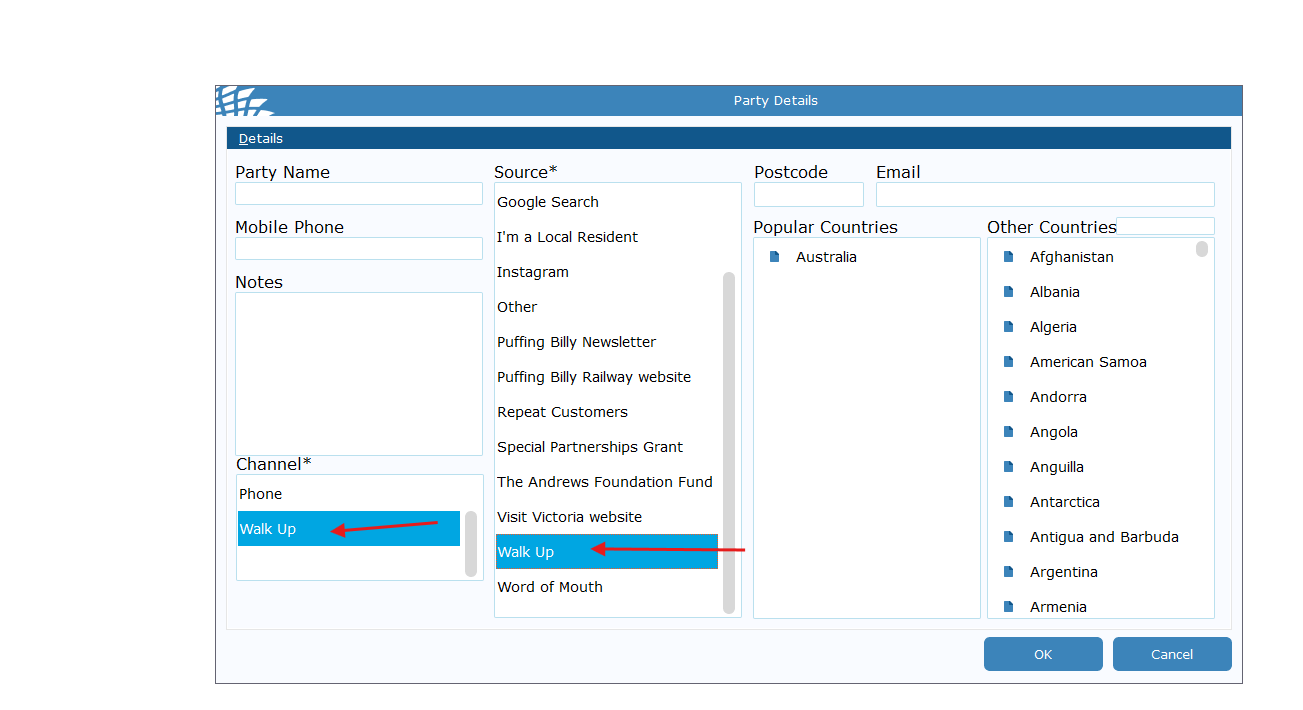](https://bookstack.pbr.org.au/uploads/images/gallery/2026-07/4Awimage.png) 7. Select Payment Type and confirm that Process on Pindpad is selected and click **OK**[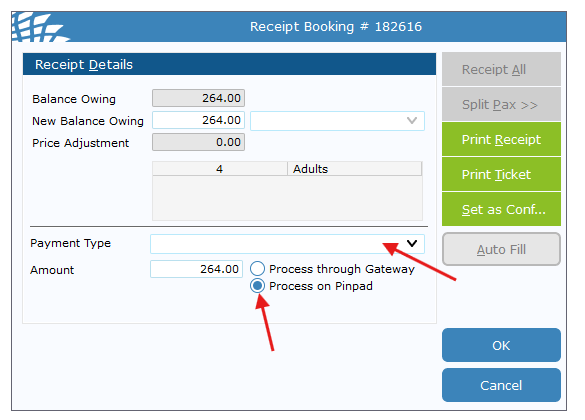](https://bookstack.pbr.org.au/uploads/images/gallery/2026-07/XV6image.png) 8. The connected EFTPOS terminal should now prompt for payment. Complete payment. 9. Once completed a tax receipt & appropriate tickets will automatically print - **The ticket will NOT have a seating allocation on it.**