Booking Management
Guides for creating bookings in CustomLinc.
Strategic Partnerships Grant
Overview
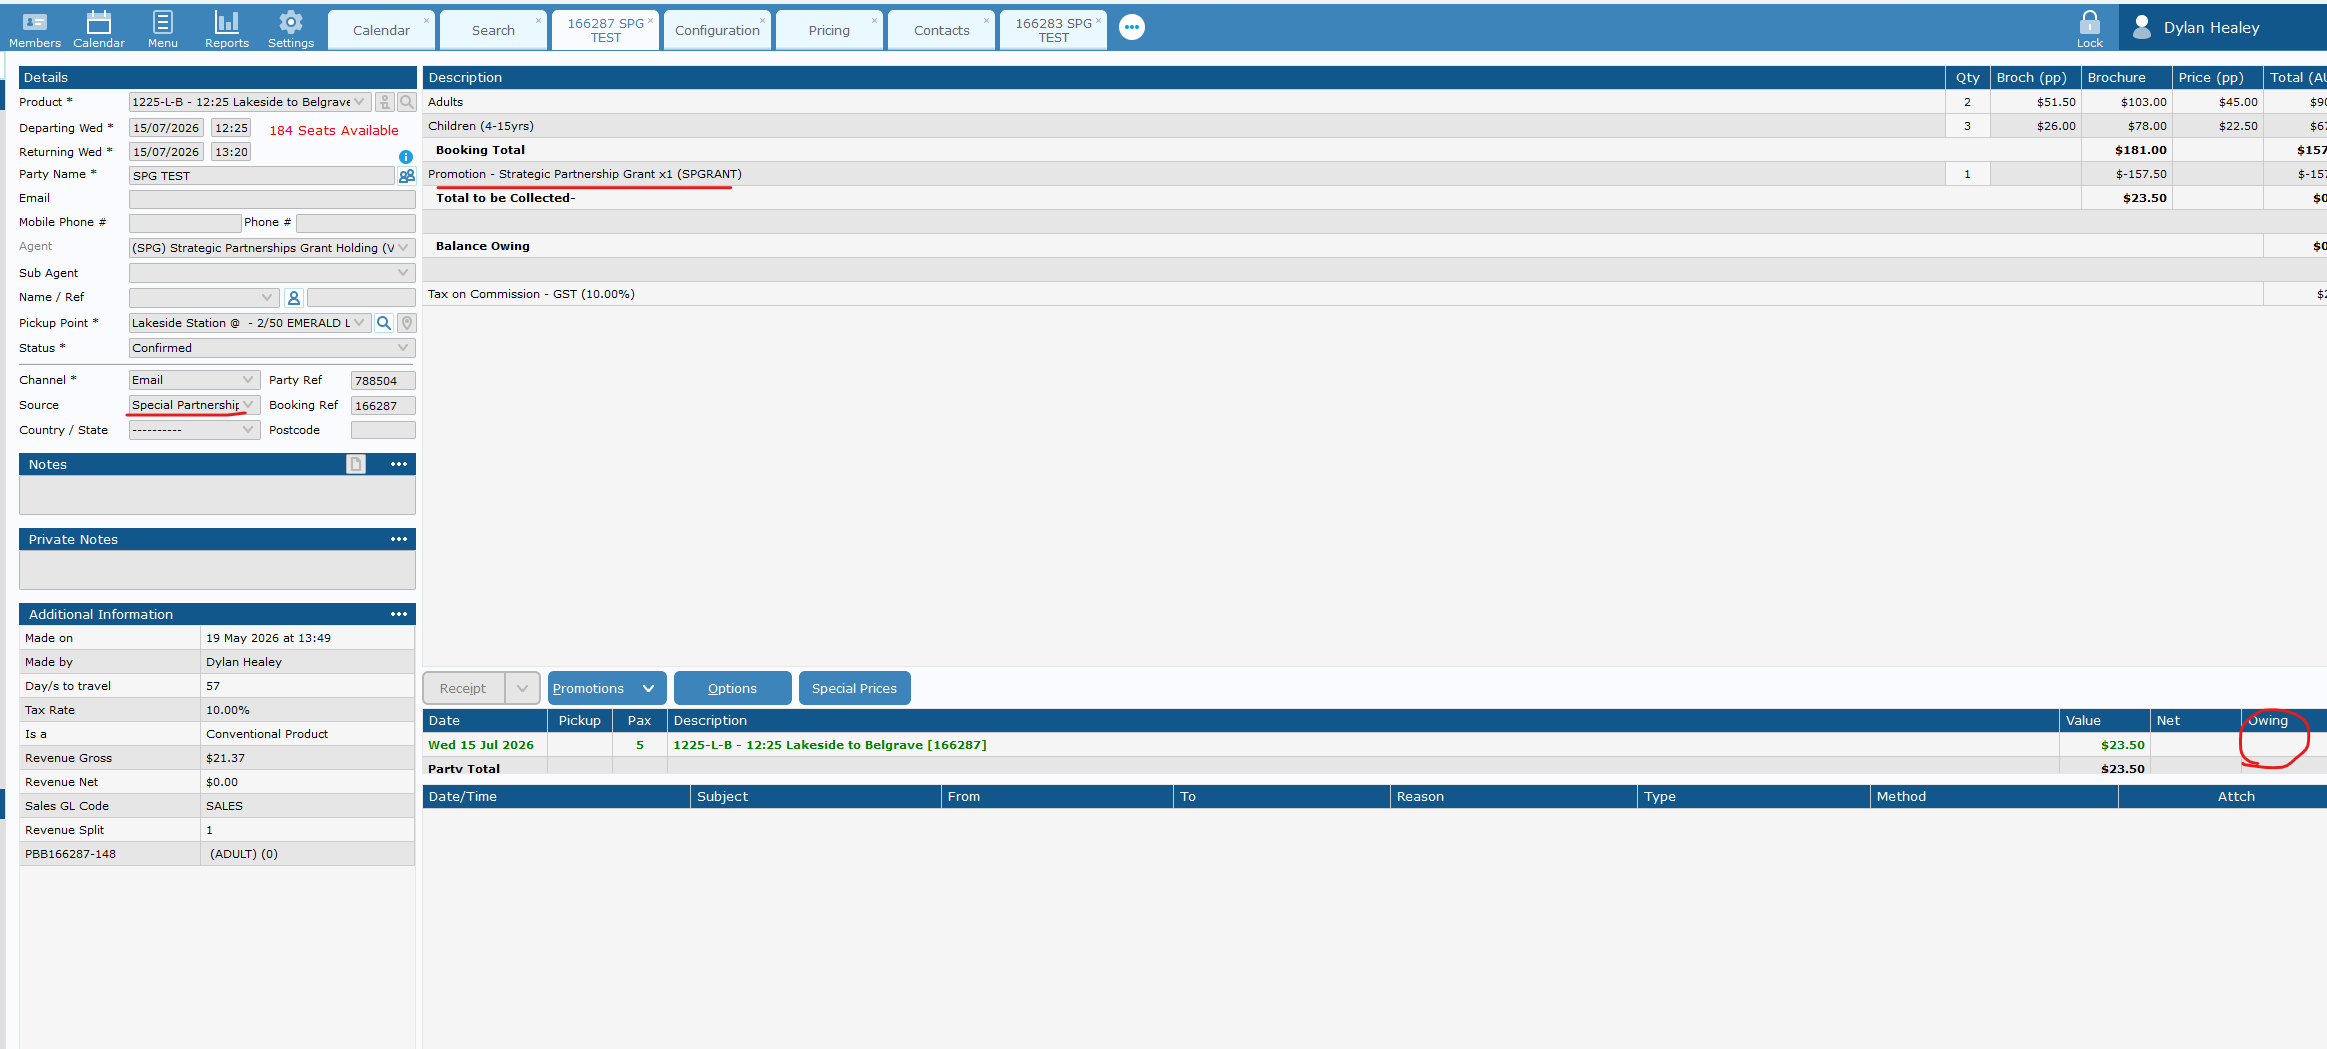
This guide explains how to create a booking in CustomLinc for the Strategic Partnerships Grant (SPG) program. Selecting the correct agent ensures the Source and Promotion Code are automatically assigned.
Steps
- In CustomLinc, click Add and select Create Standard Booking.
- Select the relevant product.
- Enter the required booking details.
- In the agent field, select (SPG) Strategic Partnerships Grant.
- Enter the number of fares required.
- Click Update.
- Confirm that the Source and Promotion Code have been automatically assigned.

Important Notes
- The Source and Promotion Code are assigned automatically when the (SPG) Strategic Partnerships Grant agent is selected — do not enter these manually.
- If the Source or Promotion Code are not populated after clicking Update, verify the correct agent has been selected before proceeding.
Booking Office
How to: Check-in a Booking
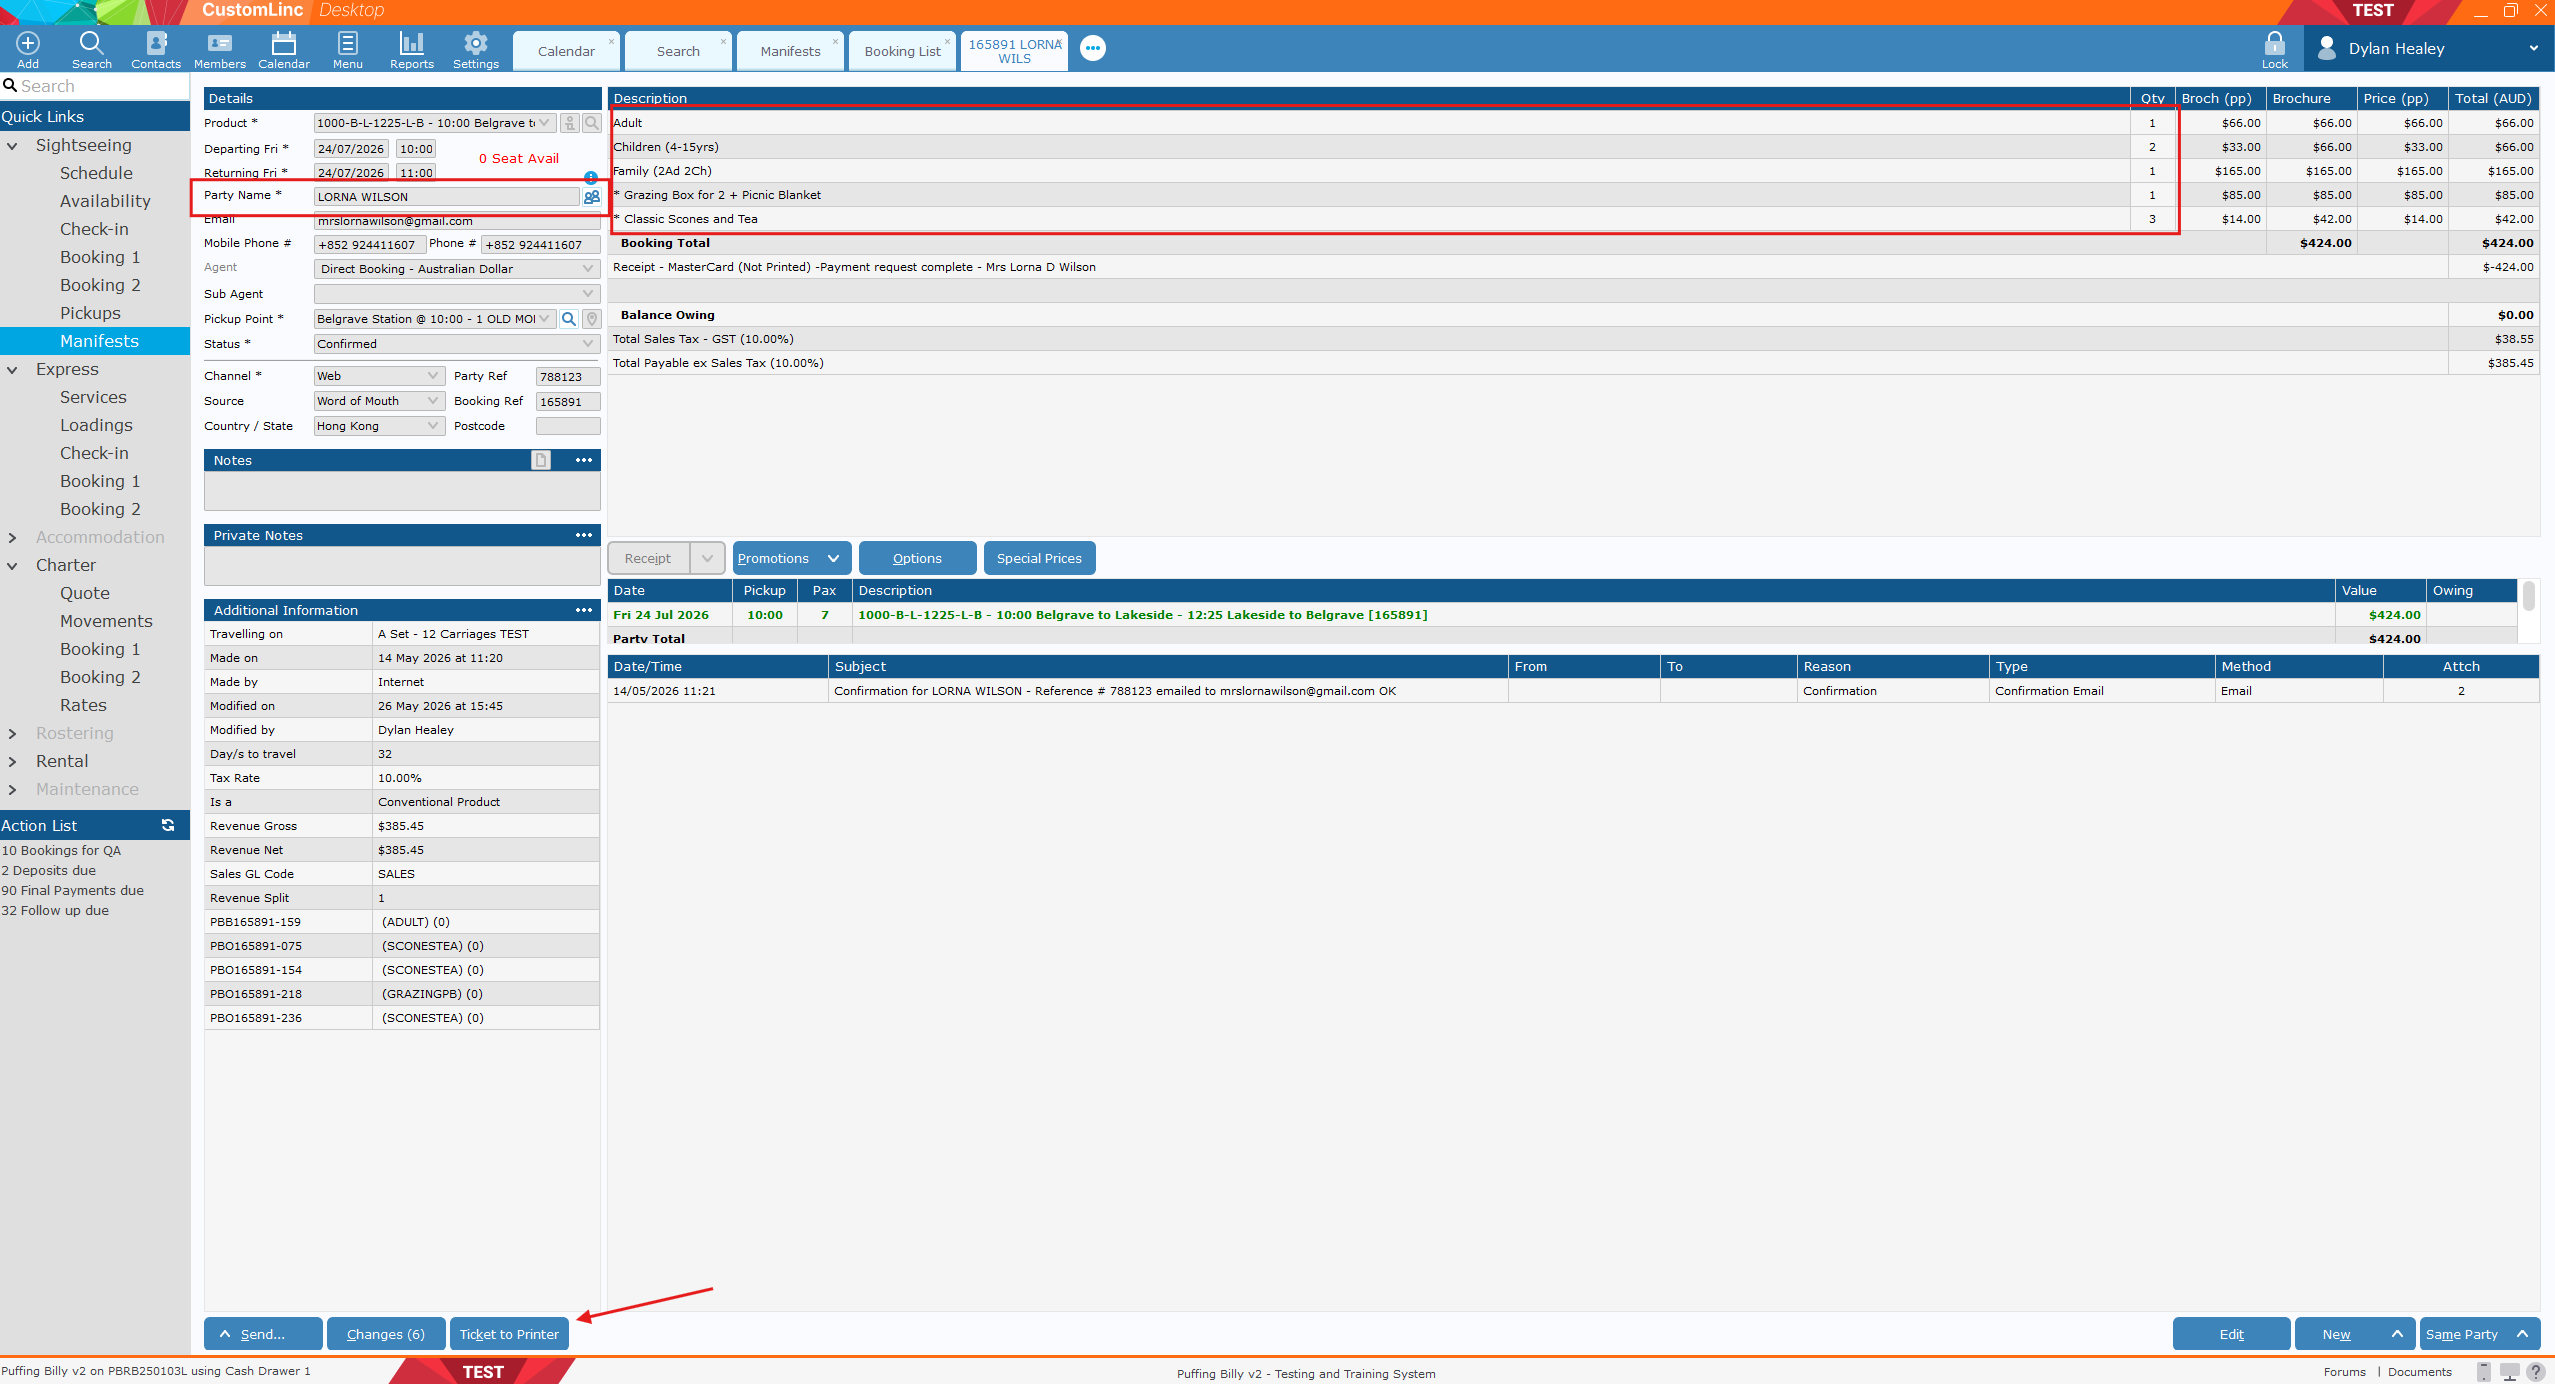
- Click Search.

- Ask customer for the Booking Reference Number, OR scan the barcode provided on booking reference.

- Confirm Party Name & Fare details (Adult, Children etc). And click Print Ticket.


How to: Manually Search for a Booking on a Specific Service
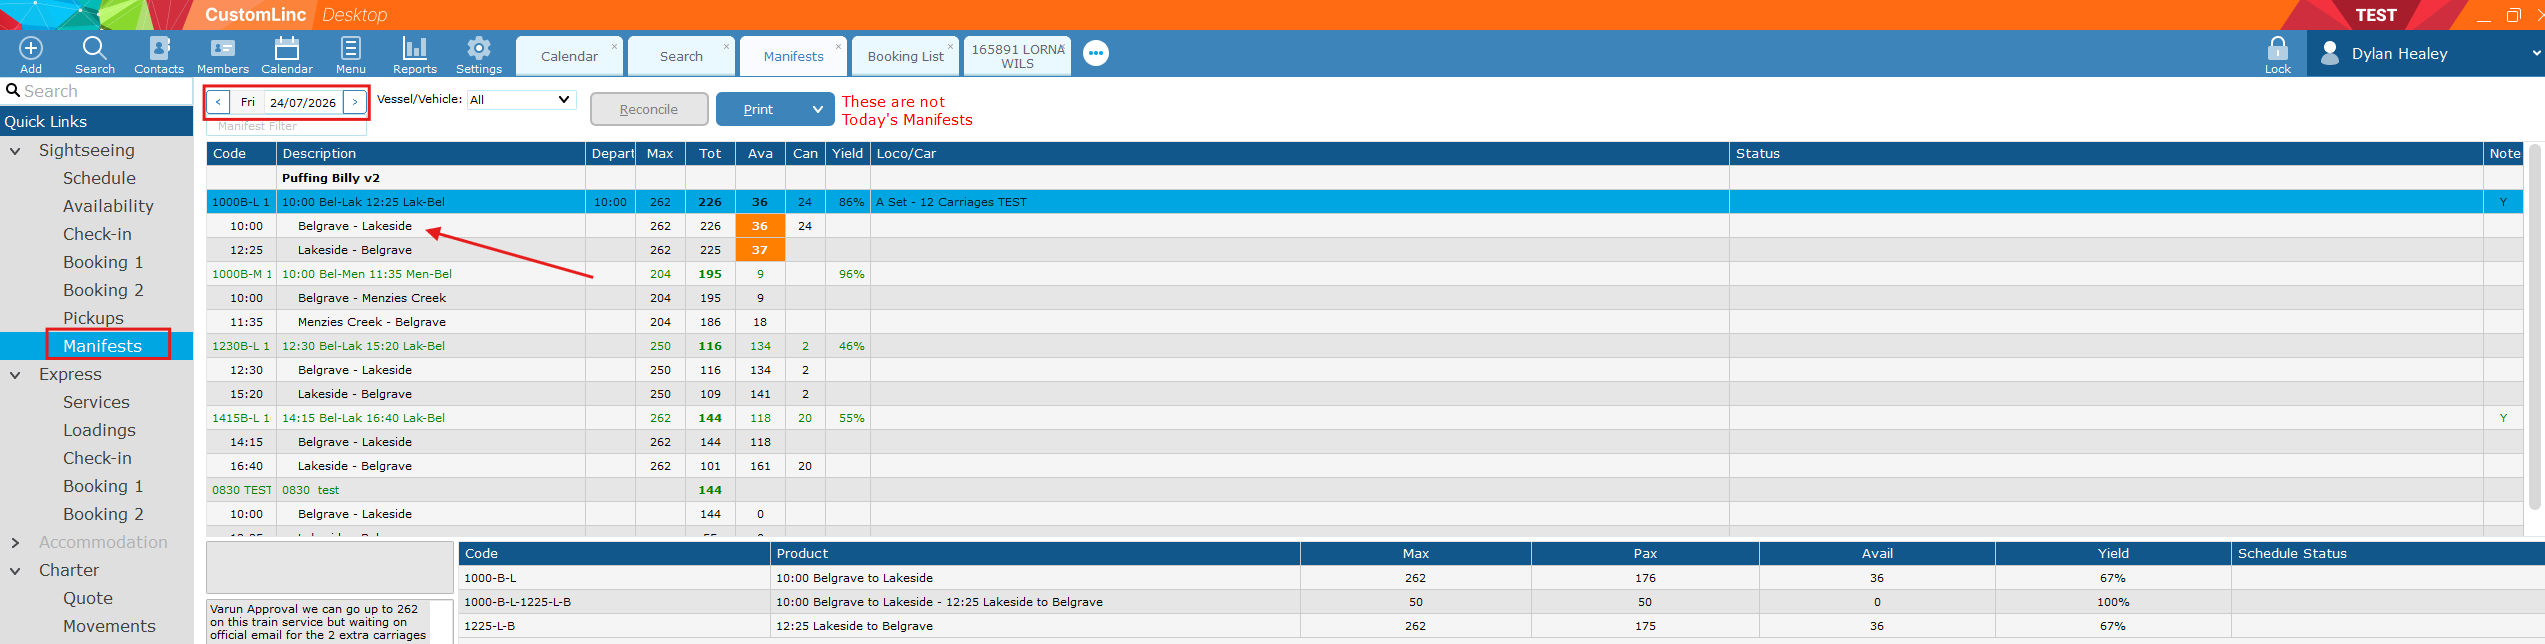
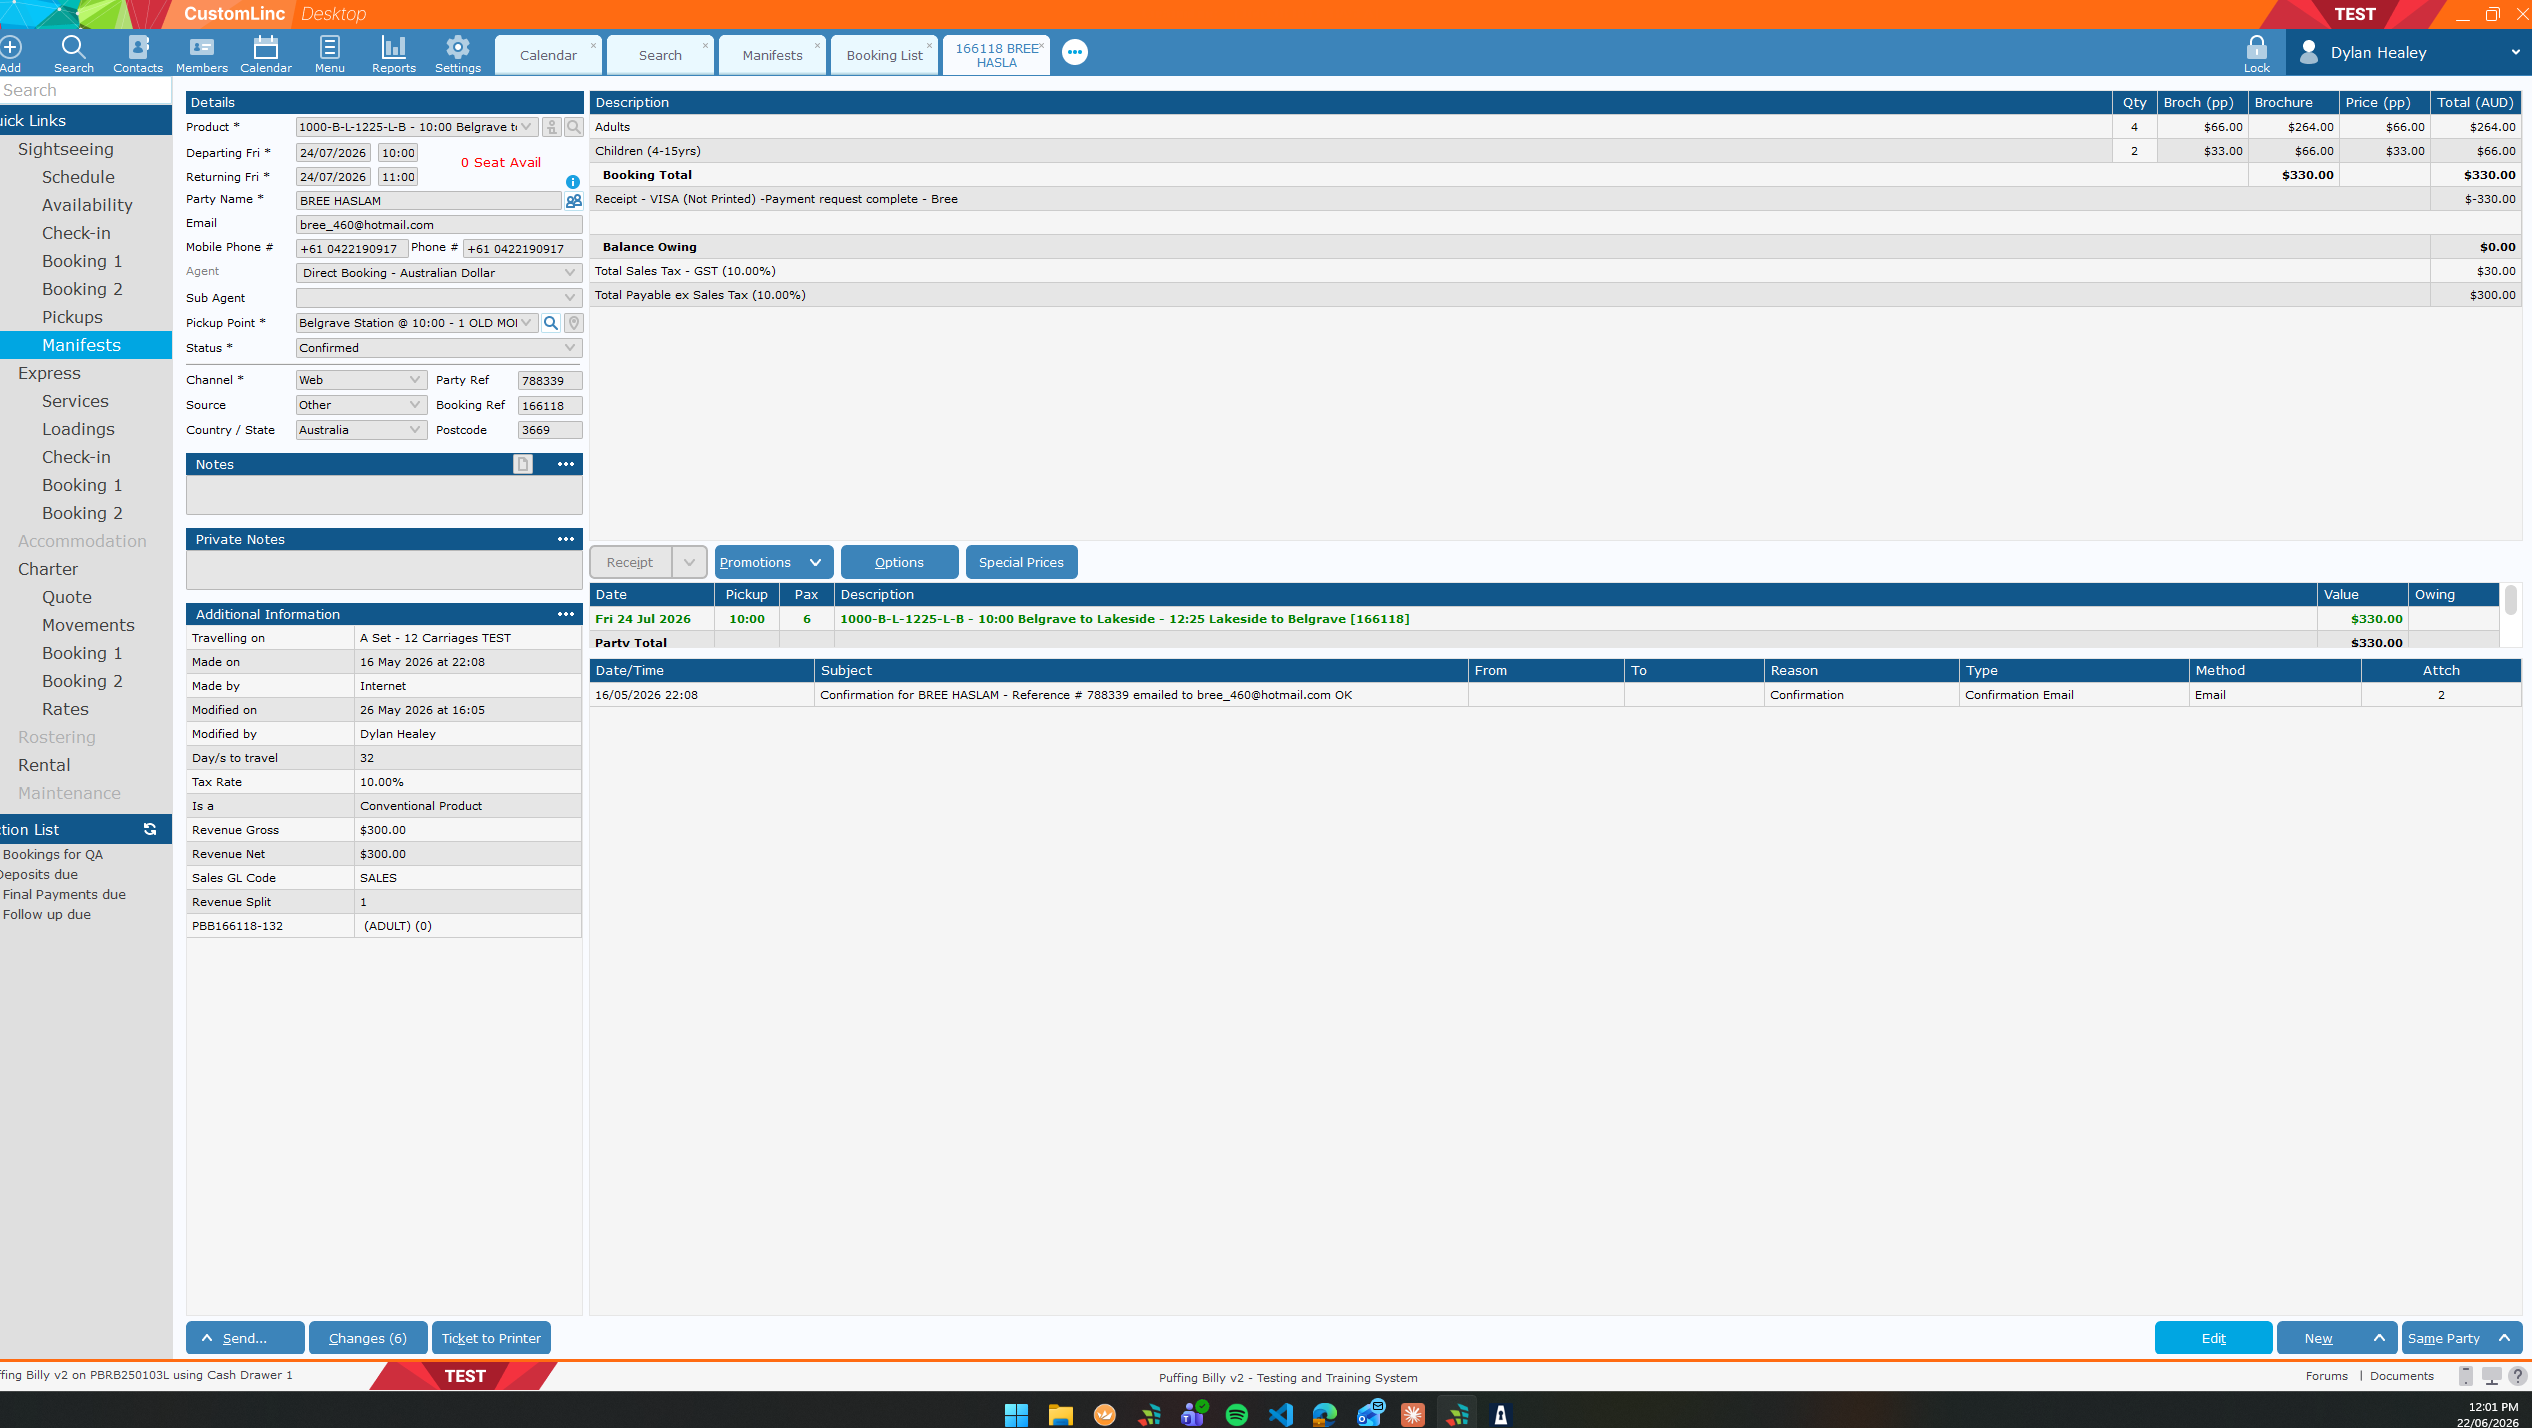
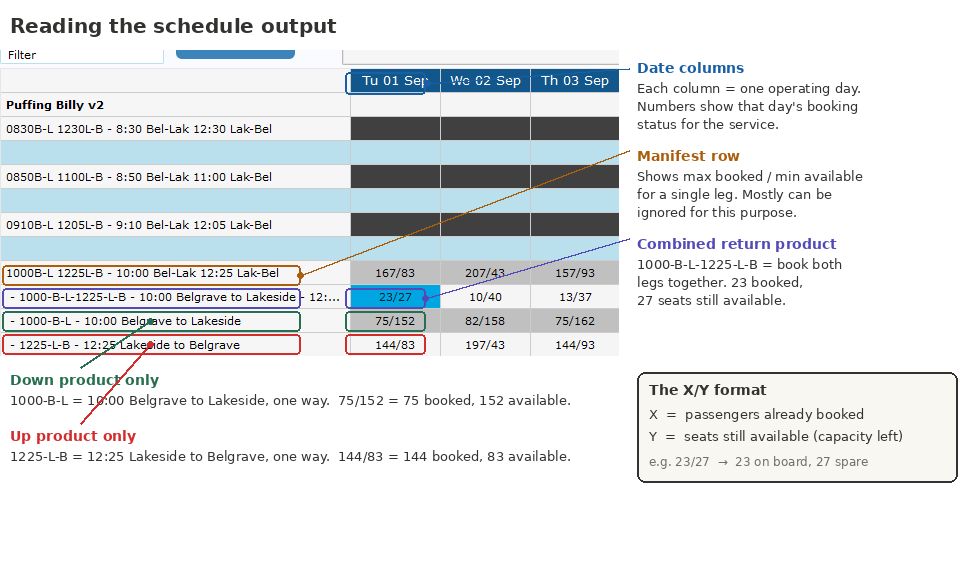
In this example we will be looking for a booking on the 10:00am Belgrave to Lakeside on the 24th of July.
- Go to Sightseeing > Manifests, set your date on the top left, then click the LEG that you would like to search. These will be in Black font (arrow).

- Find the booking by Party Name & product. In the Belgrave - Lakeside leg you will see all customers travelling on this section, including Belgrave to Lakeside Single journeys, as well as Return products.

- Double click on booking to open


How to: Check Capacity Availability for a Walk-Up Booking
To see correct information on the Availability Screen, please find a guide here: How to: Setup your Ava... | BookStack
OR ask for your team or the IT Team to assist.
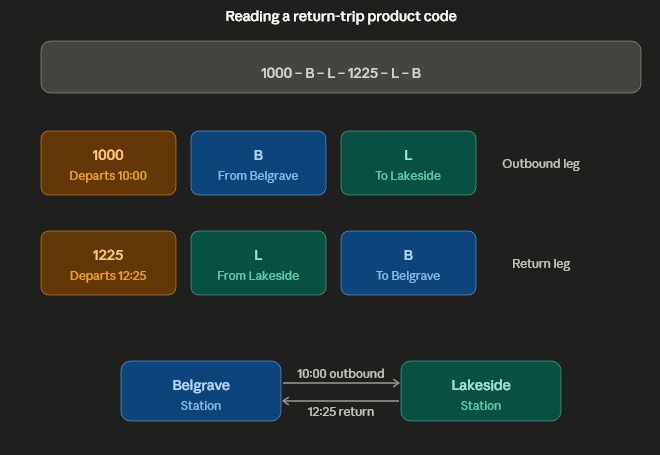
First you will need to be familiar with the Product Codes used within CustomLinc.
We have two types of journeys:
-
- Single Journeys e.g. Belgrave to Lakeside OR Lakeside to Belgrave
- Return Journeys e.g. Belgrave to Lakeside to Belgrave
These are our location codes.
-
B = Belgrave
-
M = Menzies
- N = Nobelius Packing Shed
-
L = Lakeside
-
G = Gembrook
Our Product Codes work as Departure Time - Depart Location - Arrival Location - Departure Time - Depart Location - Arrival Location
For example, a 10AM Belgrave to Lakeside Return is 1000-B-L-1225-L-B
A 10am Belgrave to Lakeside Single is 1000-B-L
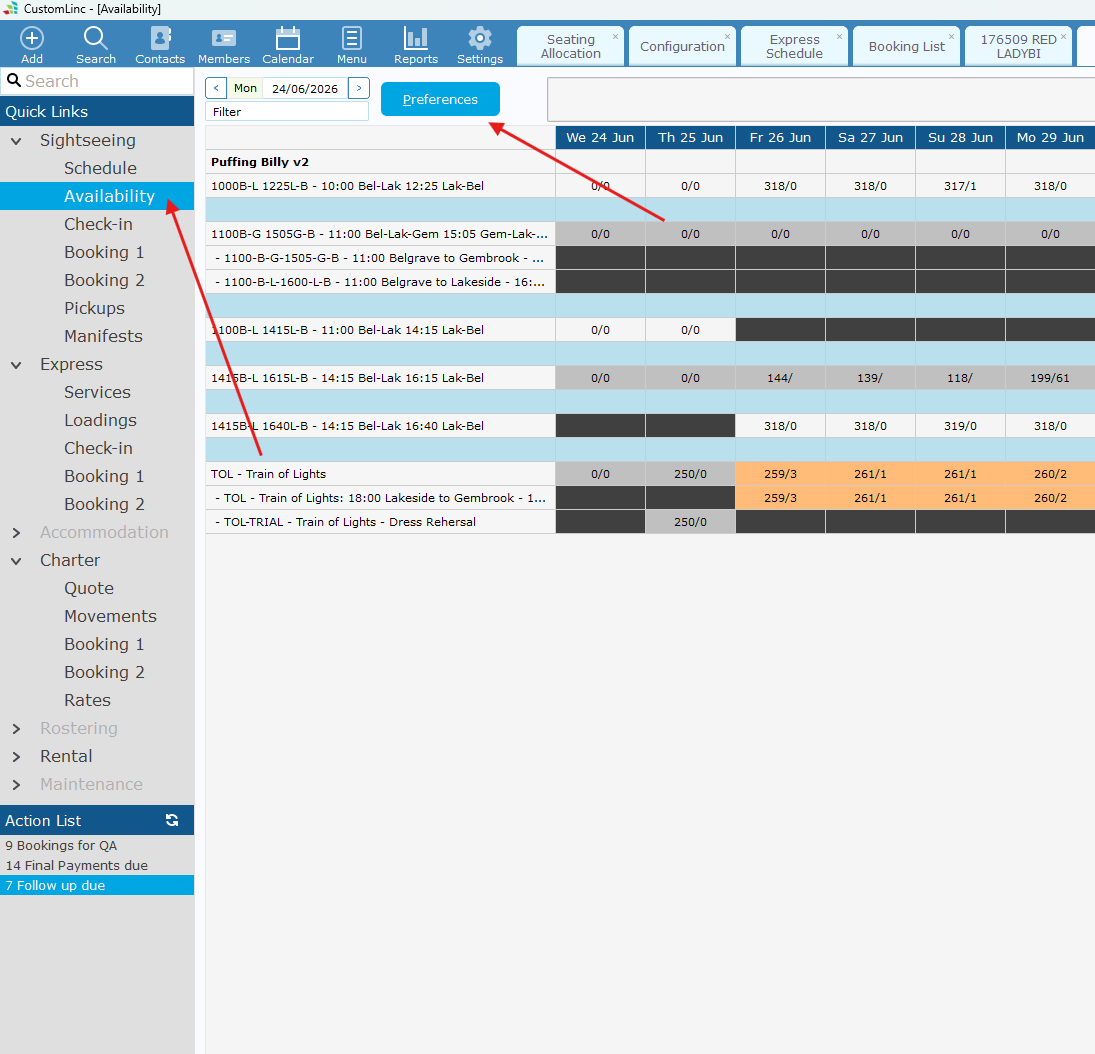
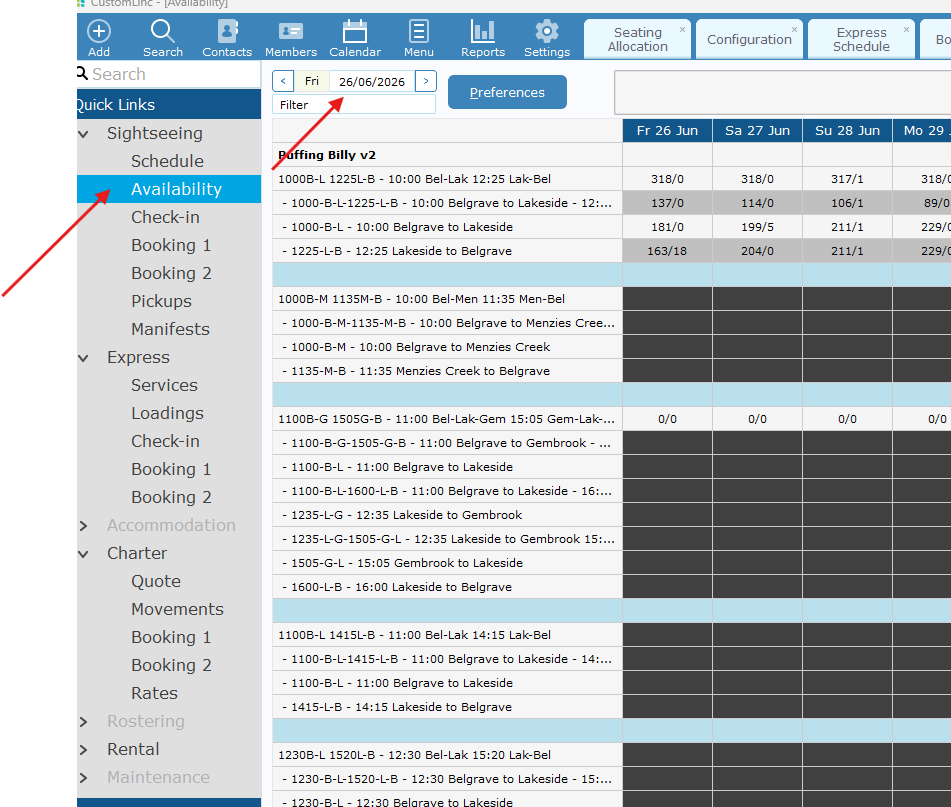
- Select Sightseeing > Availability. It should default to current date, but you can adjust the dates in the top left if needed.

- Confirm which product you are after.

- Your focus will be mainly on the second number. i.e. 23/27 on the return prodct means there is 23 bookings, and 27 available tickets.

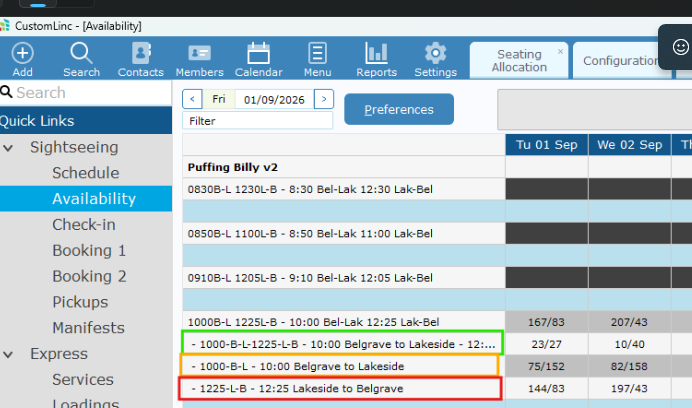
How to: Setup your Availability Screen
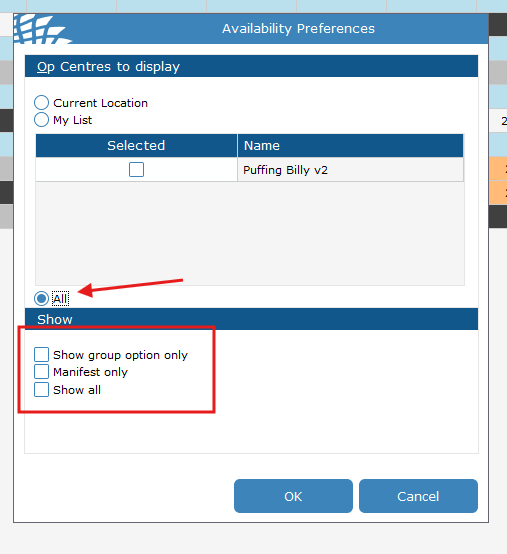
- Go to Sightseeing > Availability. Click Preferences

- Set Your Display to ALL.
And make sure all the "Show" boxes are Deselected.

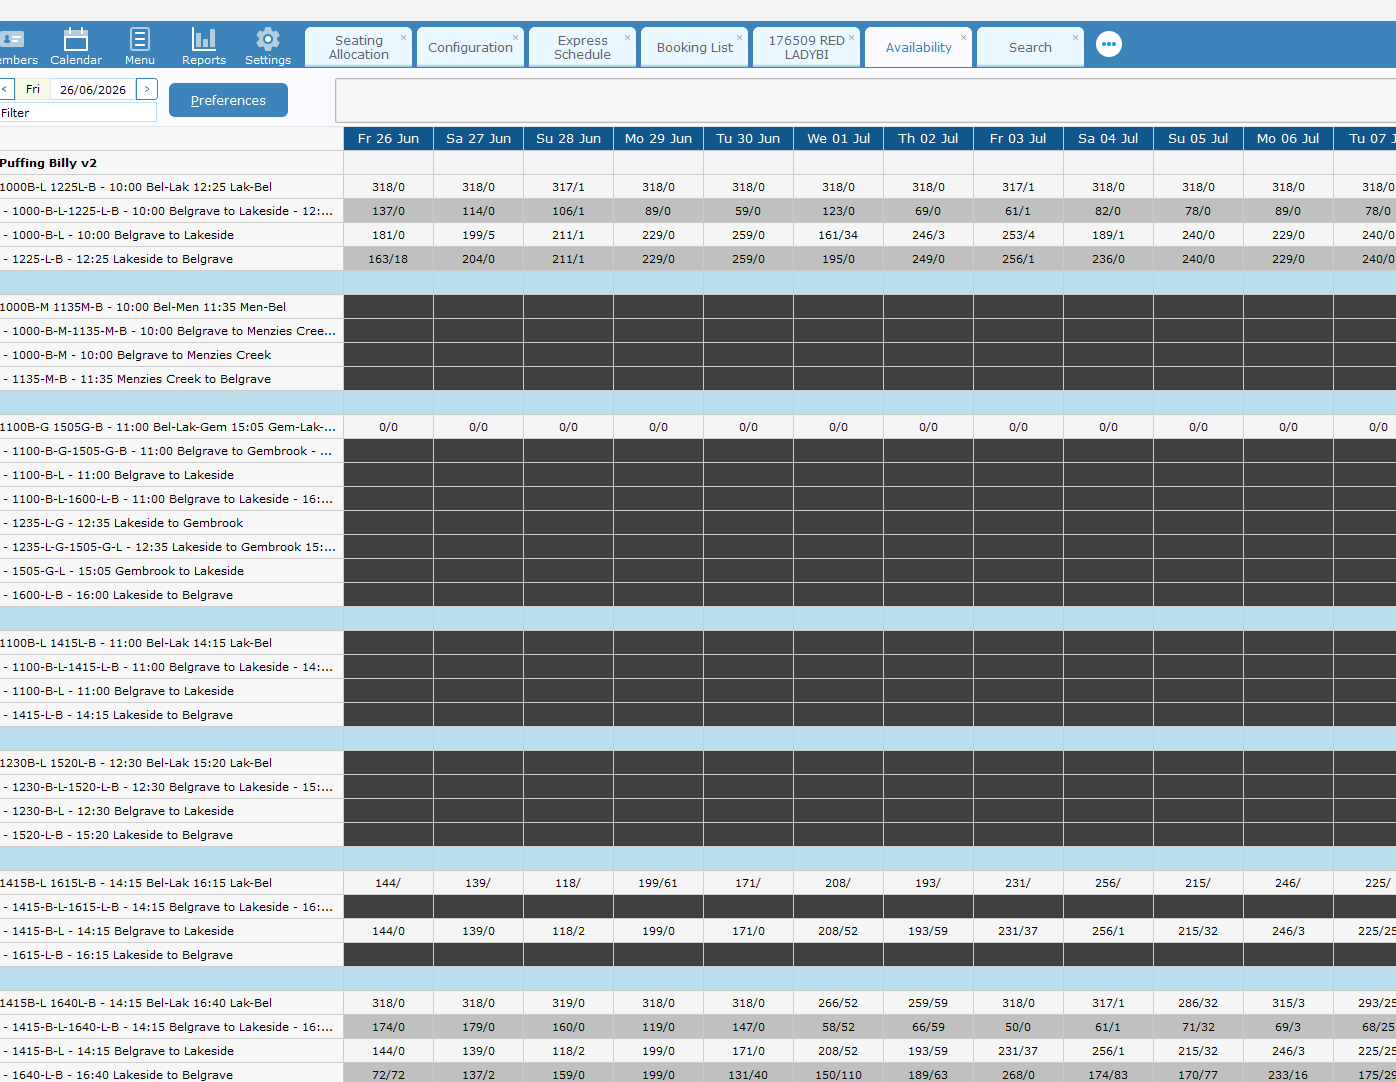
- Your availability table should now show the Manifest and all attached products underneath.

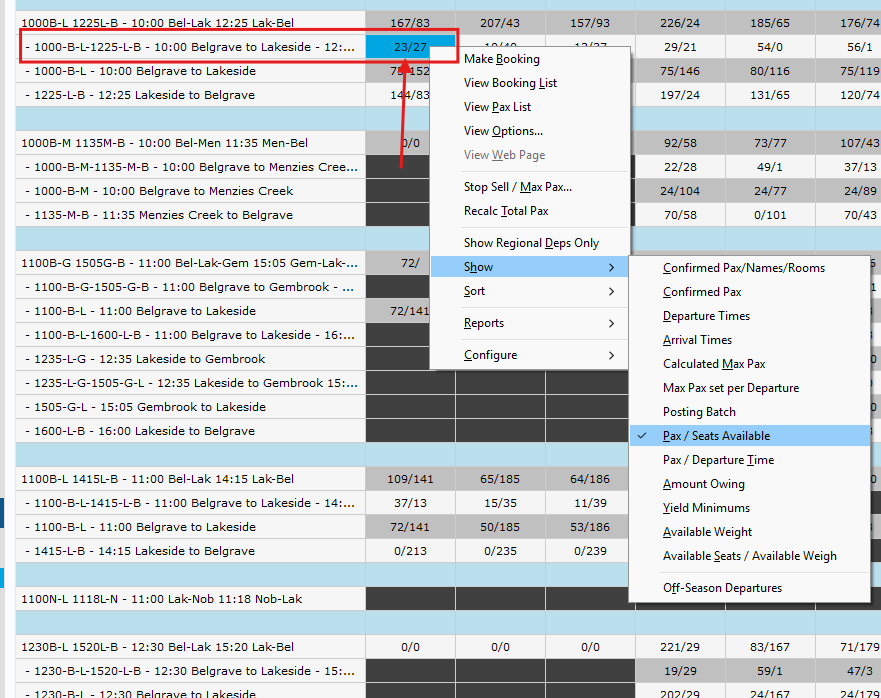
- Right click on a product availability Cell. Go to Show > Left click Pax/Seats Available

- You're now Setup.