Booking Office
- How to: Check-in a Booking
- How to: Manually Search for a Booking on a Specific Service
- How to: Check Capacity Availability for a Walk-Up Booking
- How to: Setup your Availability Screen
- How to: Make a booking with Quick Ticket (POS)
- How to: Make a Booking for a Walk-Up
- How to: Print the Seating Plan
How to: Check-in a Booking
- Click Search.

- Ask customer for the Booking Reference Number, OR scan the barcode provided on booking reference.

- Confirm Party Name & Fare details (Adult, Children etc). And click Print Ticket.

How to: Manually Search for a Booking on a Specific Service
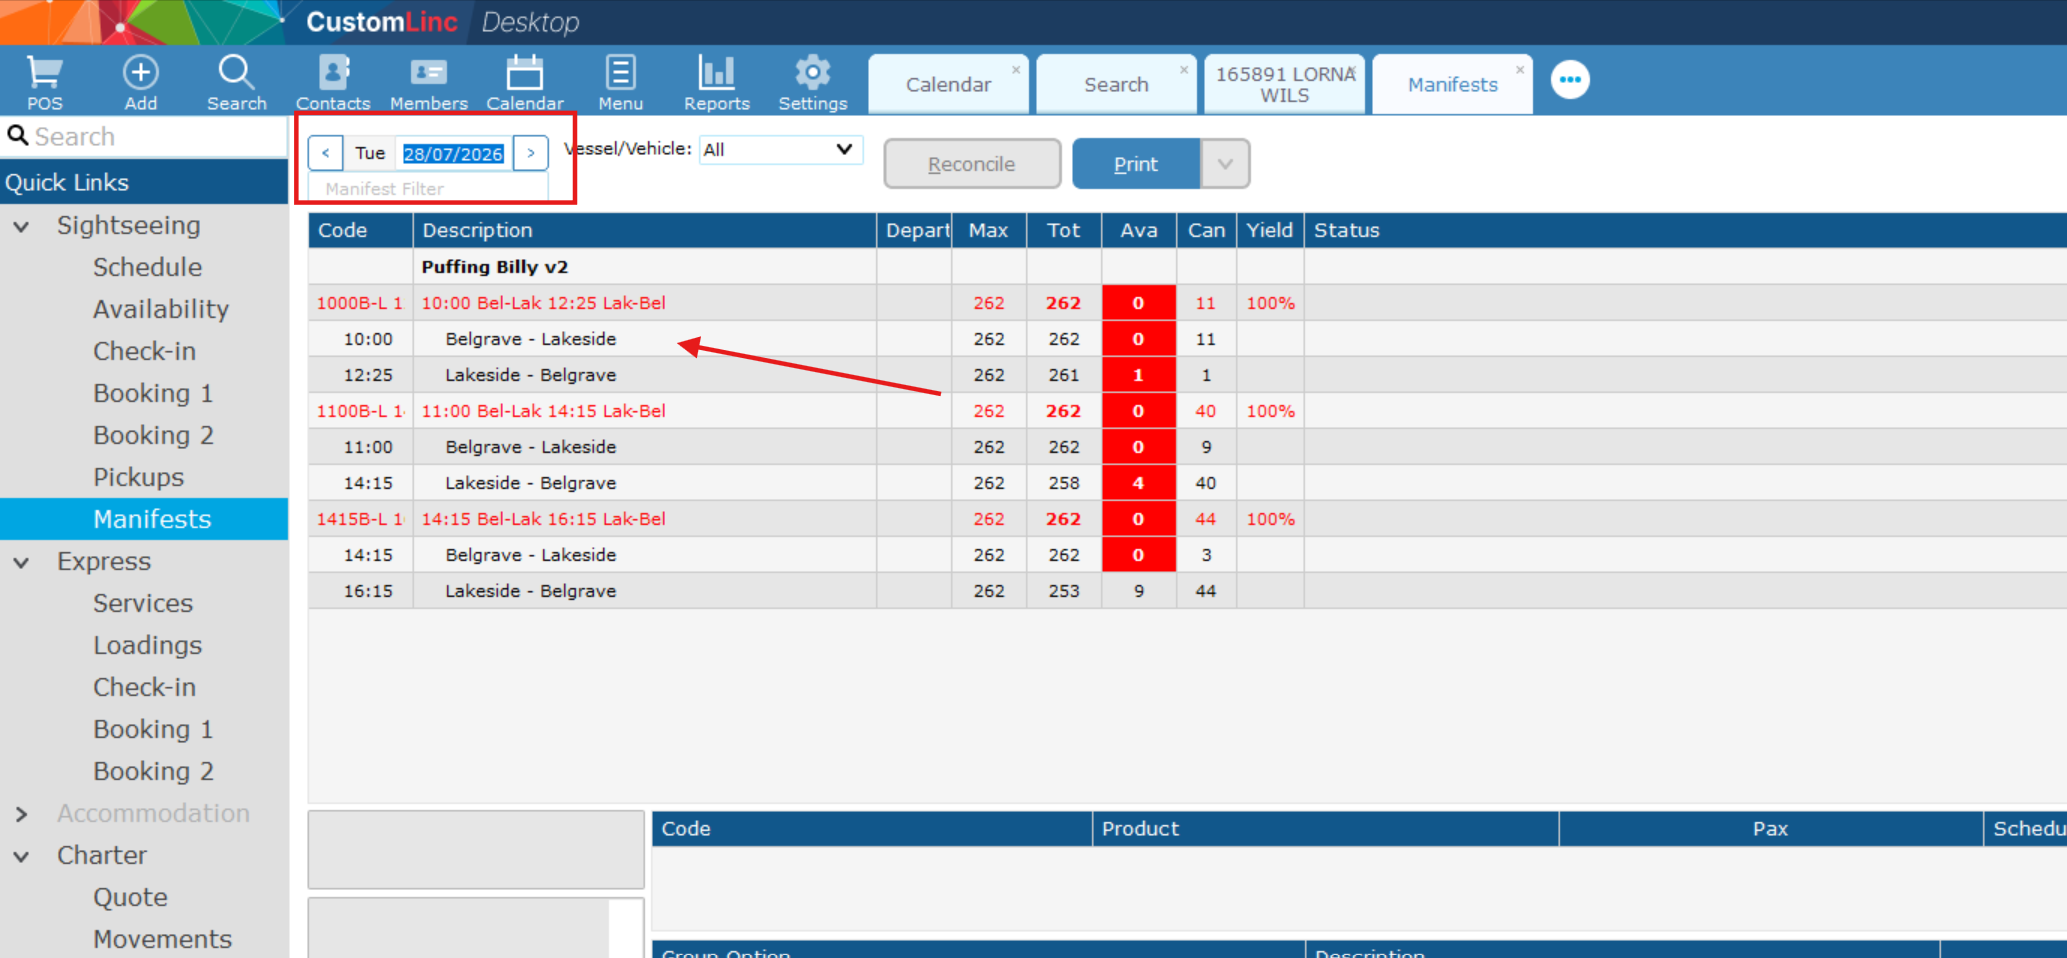
In this example we will be looking for a booking on the 10:00am Belgrave to Lakeside on the 24th of July.
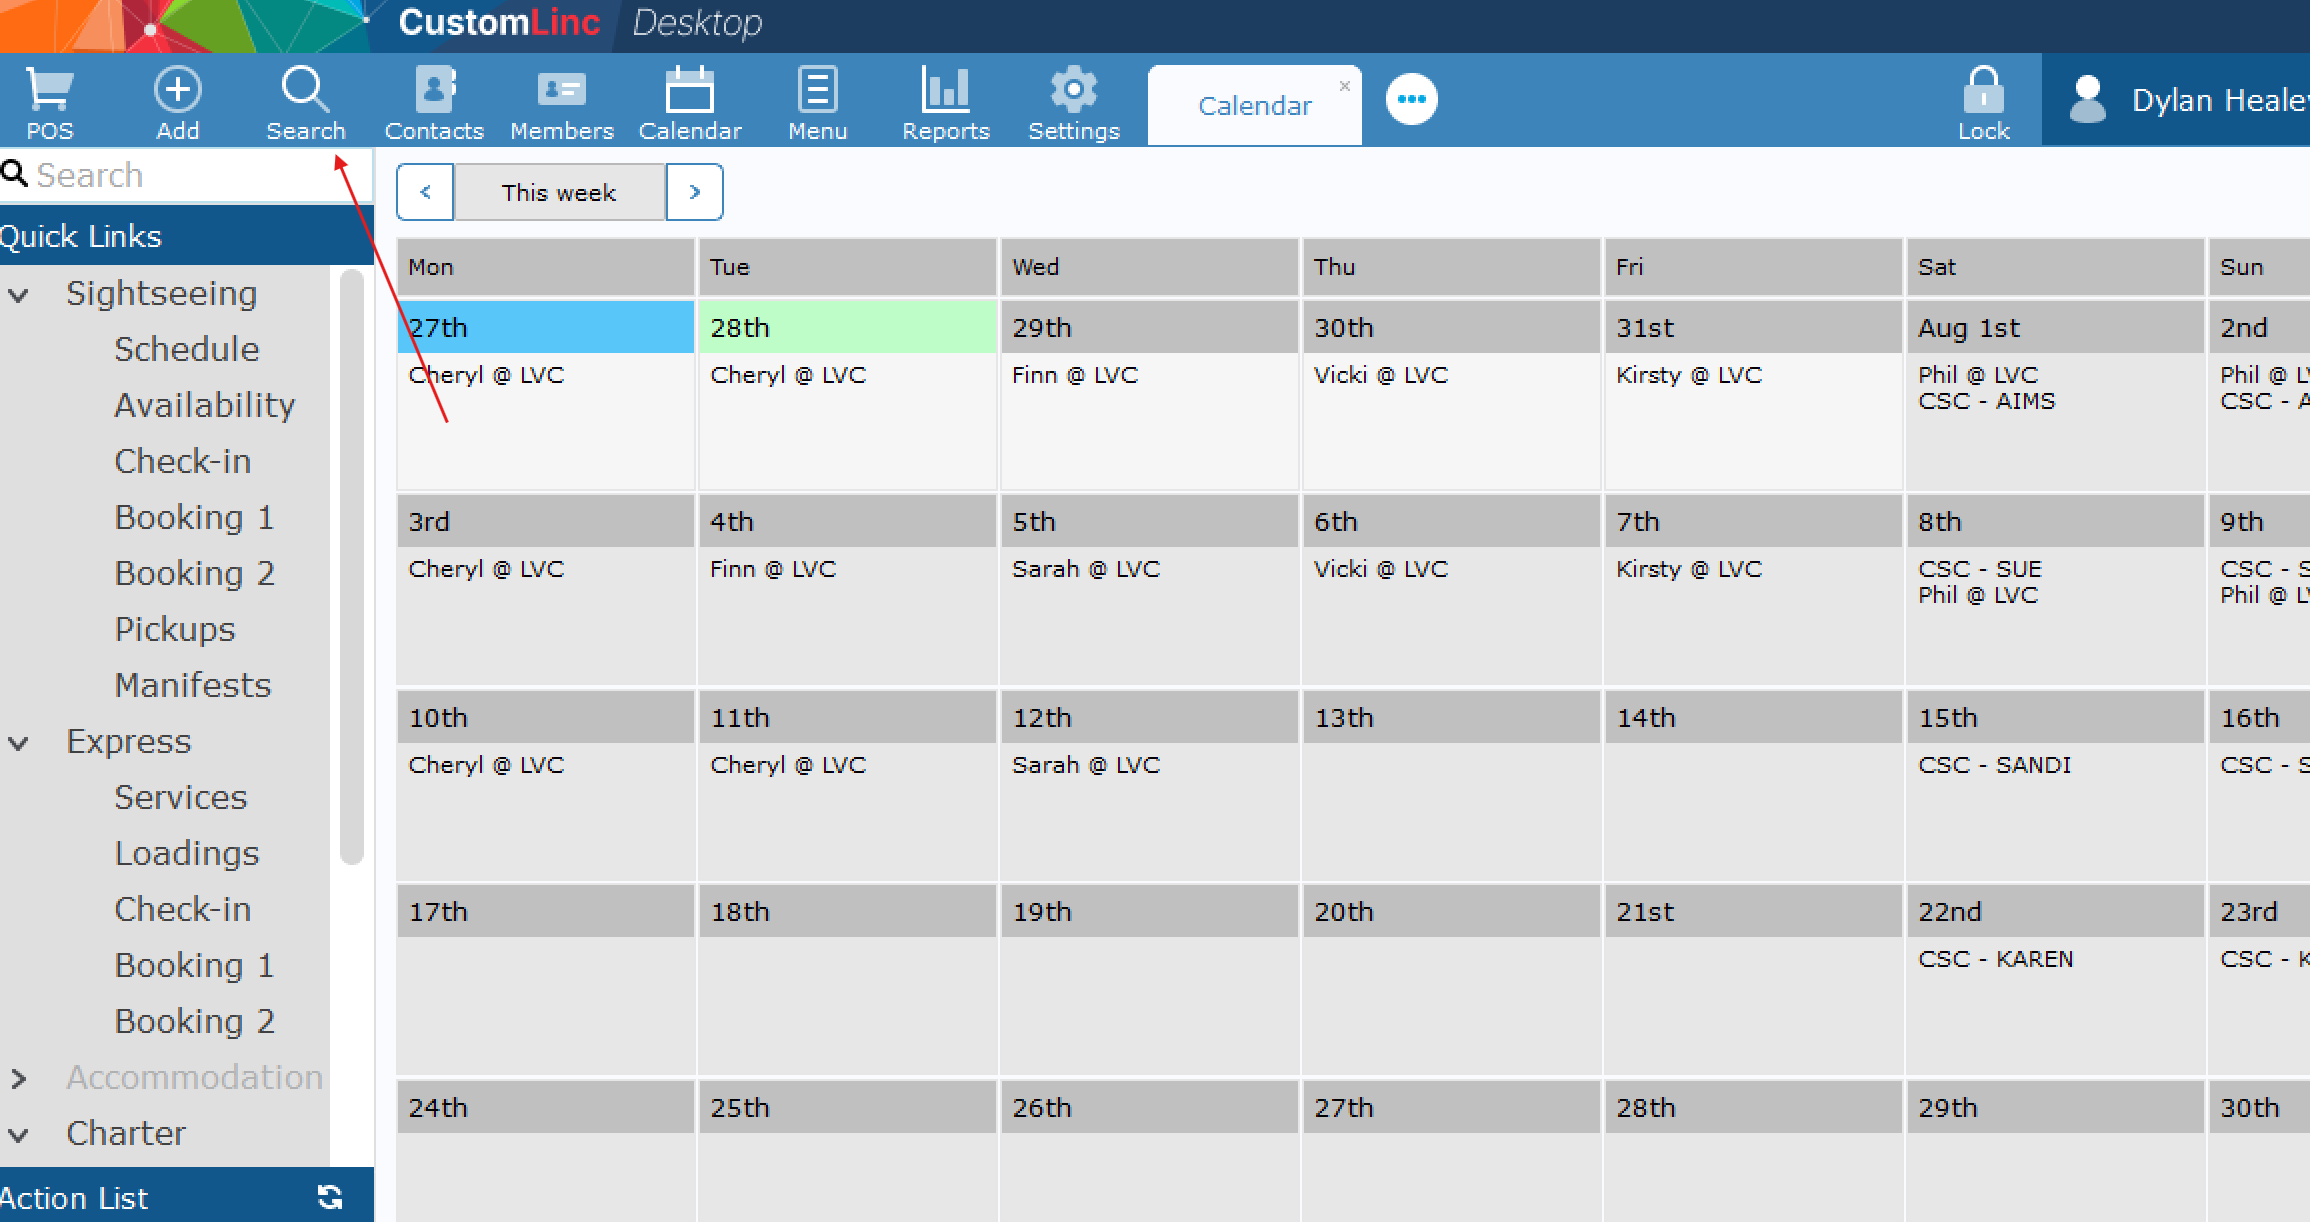
- Go to Sightseeing > Manifests, set your date on the top left, then click the LEG that you would like to search. These will be in Black font (arrow).

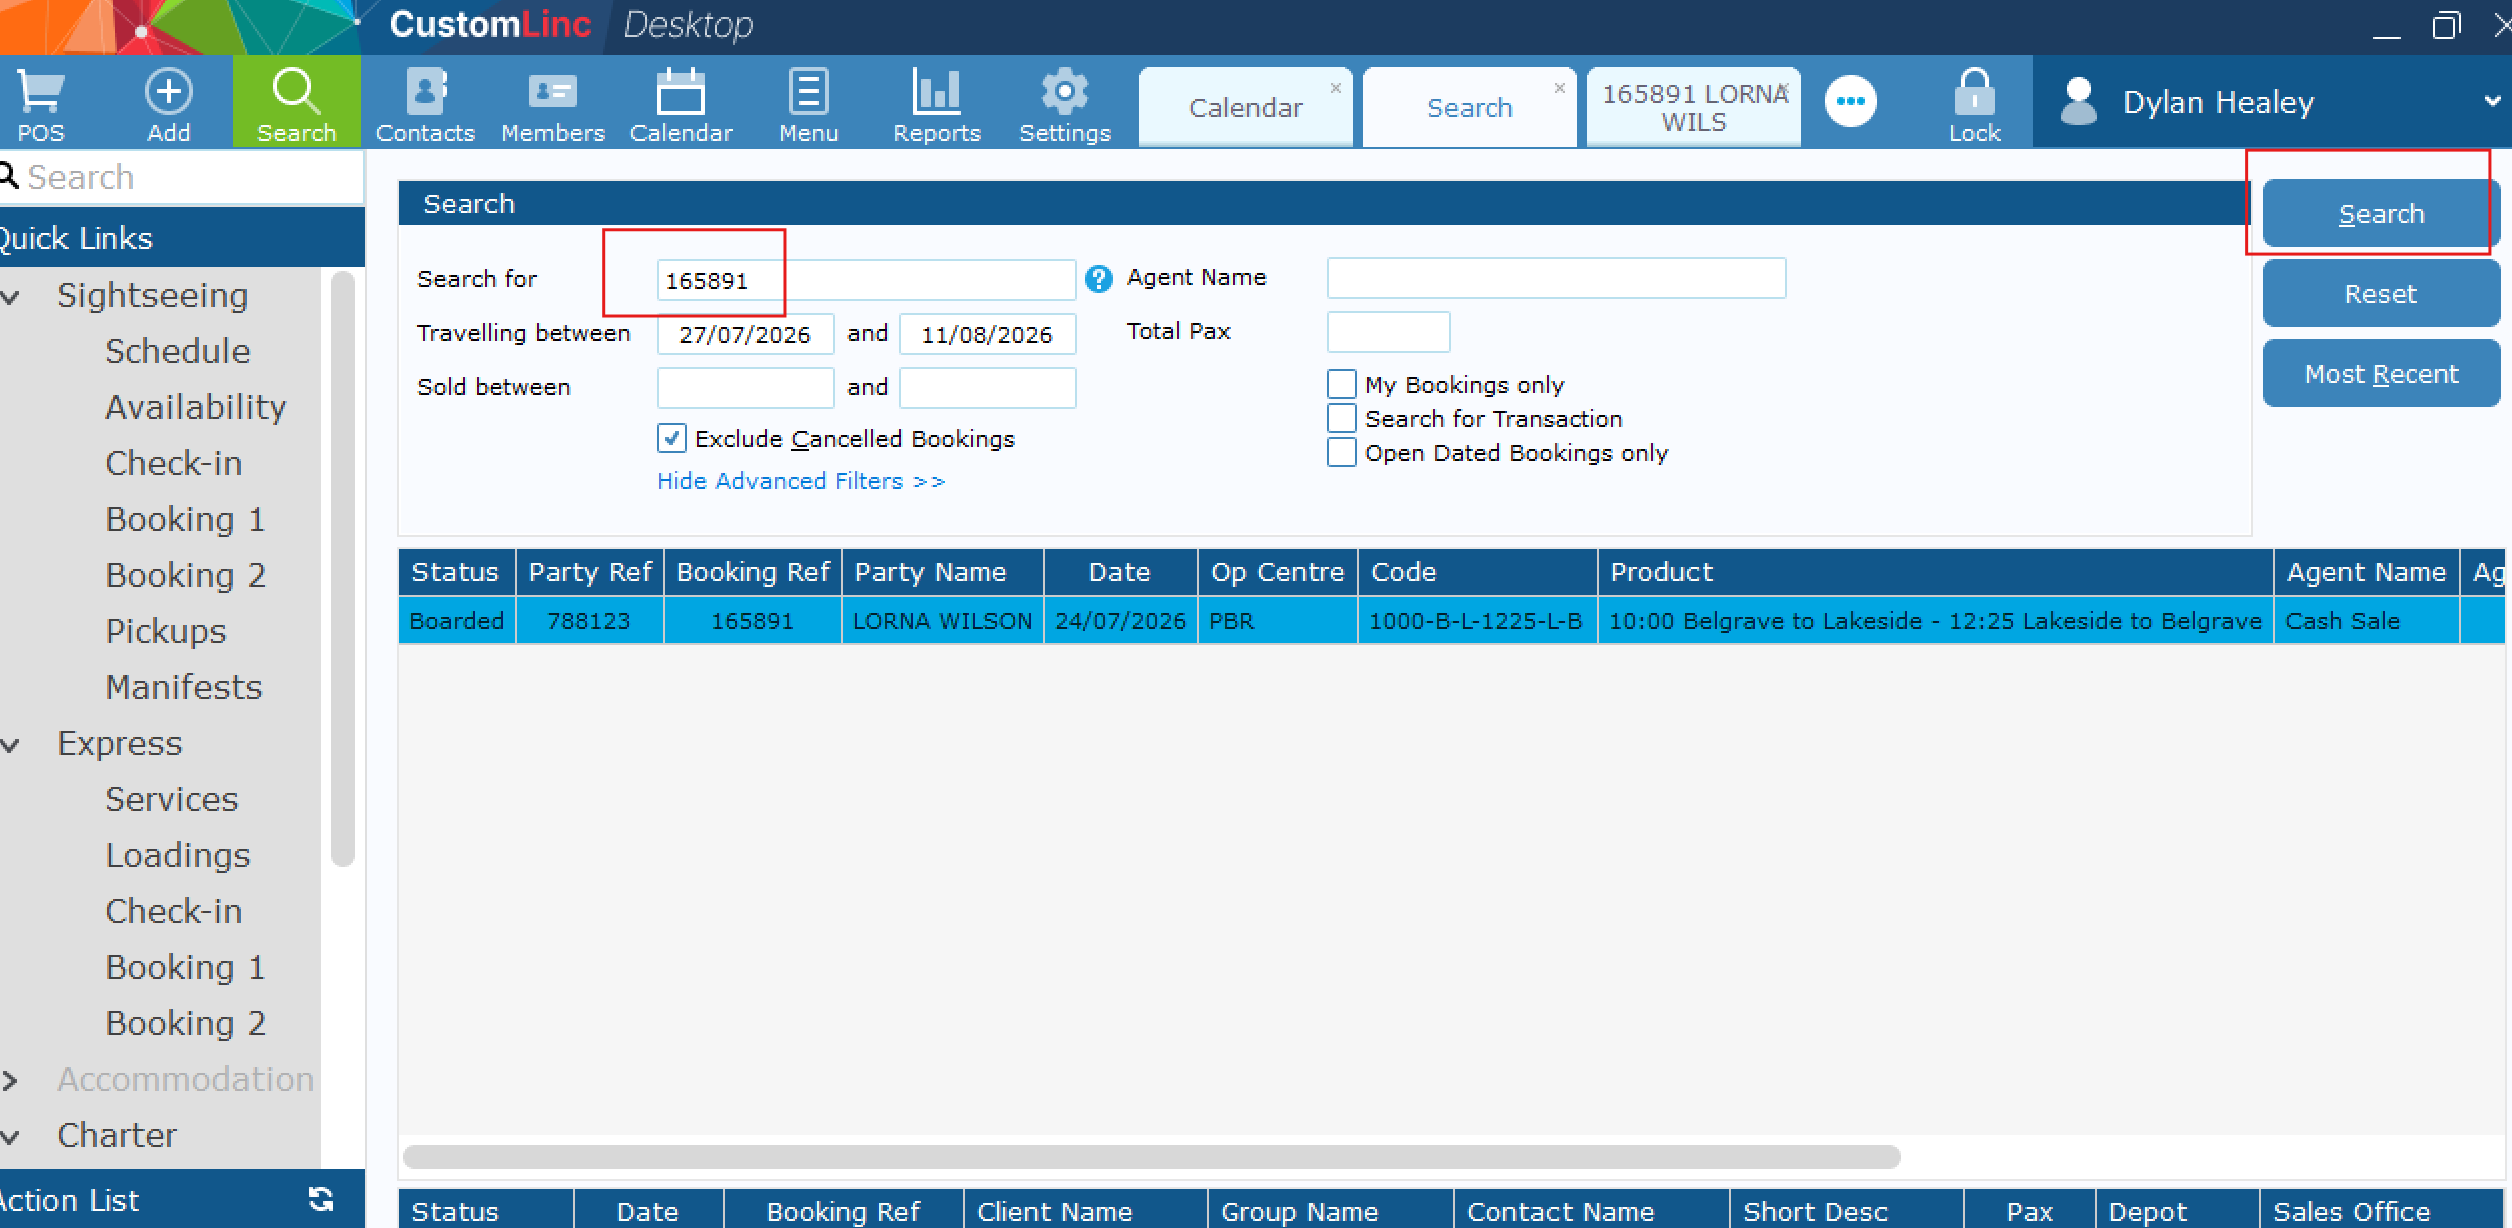
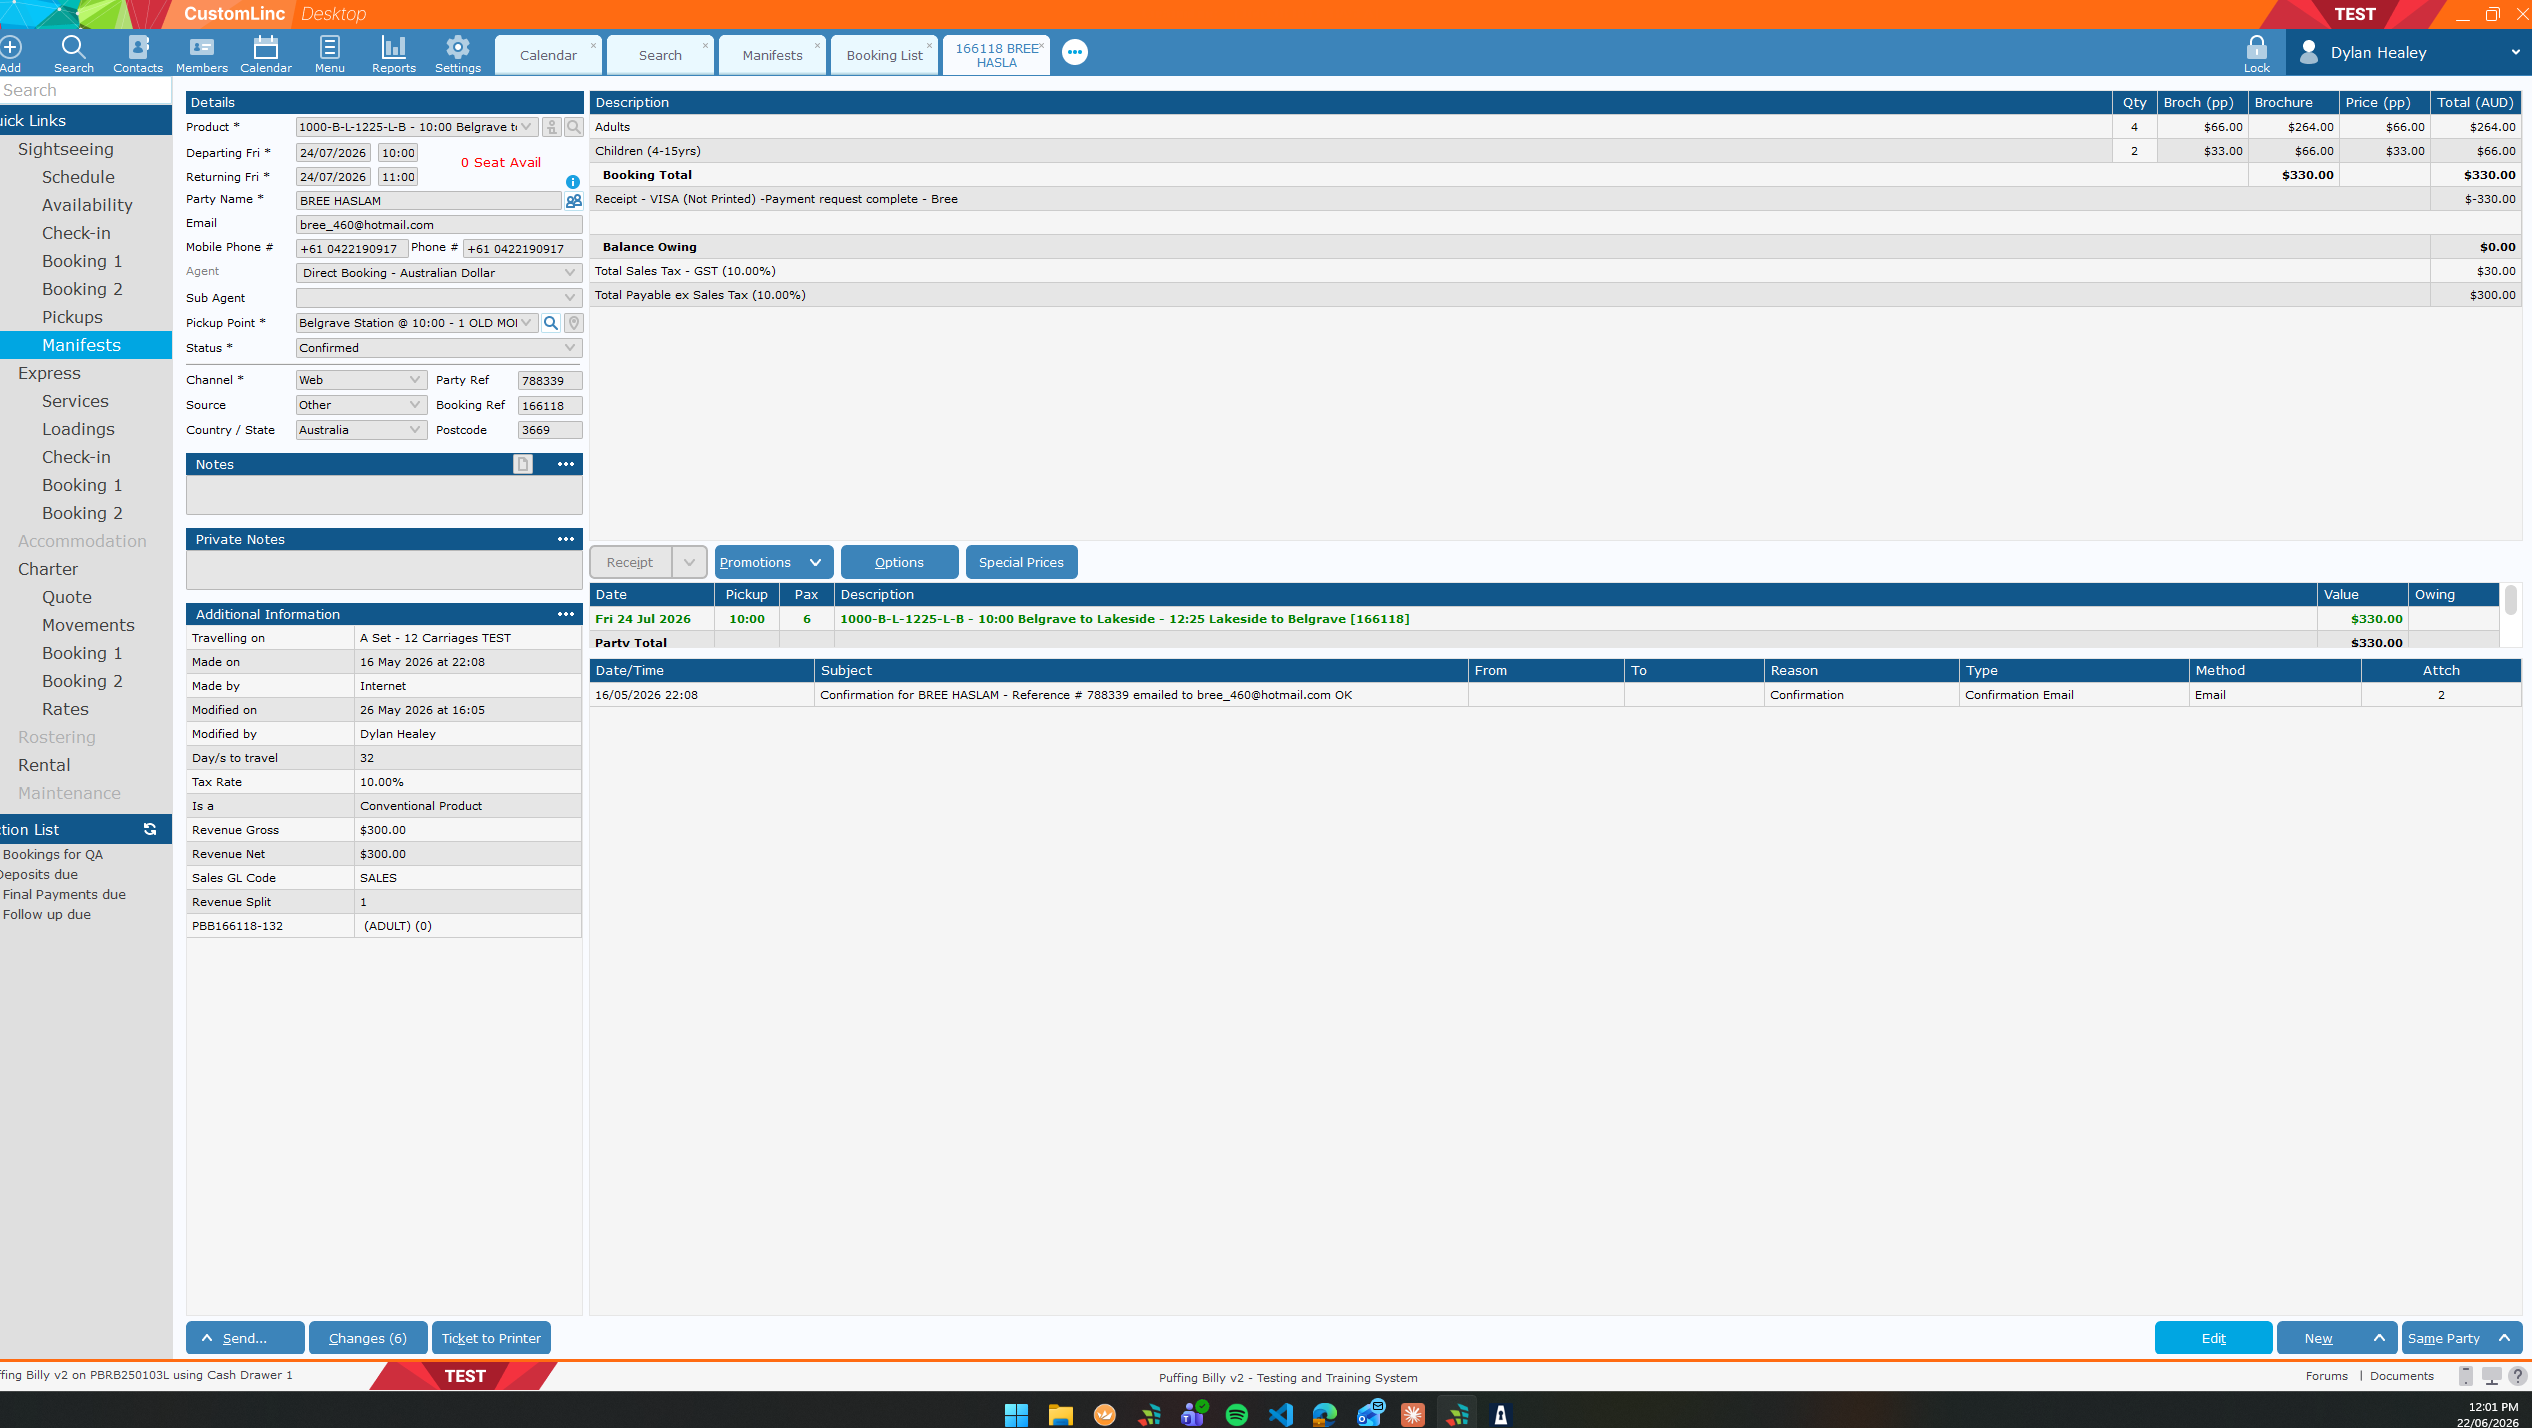
- Find the booking by Party Name & product. In the Belgrave - Lakeside leg you will see all customers travelling on this section, including Belgrave to Lakeside Single journeys, as well as Return products.

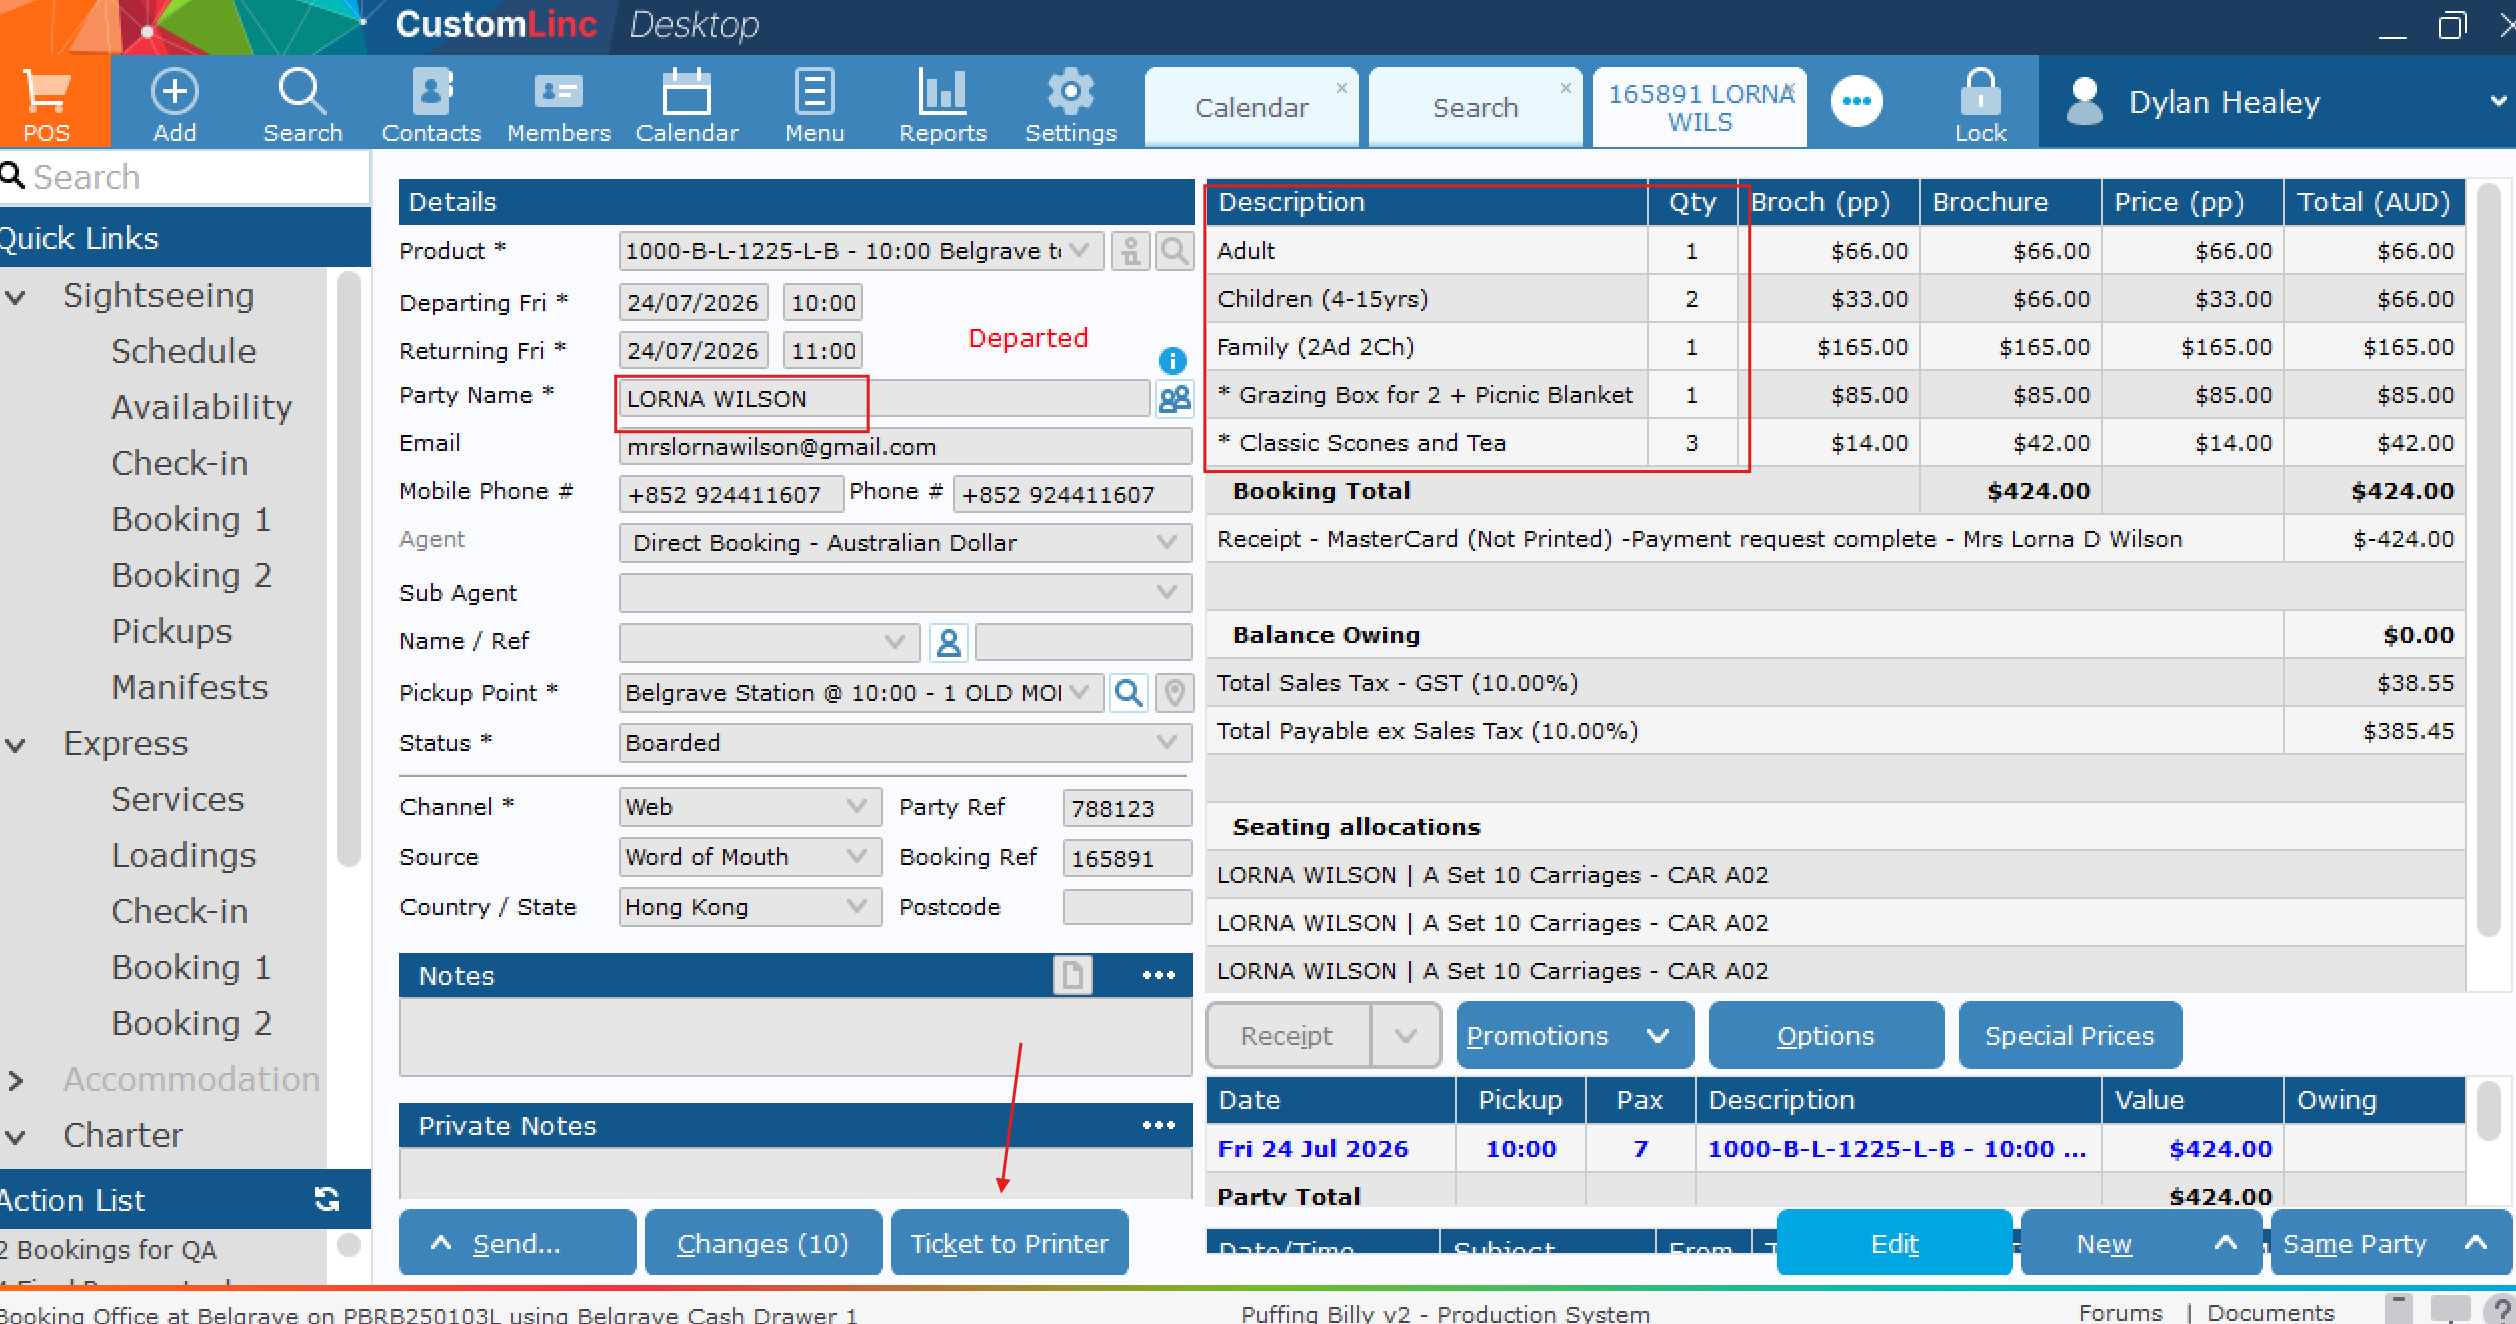
- Double click on booking to open


How to: Check Capacity Availability for a Walk-Up Booking
To see correct information on the Availability Screen, please find a guide here: How to: Setup your Ava... | BookStack
OR ask for your team or the IT Team to assist.
First you will need to be familiar with the Product Codes used within CustomLinc.
We have two types of journeys:
-
- Single Journeys e.g. Belgrave to Lakeside OR Lakeside to Belgrave
- Return Journeys e.g. Belgrave to Lakeside to Belgrave
These are our location codes.
-
B = Belgrave
-
M = Menzies
- N = Nobelius Packing Shed
-
L = Lakeside
-
G = Gembrook
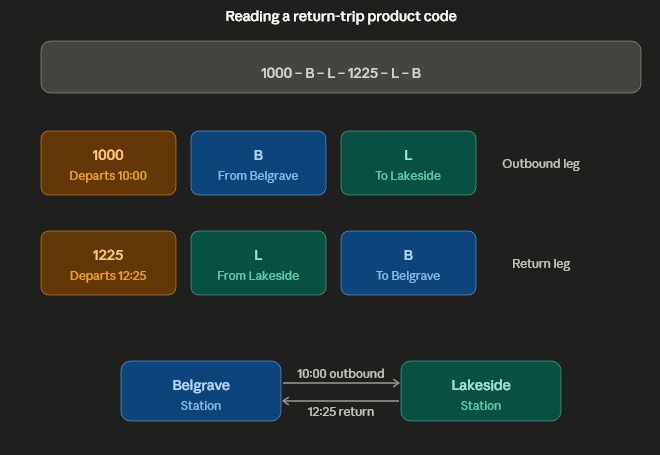
Our Product Codes work as Departure Time - Depart Location - Arrival Location - Departure Time - Depart Location - Arrival Location
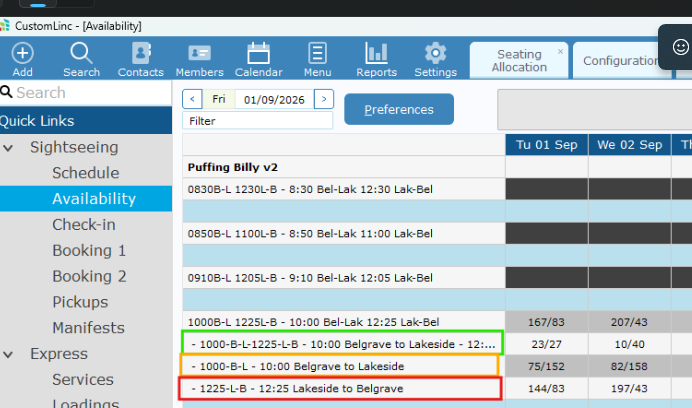
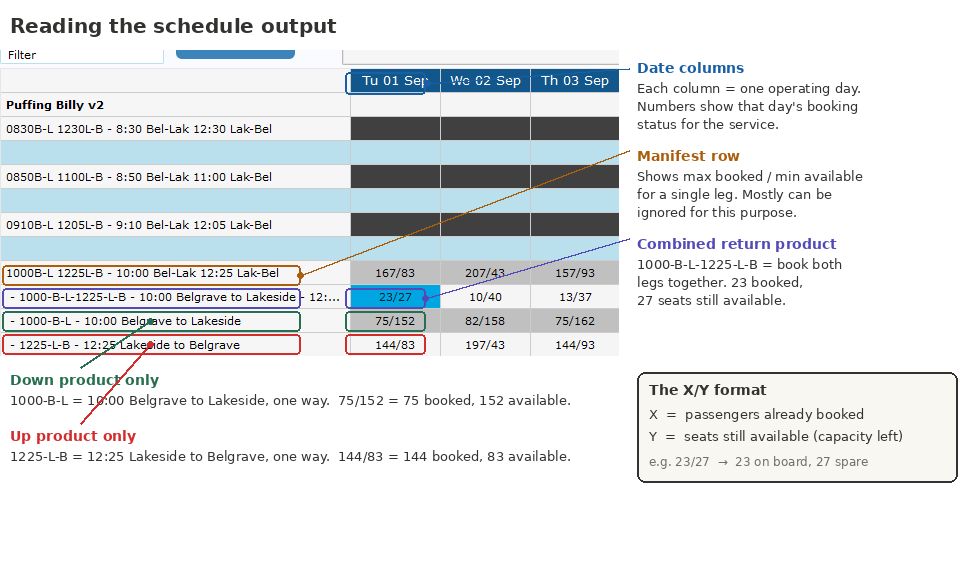
For example, a 10AM Belgrave to Lakeside Return is 1000-B-L-1225-L-B
A 10am Belgrave to Lakeside Single is 1000-B-L
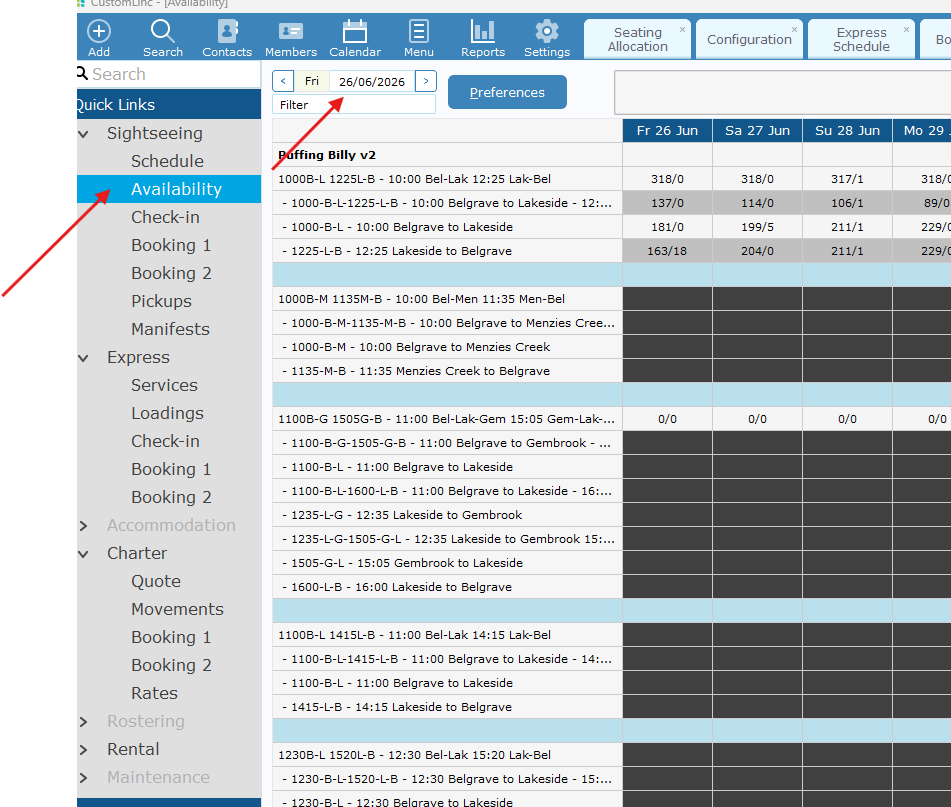
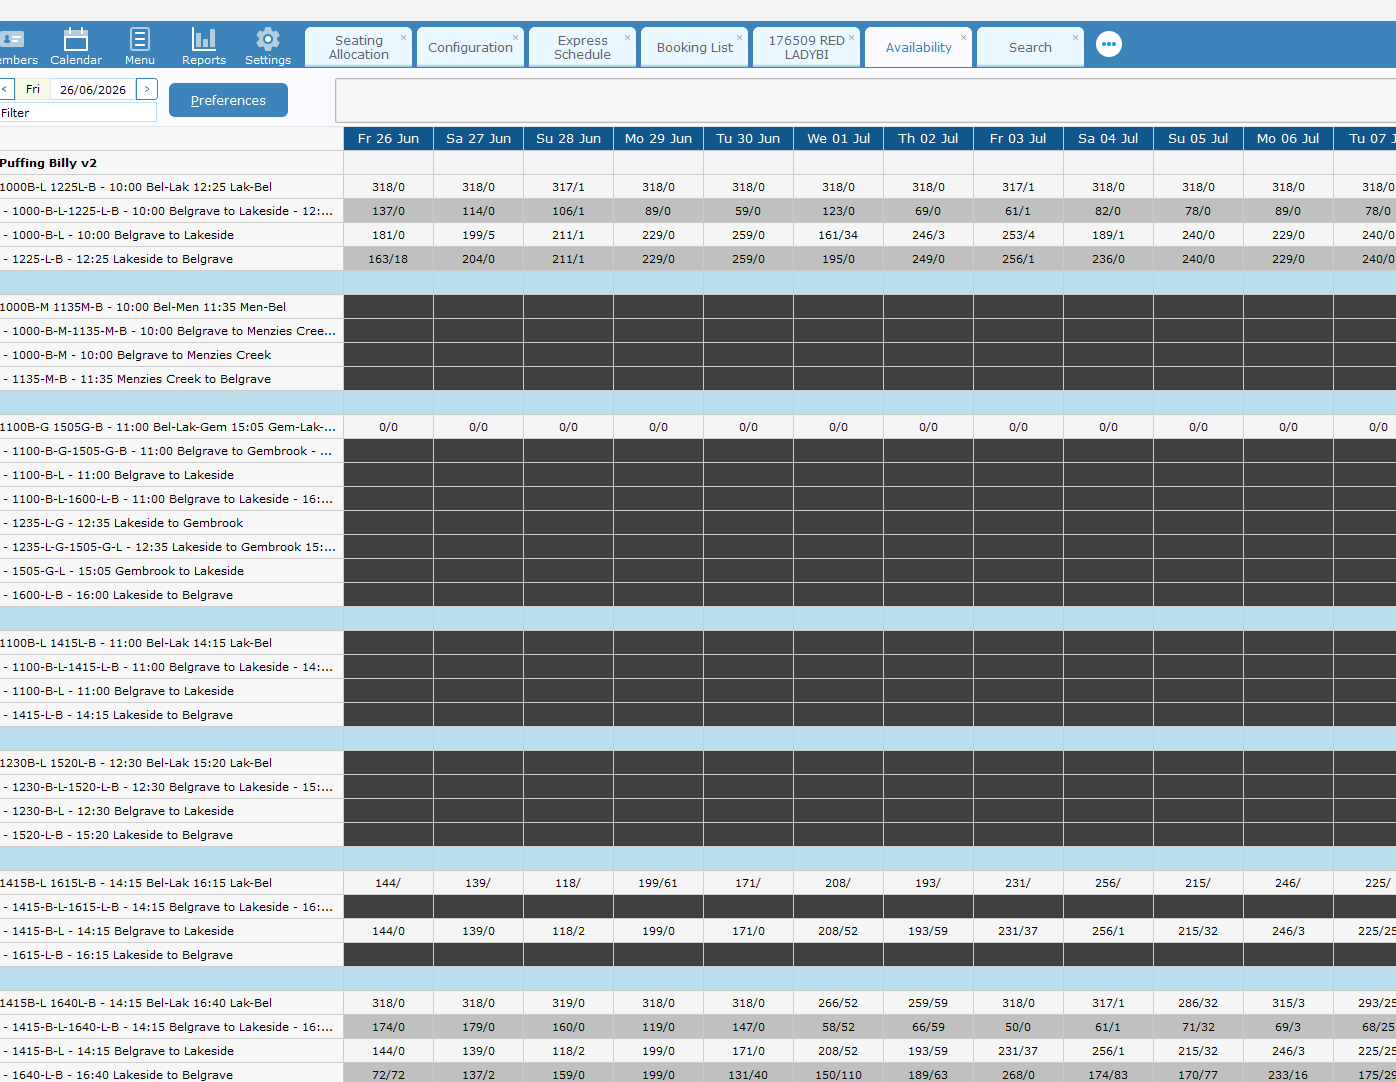
- Select Sightseeing > Availability. It should default to current date, but you can adjust the dates in the top left if needed.

- Confirm which product you are after.

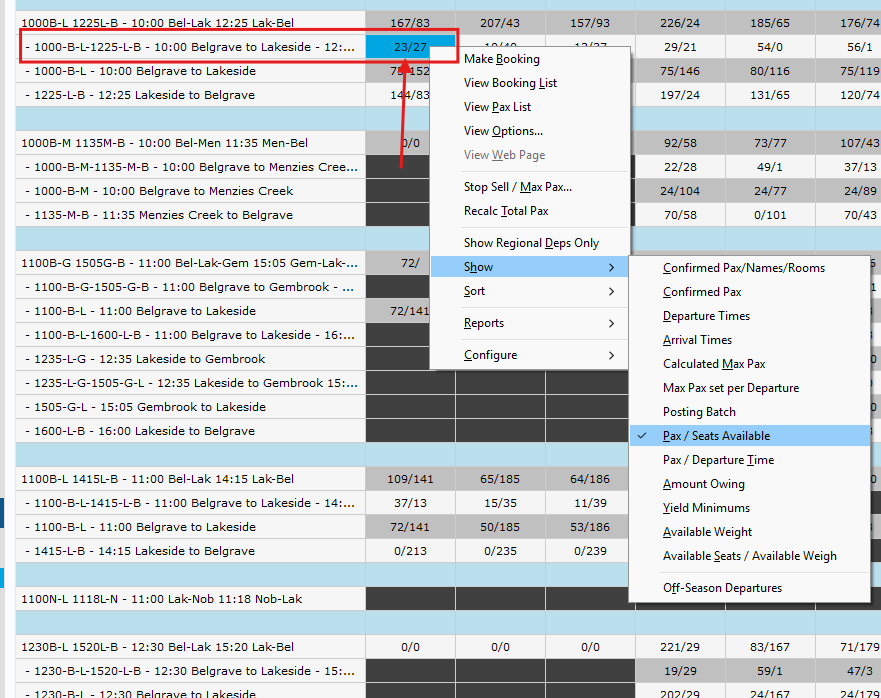
- Your focus will be mainly on the second number. i.e. 23/27 on the return prodct means there is 23 bookings, and 27 available tickets.

How to: Setup your Availability Screen
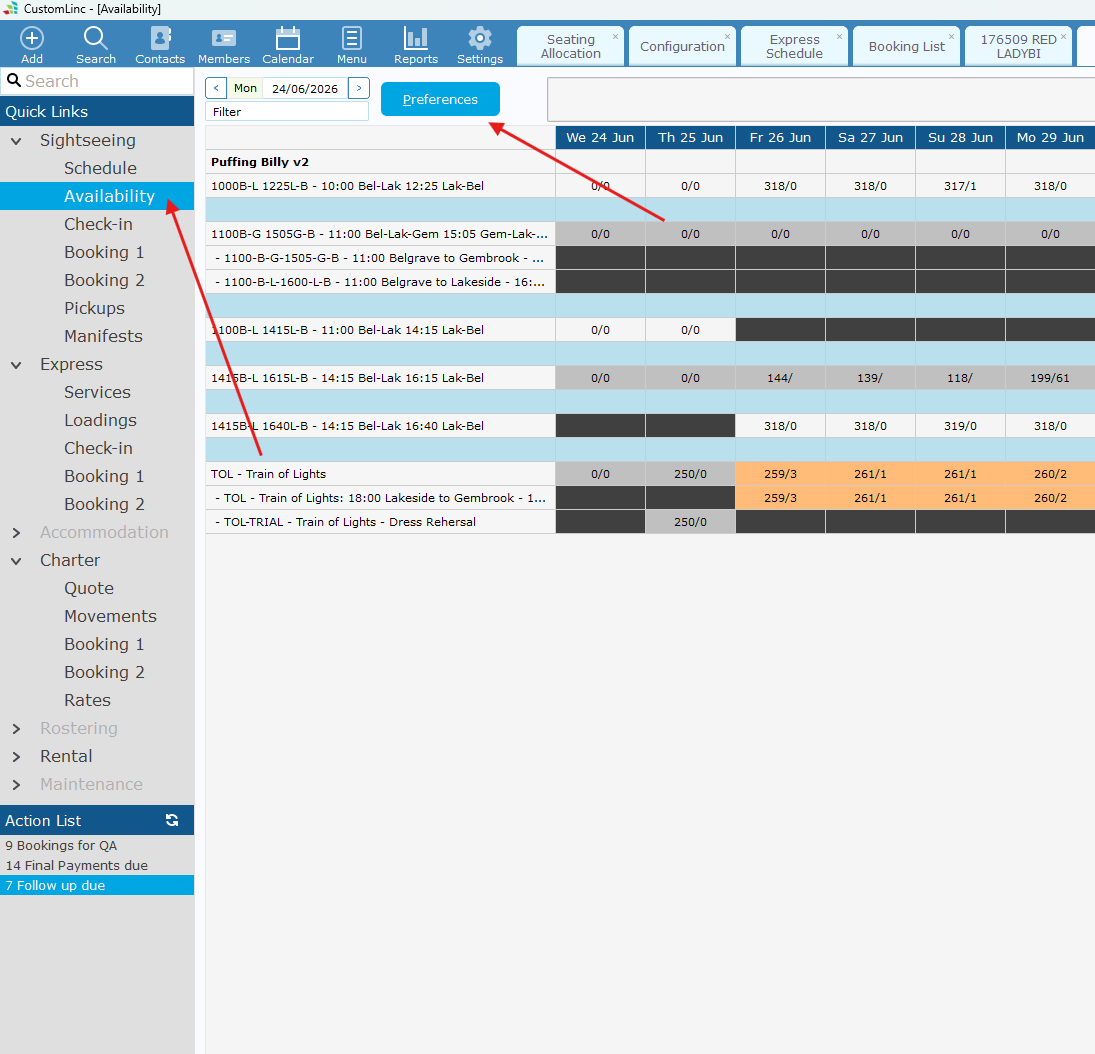
- Go to Sightseeing > Availability. Click Preferences

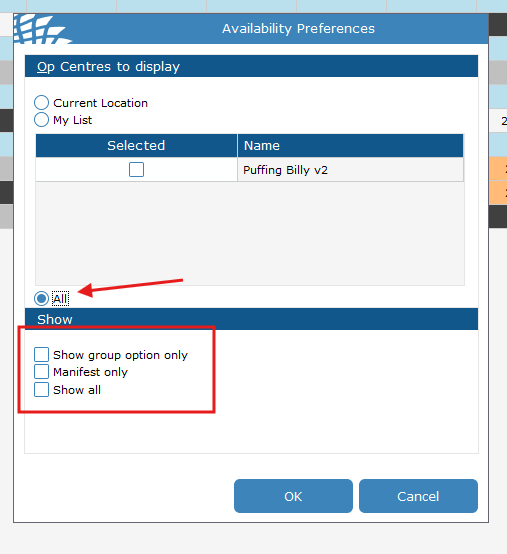
- Set Your Display to ALL.
And make sure all the "Show" boxes are Deselected.

- Your availability table should now show the Manifest and all attached products underneath.

- Right click on a product availability Cell. Go to Show > Left click Pax/Seats Available

- You're now Setup.
How to: Make a booking with Quick Ticket (POS)
The workstation you are trying to do this from needs to be setup to sell tickets via 'Quick Ticket' if the POS option in step 1 is not visible. Please contact IT and request for access.
Currently the booking made will not receive a Carriage Allocation. Please confirm there is room on a carriage prior to booking.
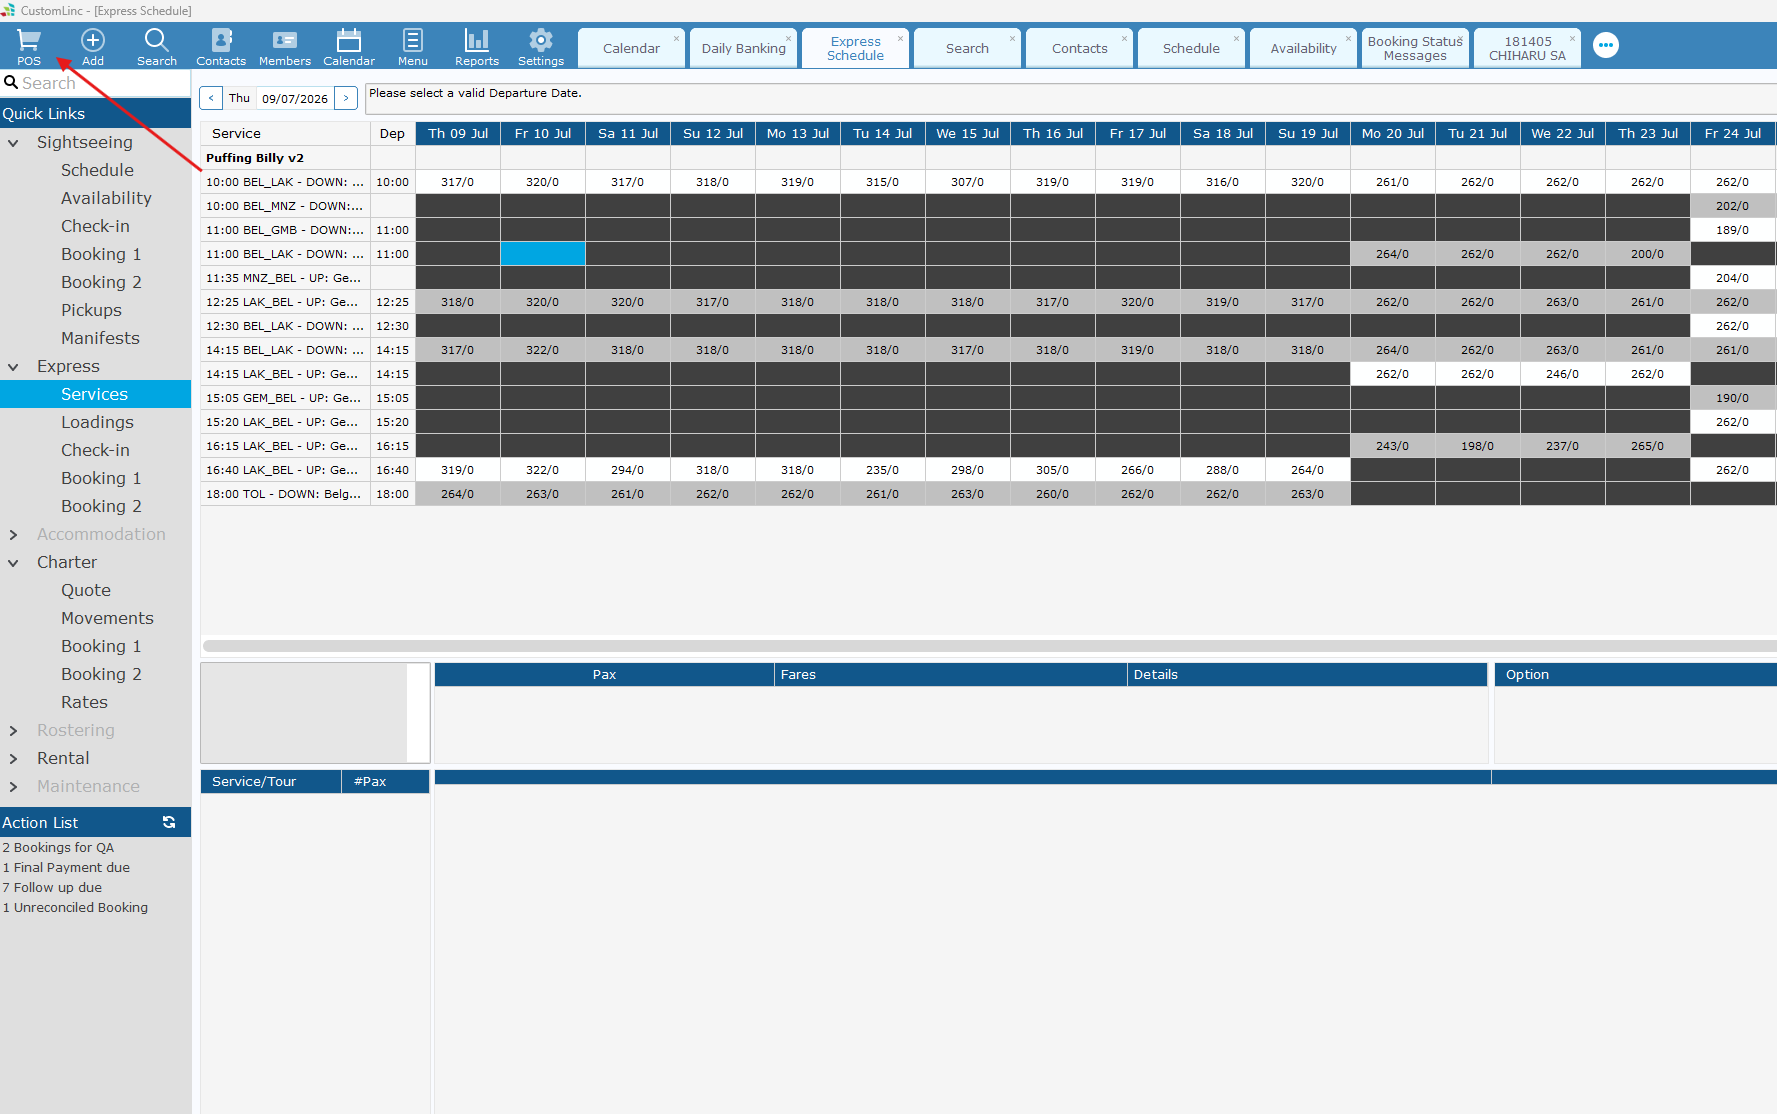
- Open CustomLinc and click POS in the top left.

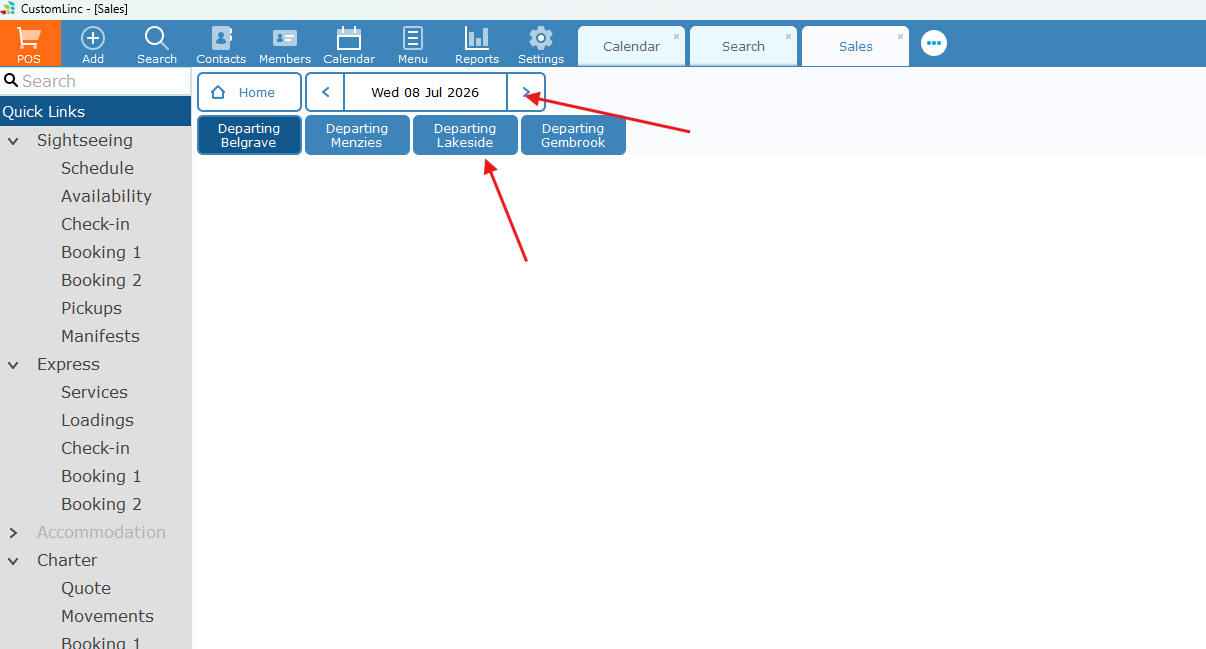
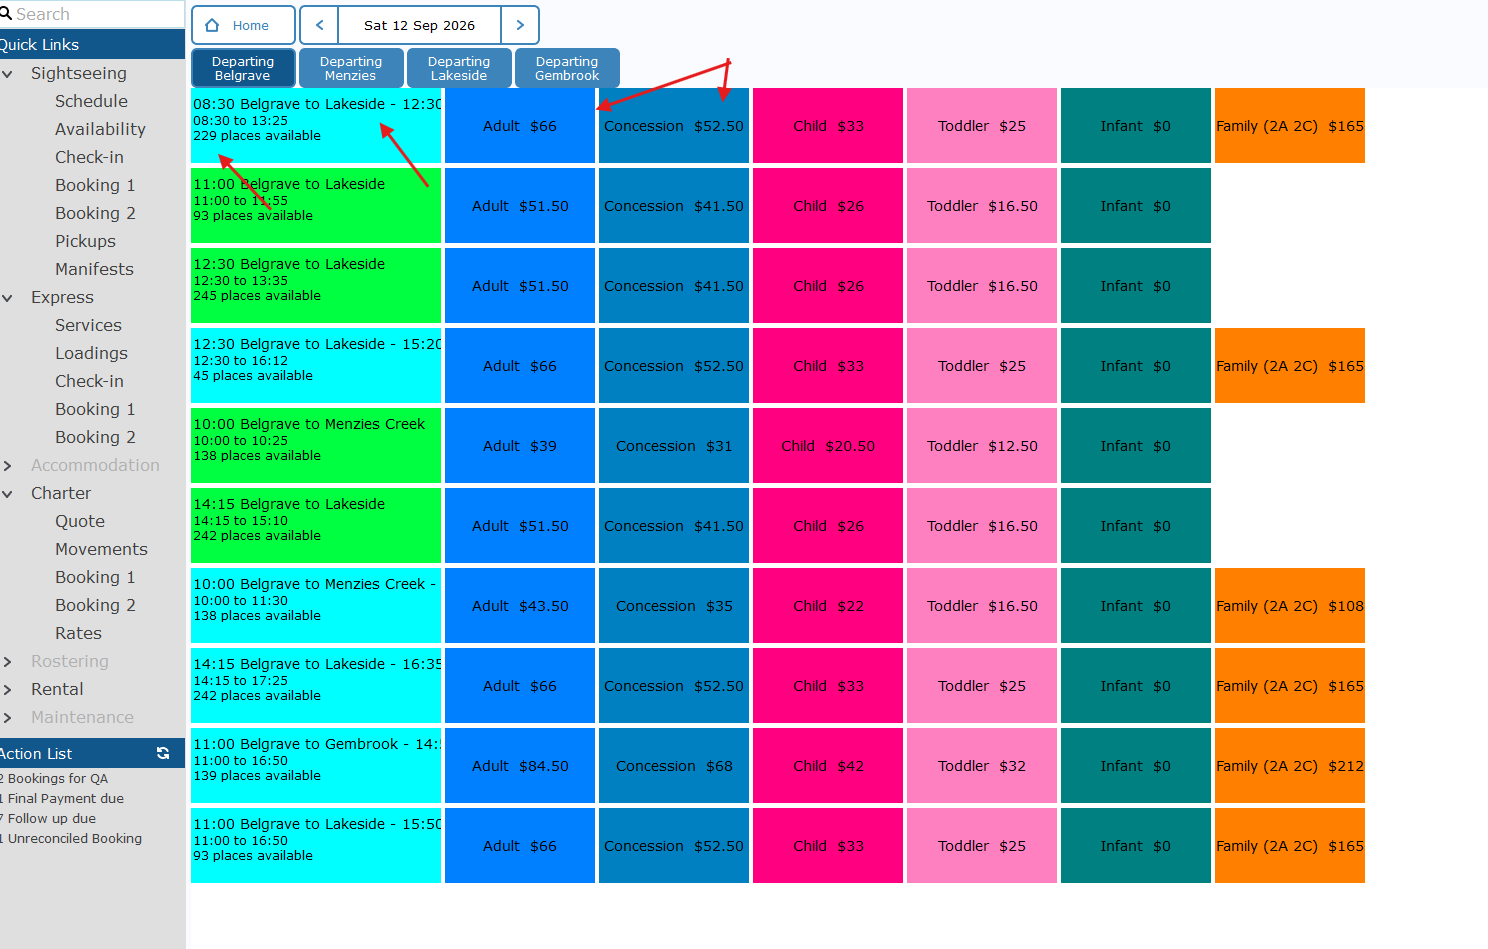
- Select the Date and the Departing Location

- here you'll see the Type of Journey, The available seats & the fares available.

Currently
Return products are coloured Light Blue
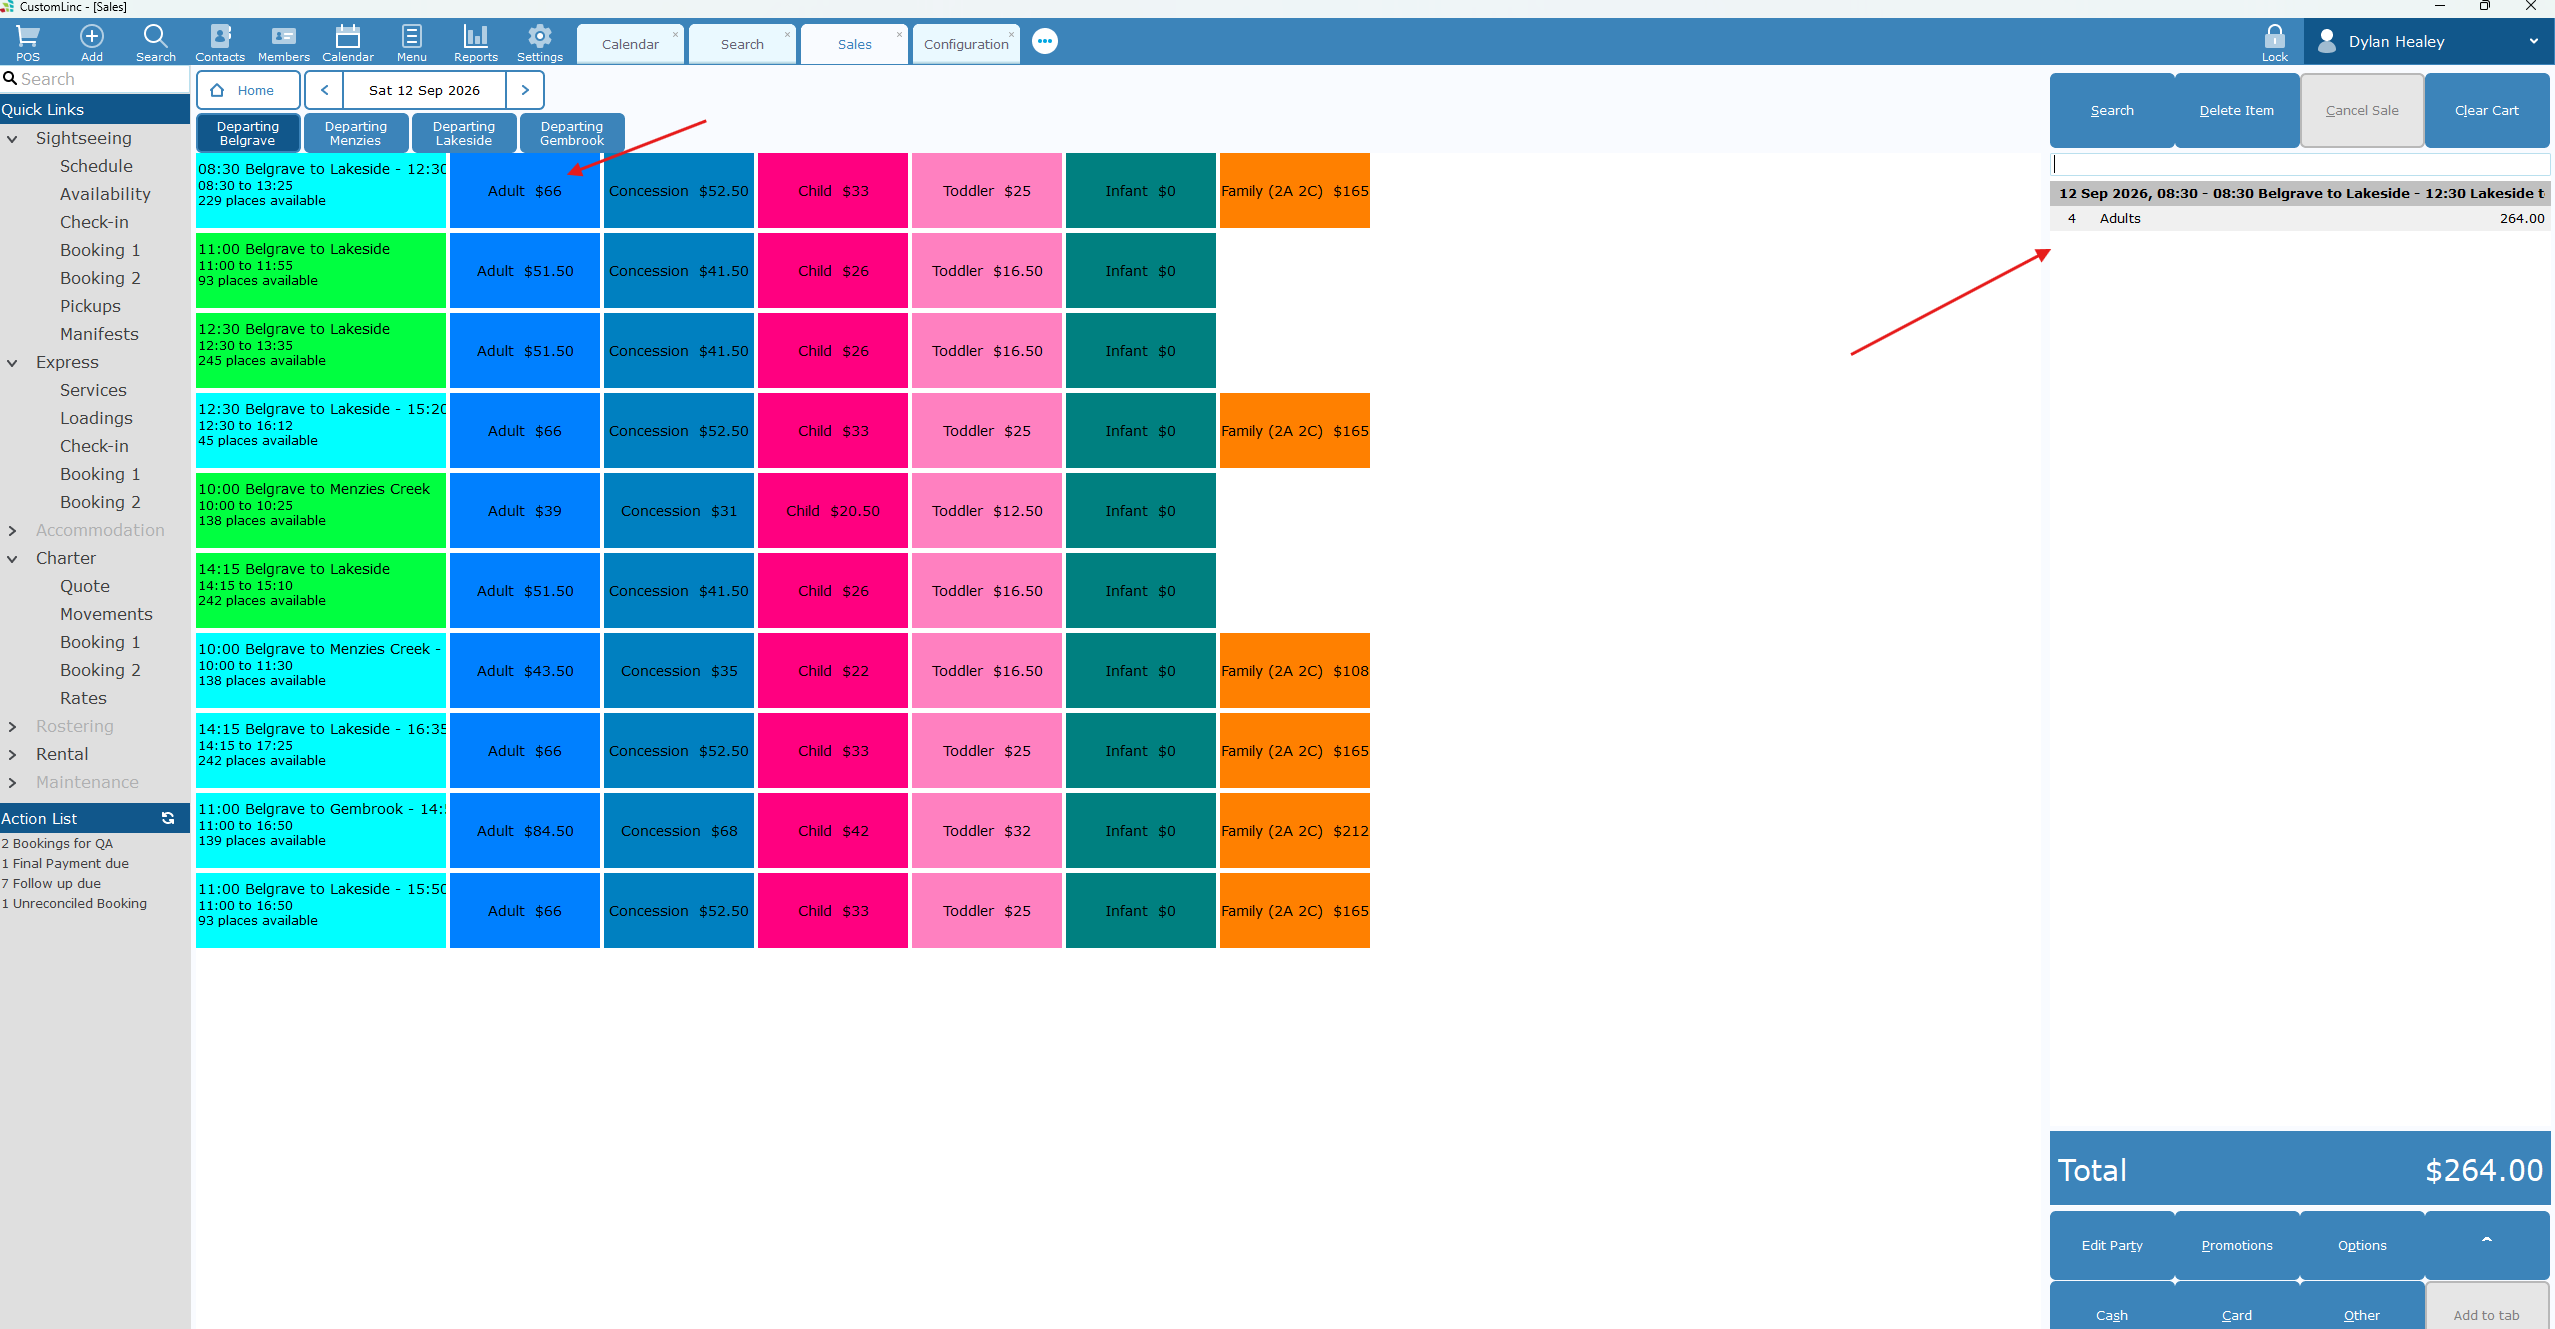
Single Way products are coloured Green - Click on the appropriate fare(s) for the product. You will see it populate the fares on the far-right side.

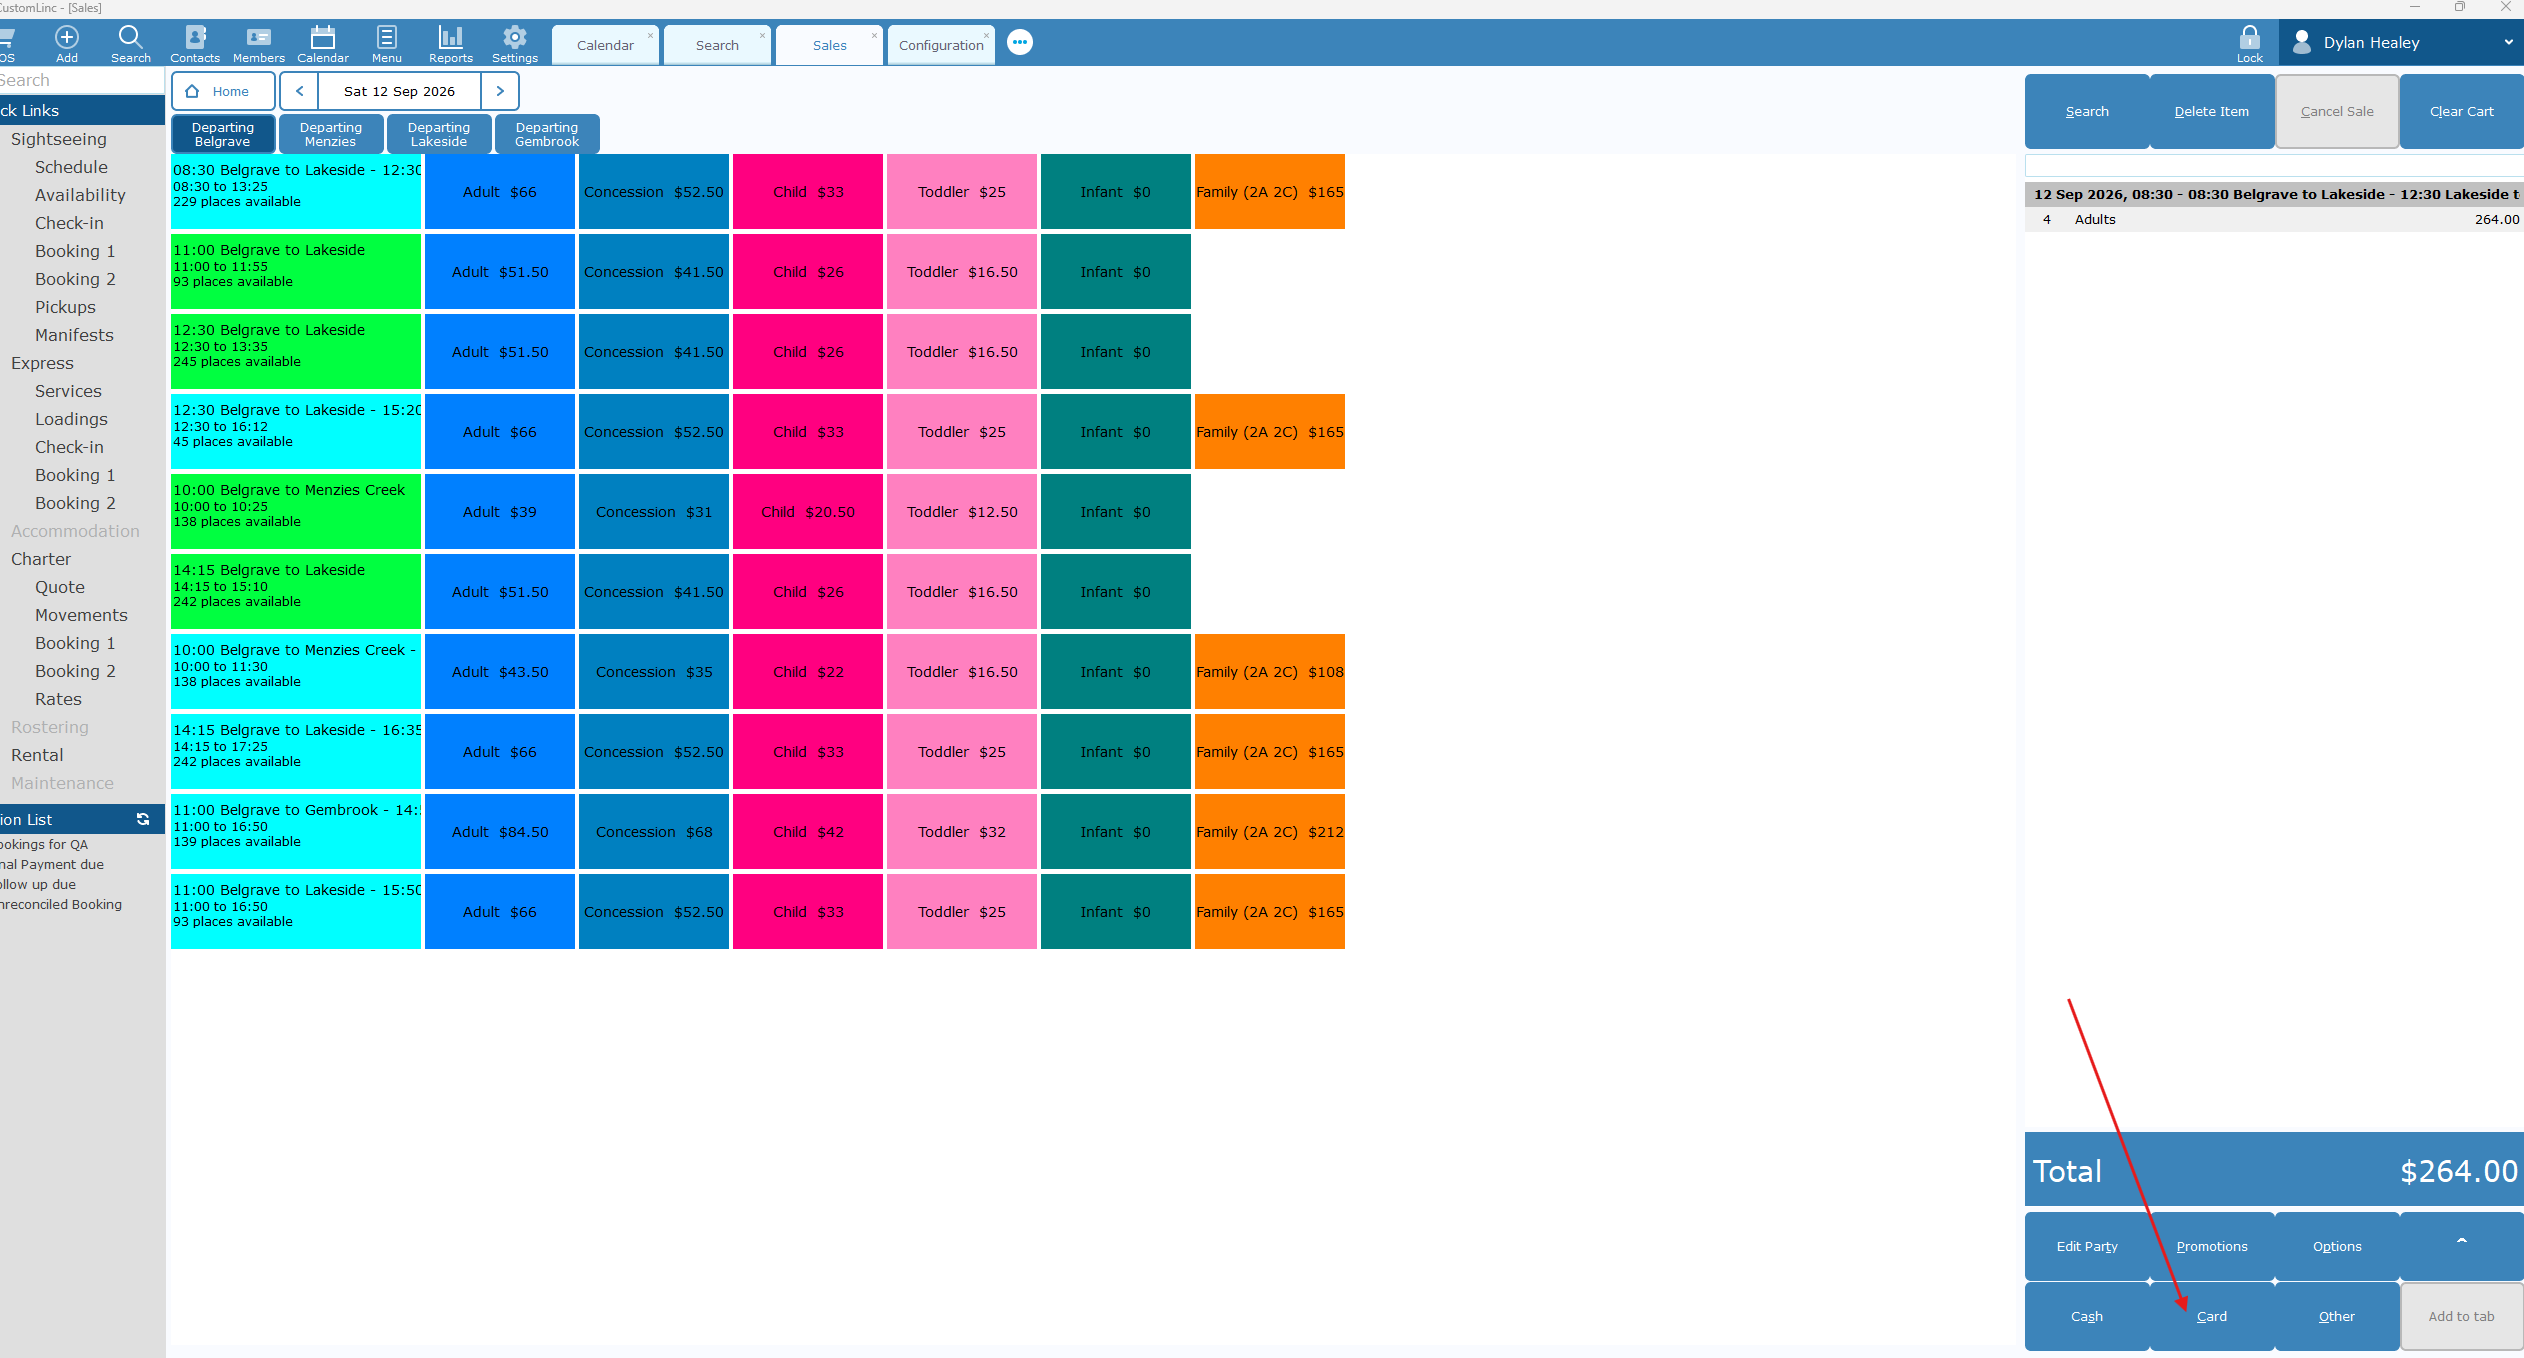
- Click Card in the bottom right.

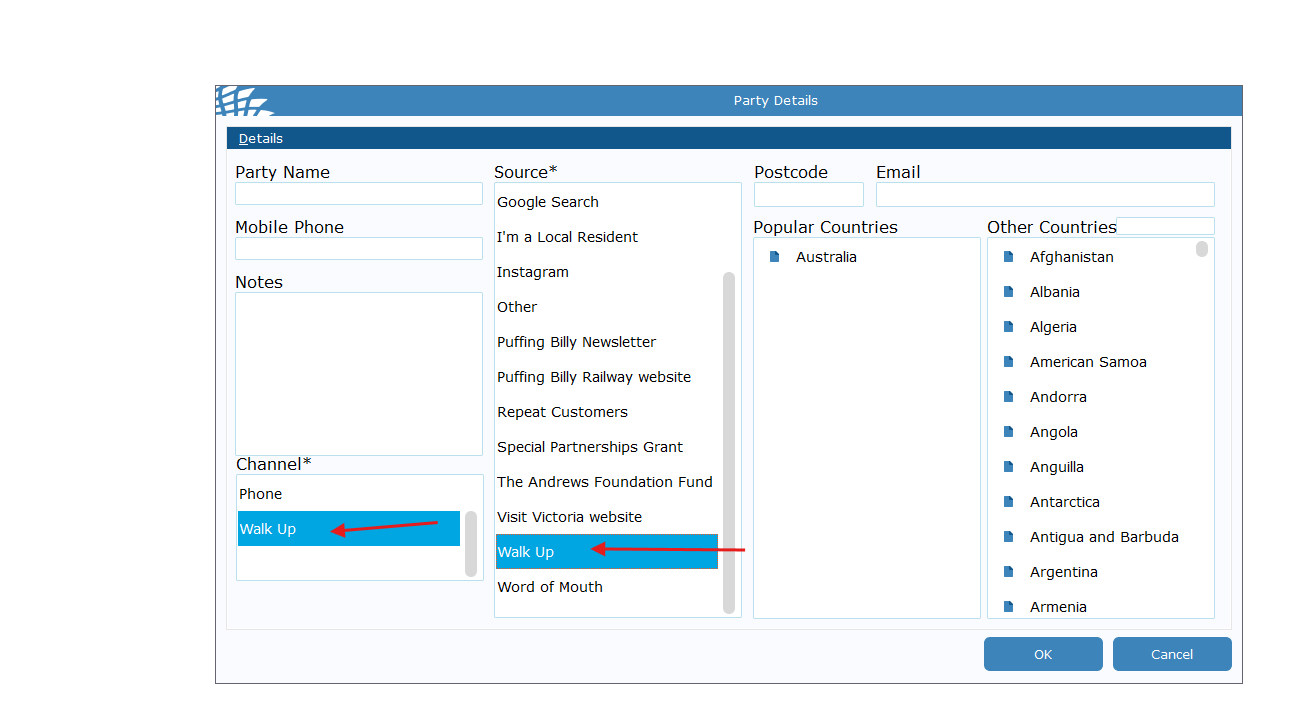
- Select Walk Up for the Channel & Source. Click OK.

- Select Payment Type - EFTPOS - Integrated and confirm that Process on Pindpad is selected and click OK

- The connected EFTPOS terminal should now prompt for payment. Complete payment.
- Once completed a tax receipt & appropriate tickets will automatically print - The ticket will NOT have a seating allocation on it.
How to: Make a Booking for a Walk-Up
- Go to Sightseing > Manifest
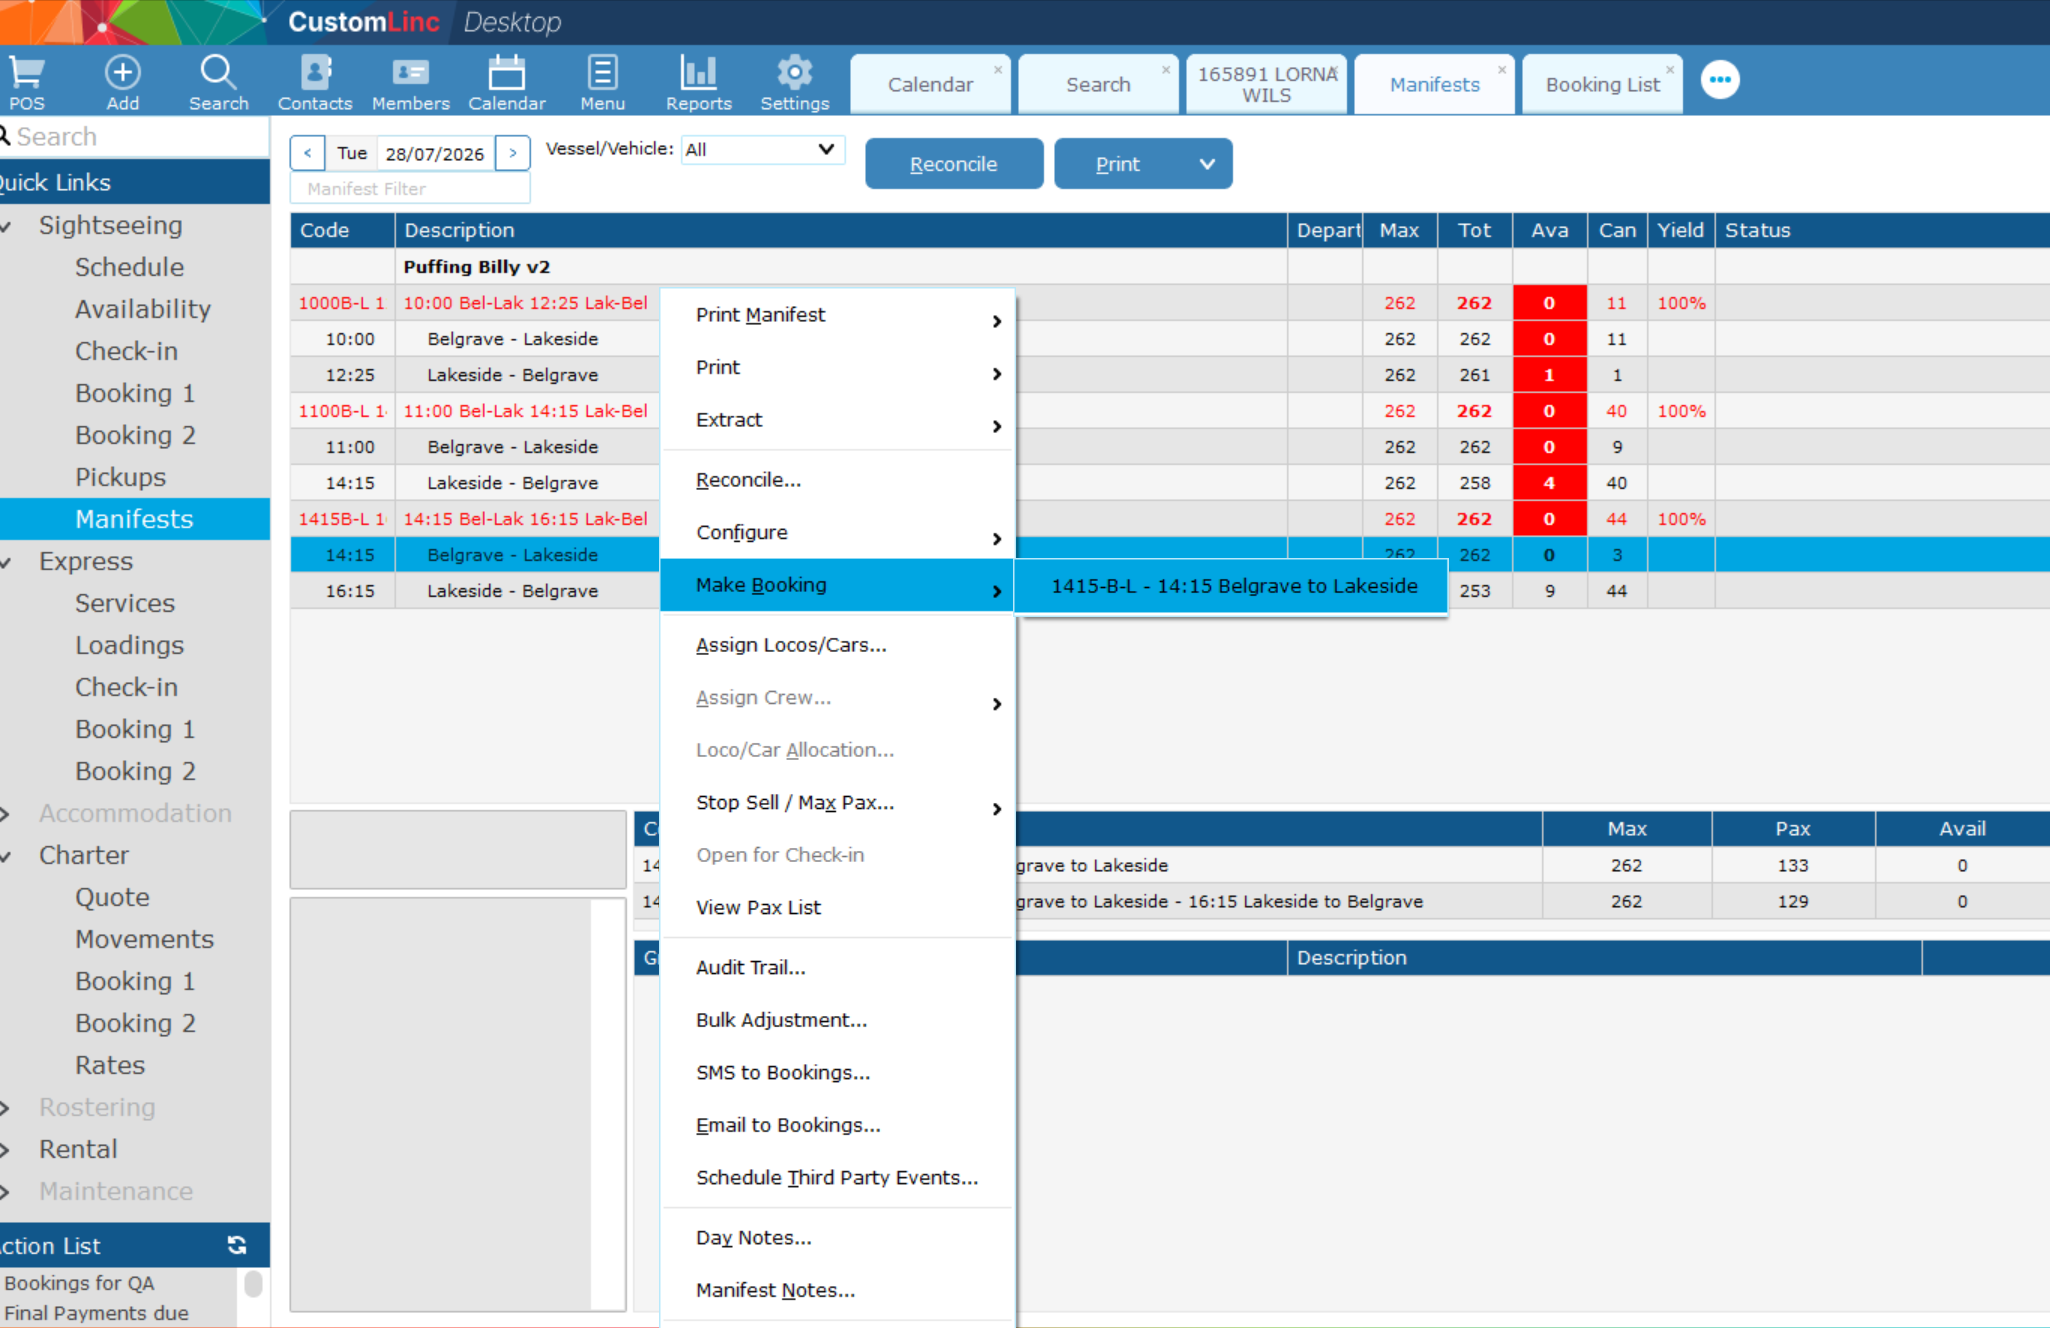
- Right click the Manfiest you would like to book a product for. (The manifest will have Green Text)
In this example we will make a booking for the 14:15 Bel - Lak with a 16:40 Lak - Bel Return. - Go to Make Booking, click on the product you wish to sell.

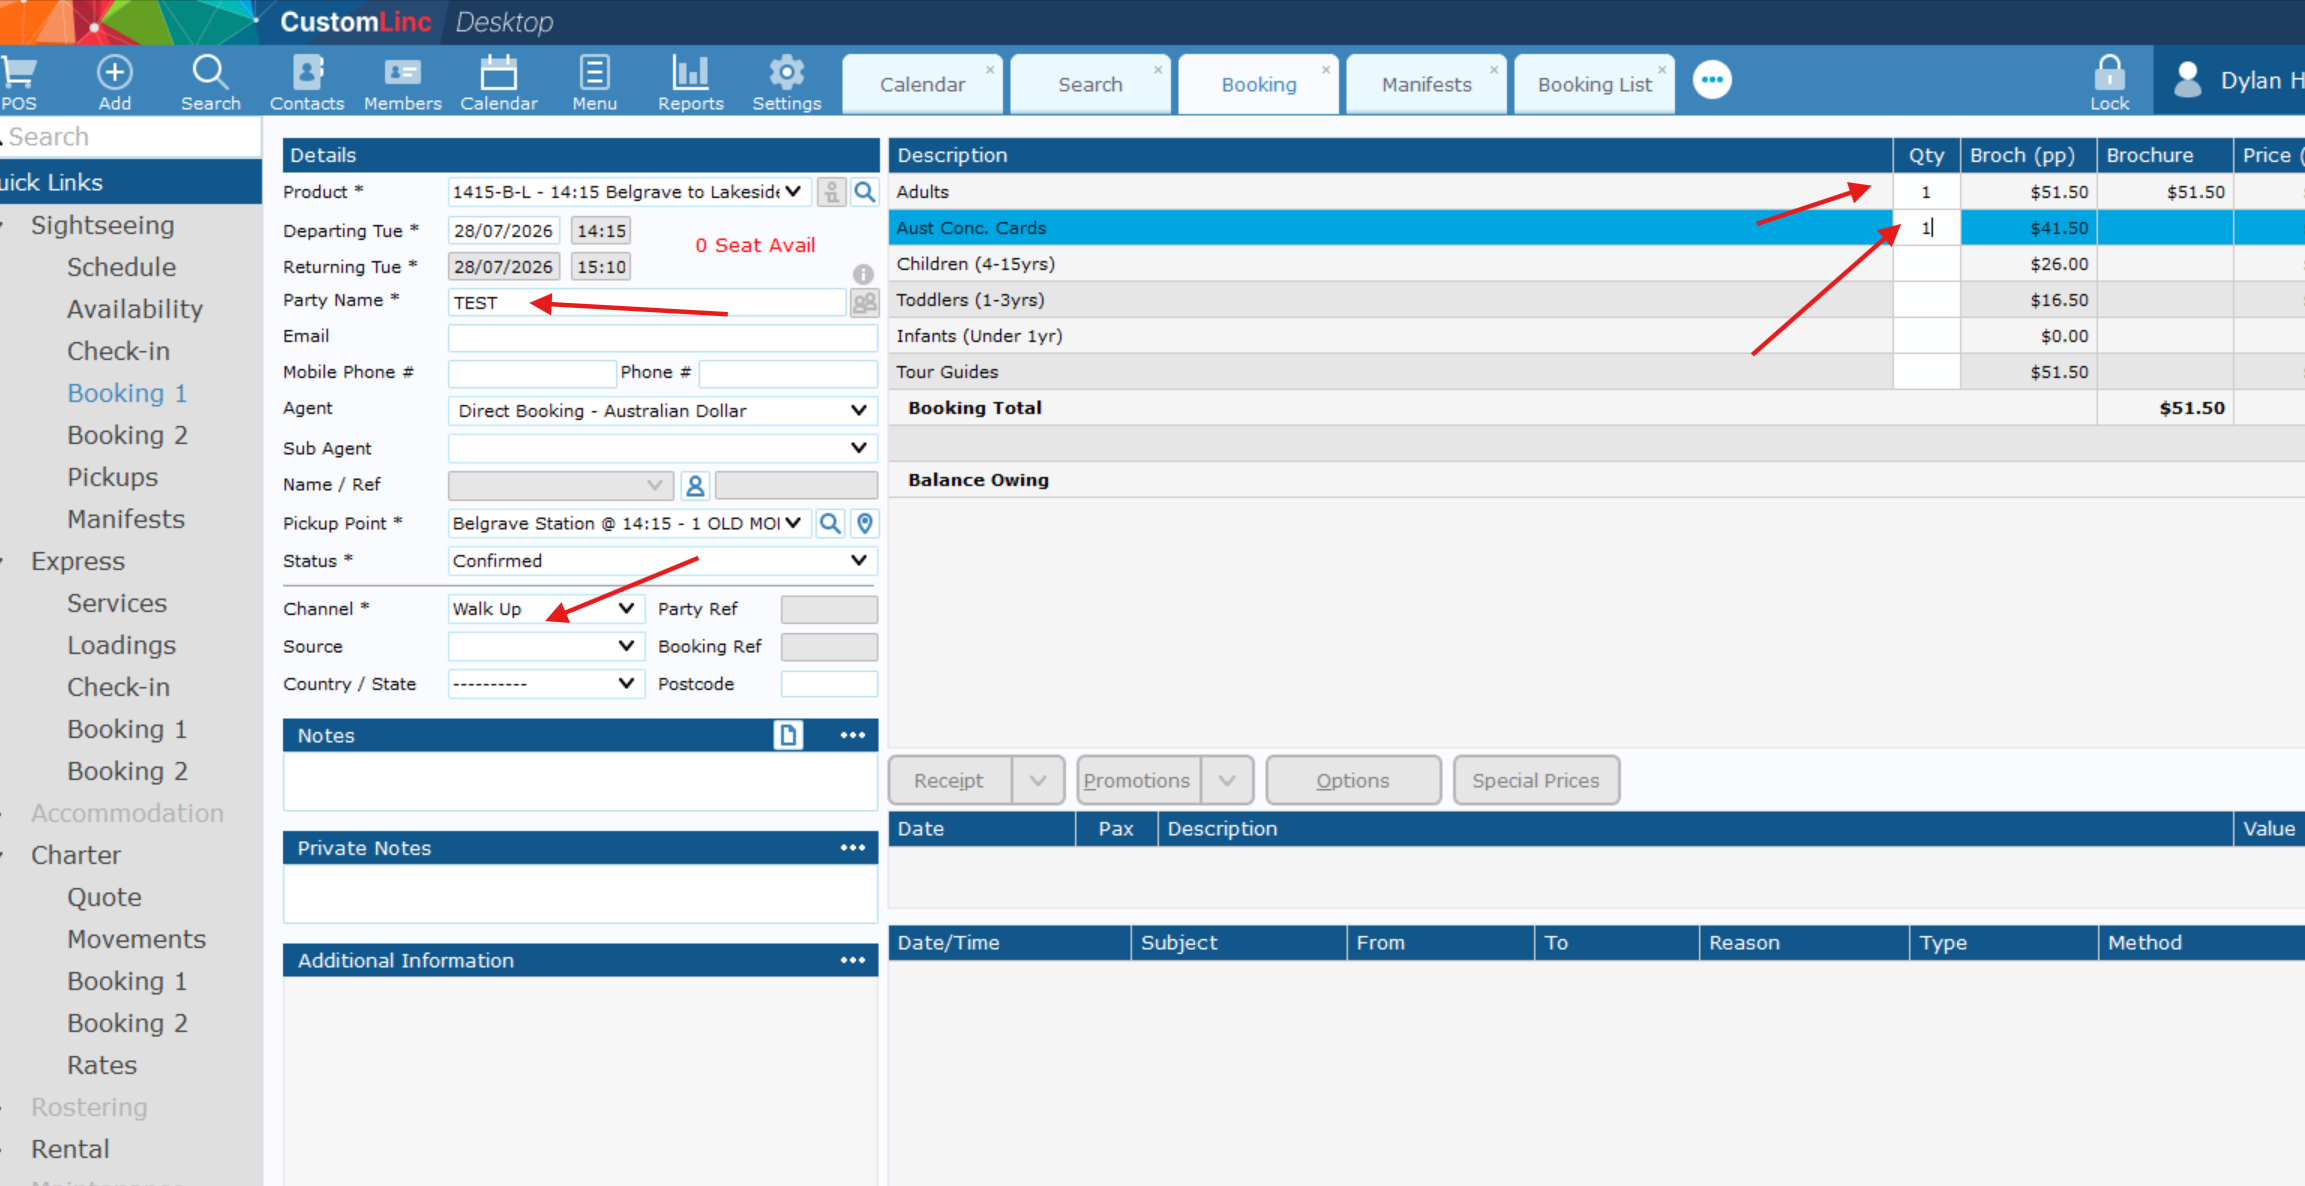
- Fill in Party Name, Select Walk Up in Channel and input the fares you would like to sell.

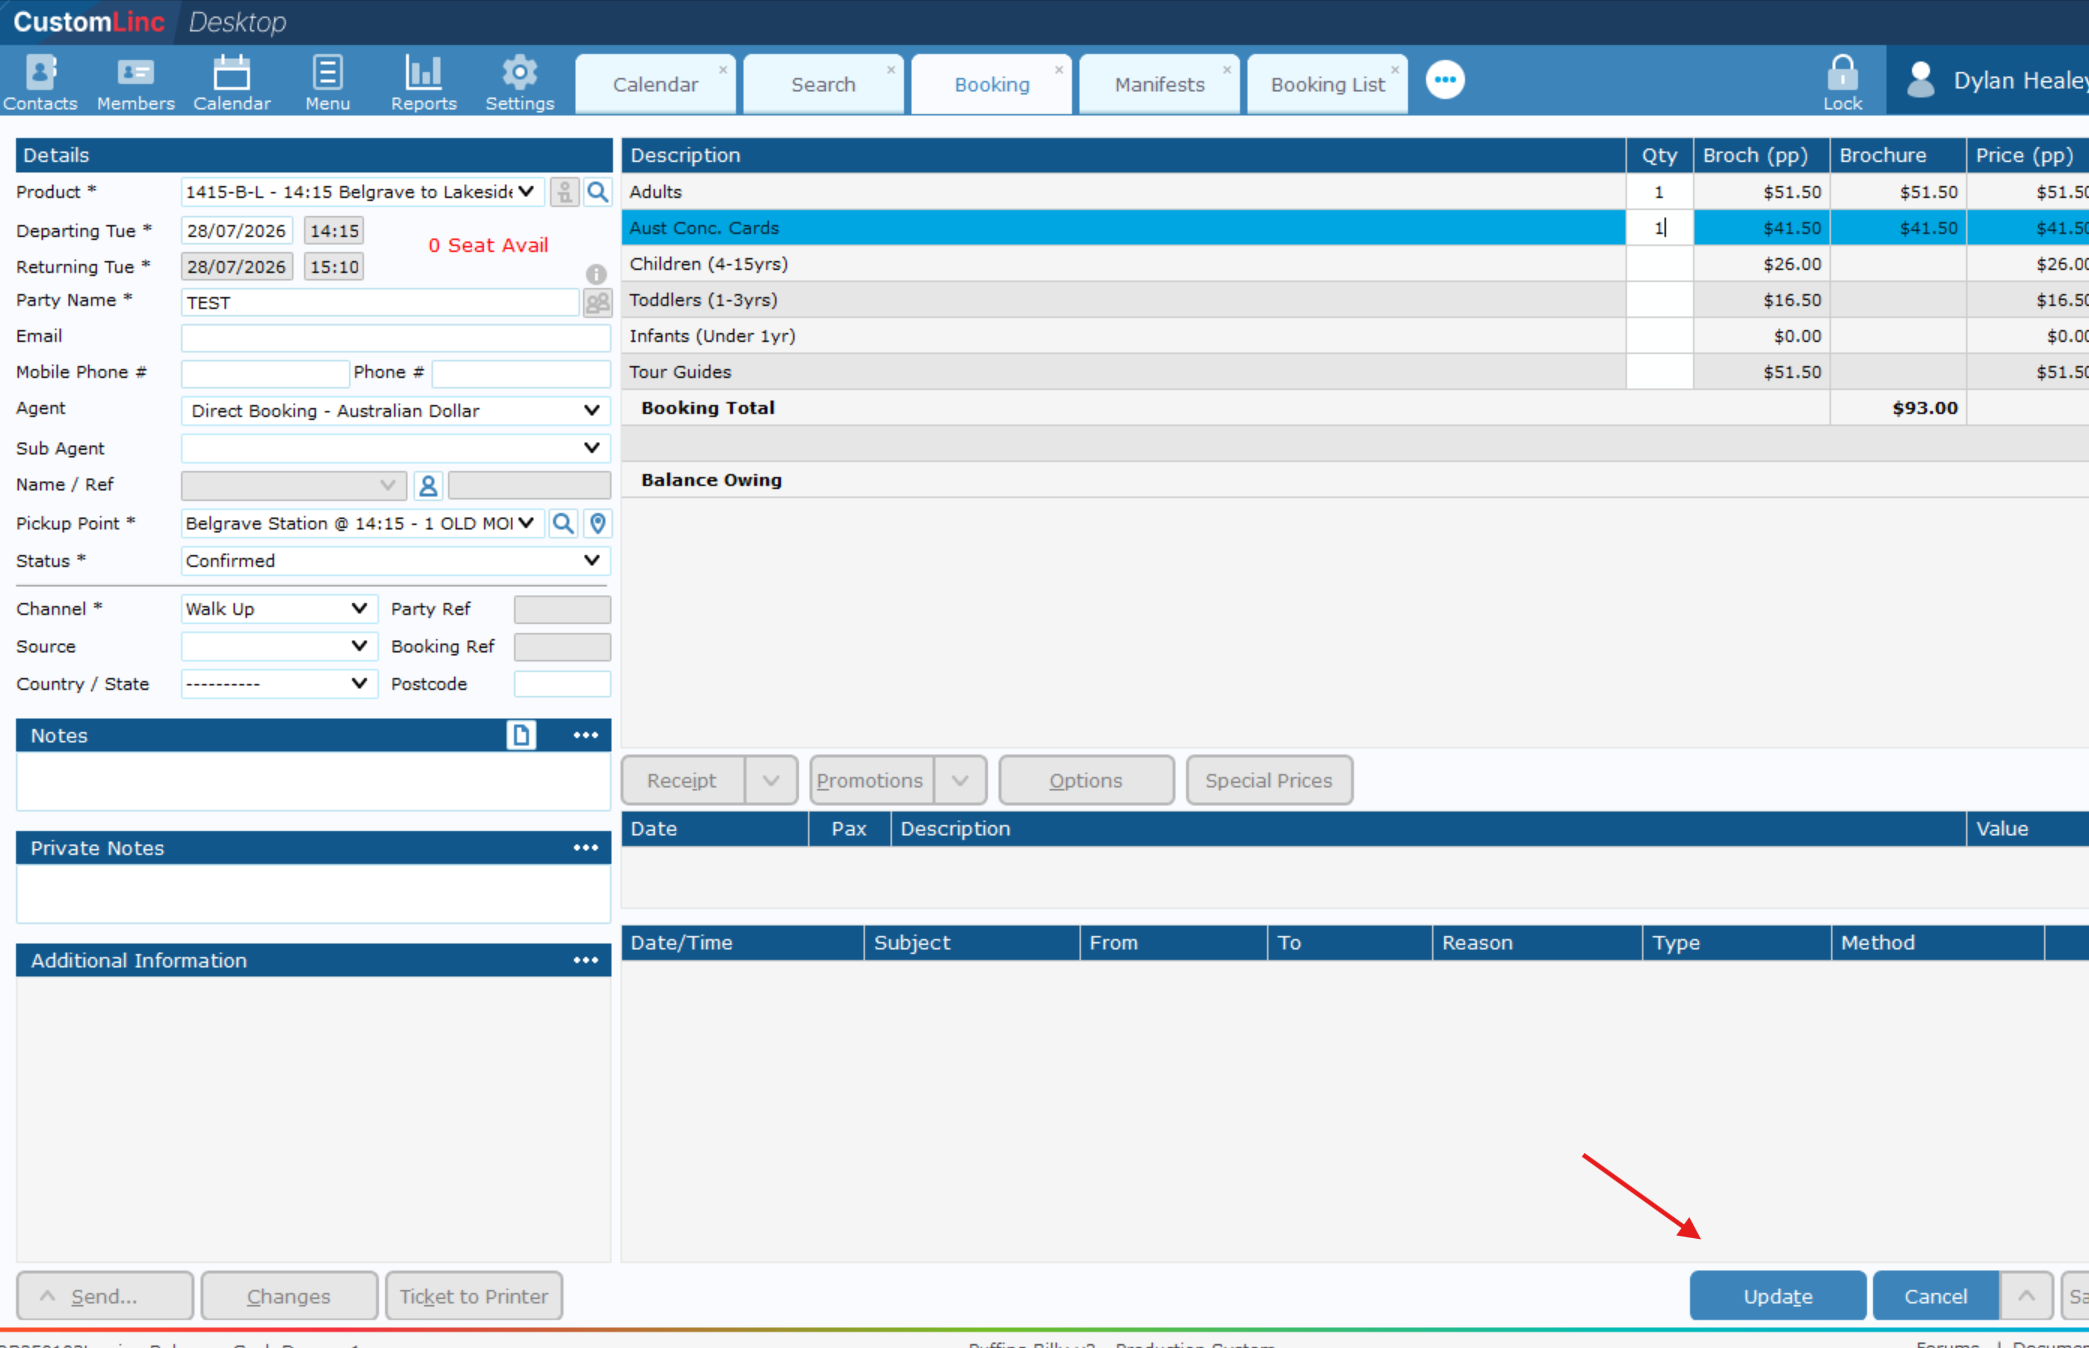
- Click Update in the bottom right.

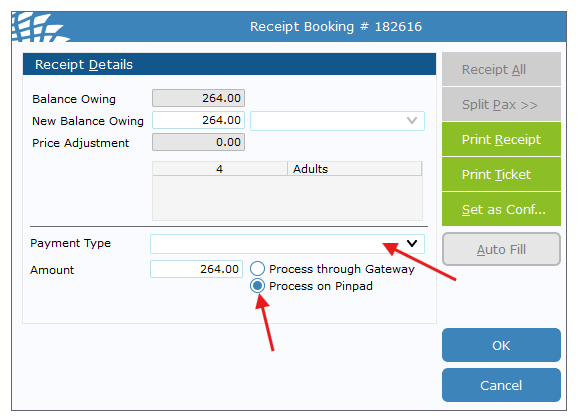
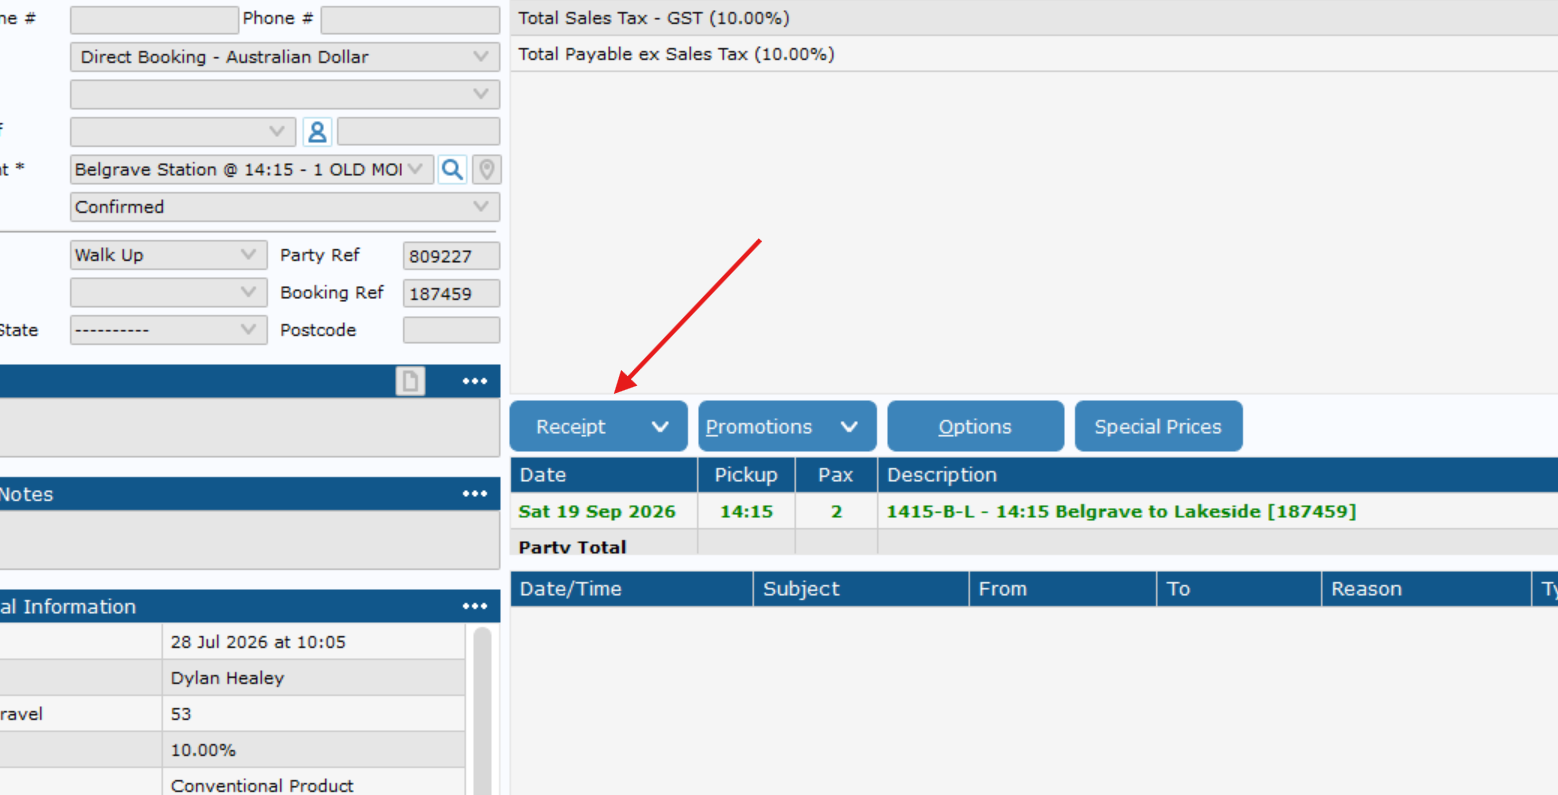
- Click Receipt

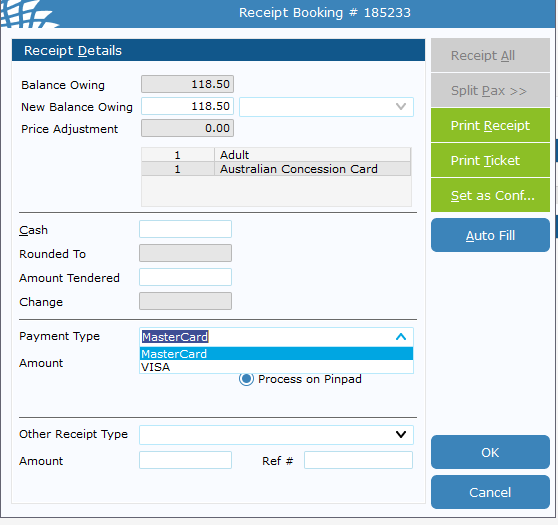
- Click the Payment Type dropdown and Select Visa or Mastercard.
It does not matter which one you choose.

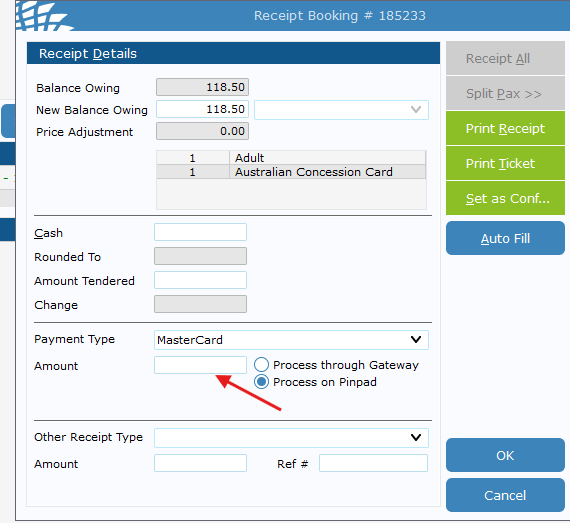
- Double left click the amount, it will auot fill with the total balance owing.

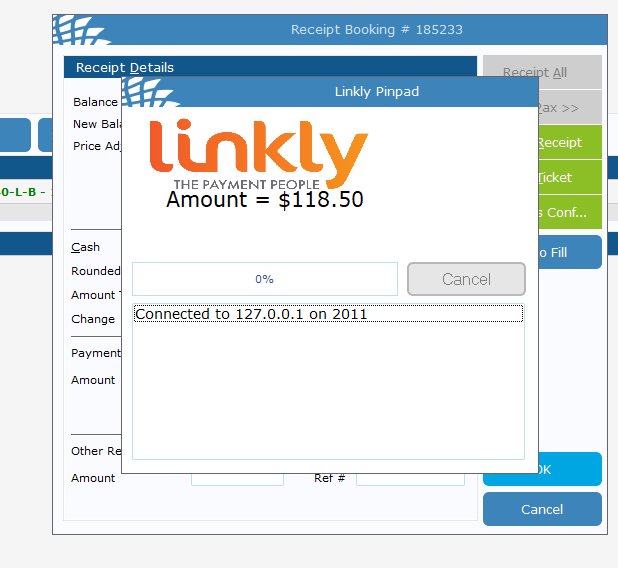
- Click Ok, then finish the transaction on the EFTPOS machine.
It may take 20-30 seconds the first time of the day to logon.

- Once complete, it should auto exit out. Then you can press Ticket to Printer as normal.
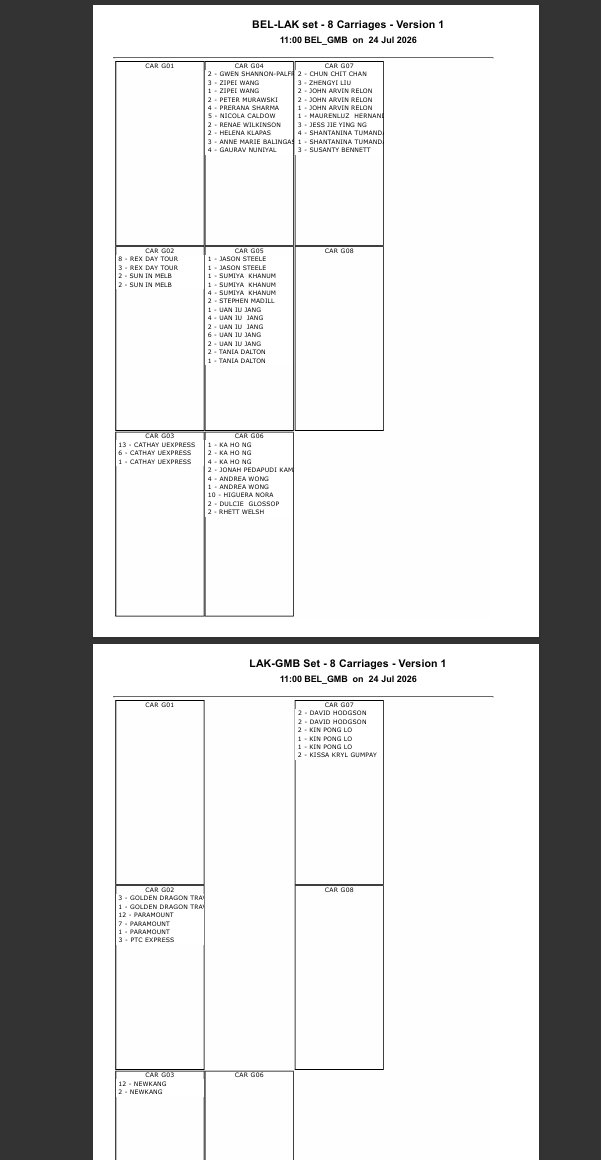
How to: Print the Seating Plan
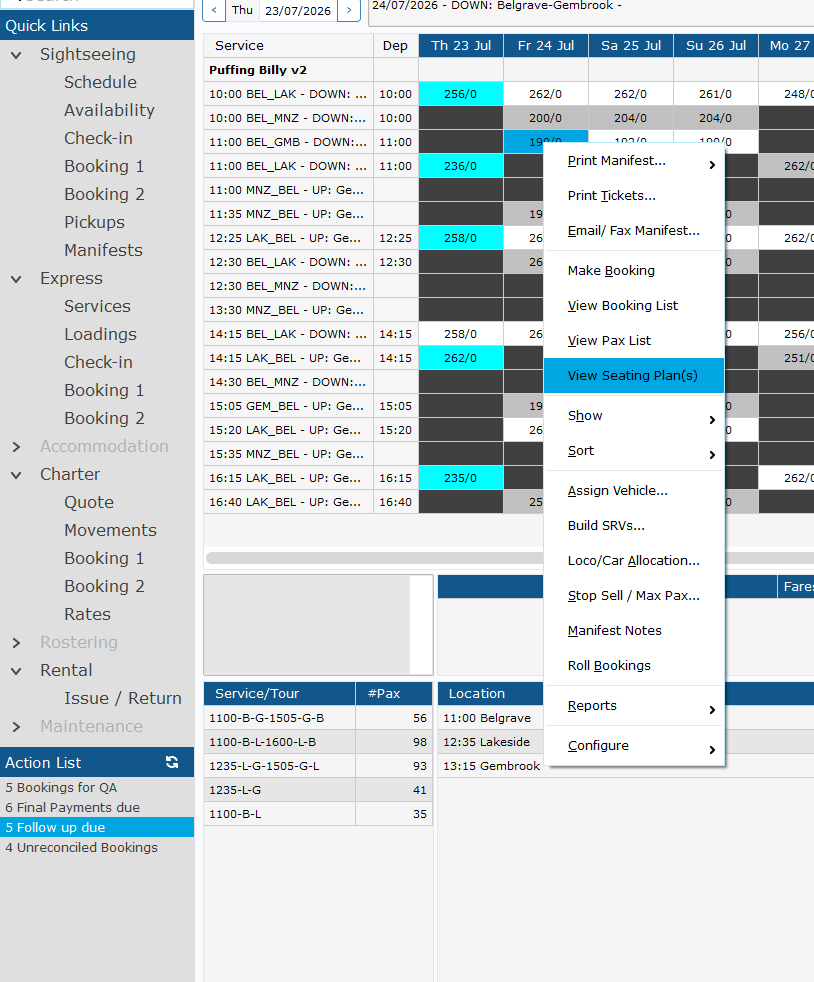
1. Go to Express > Services, right click the appropriate service and Click View Seating Plans
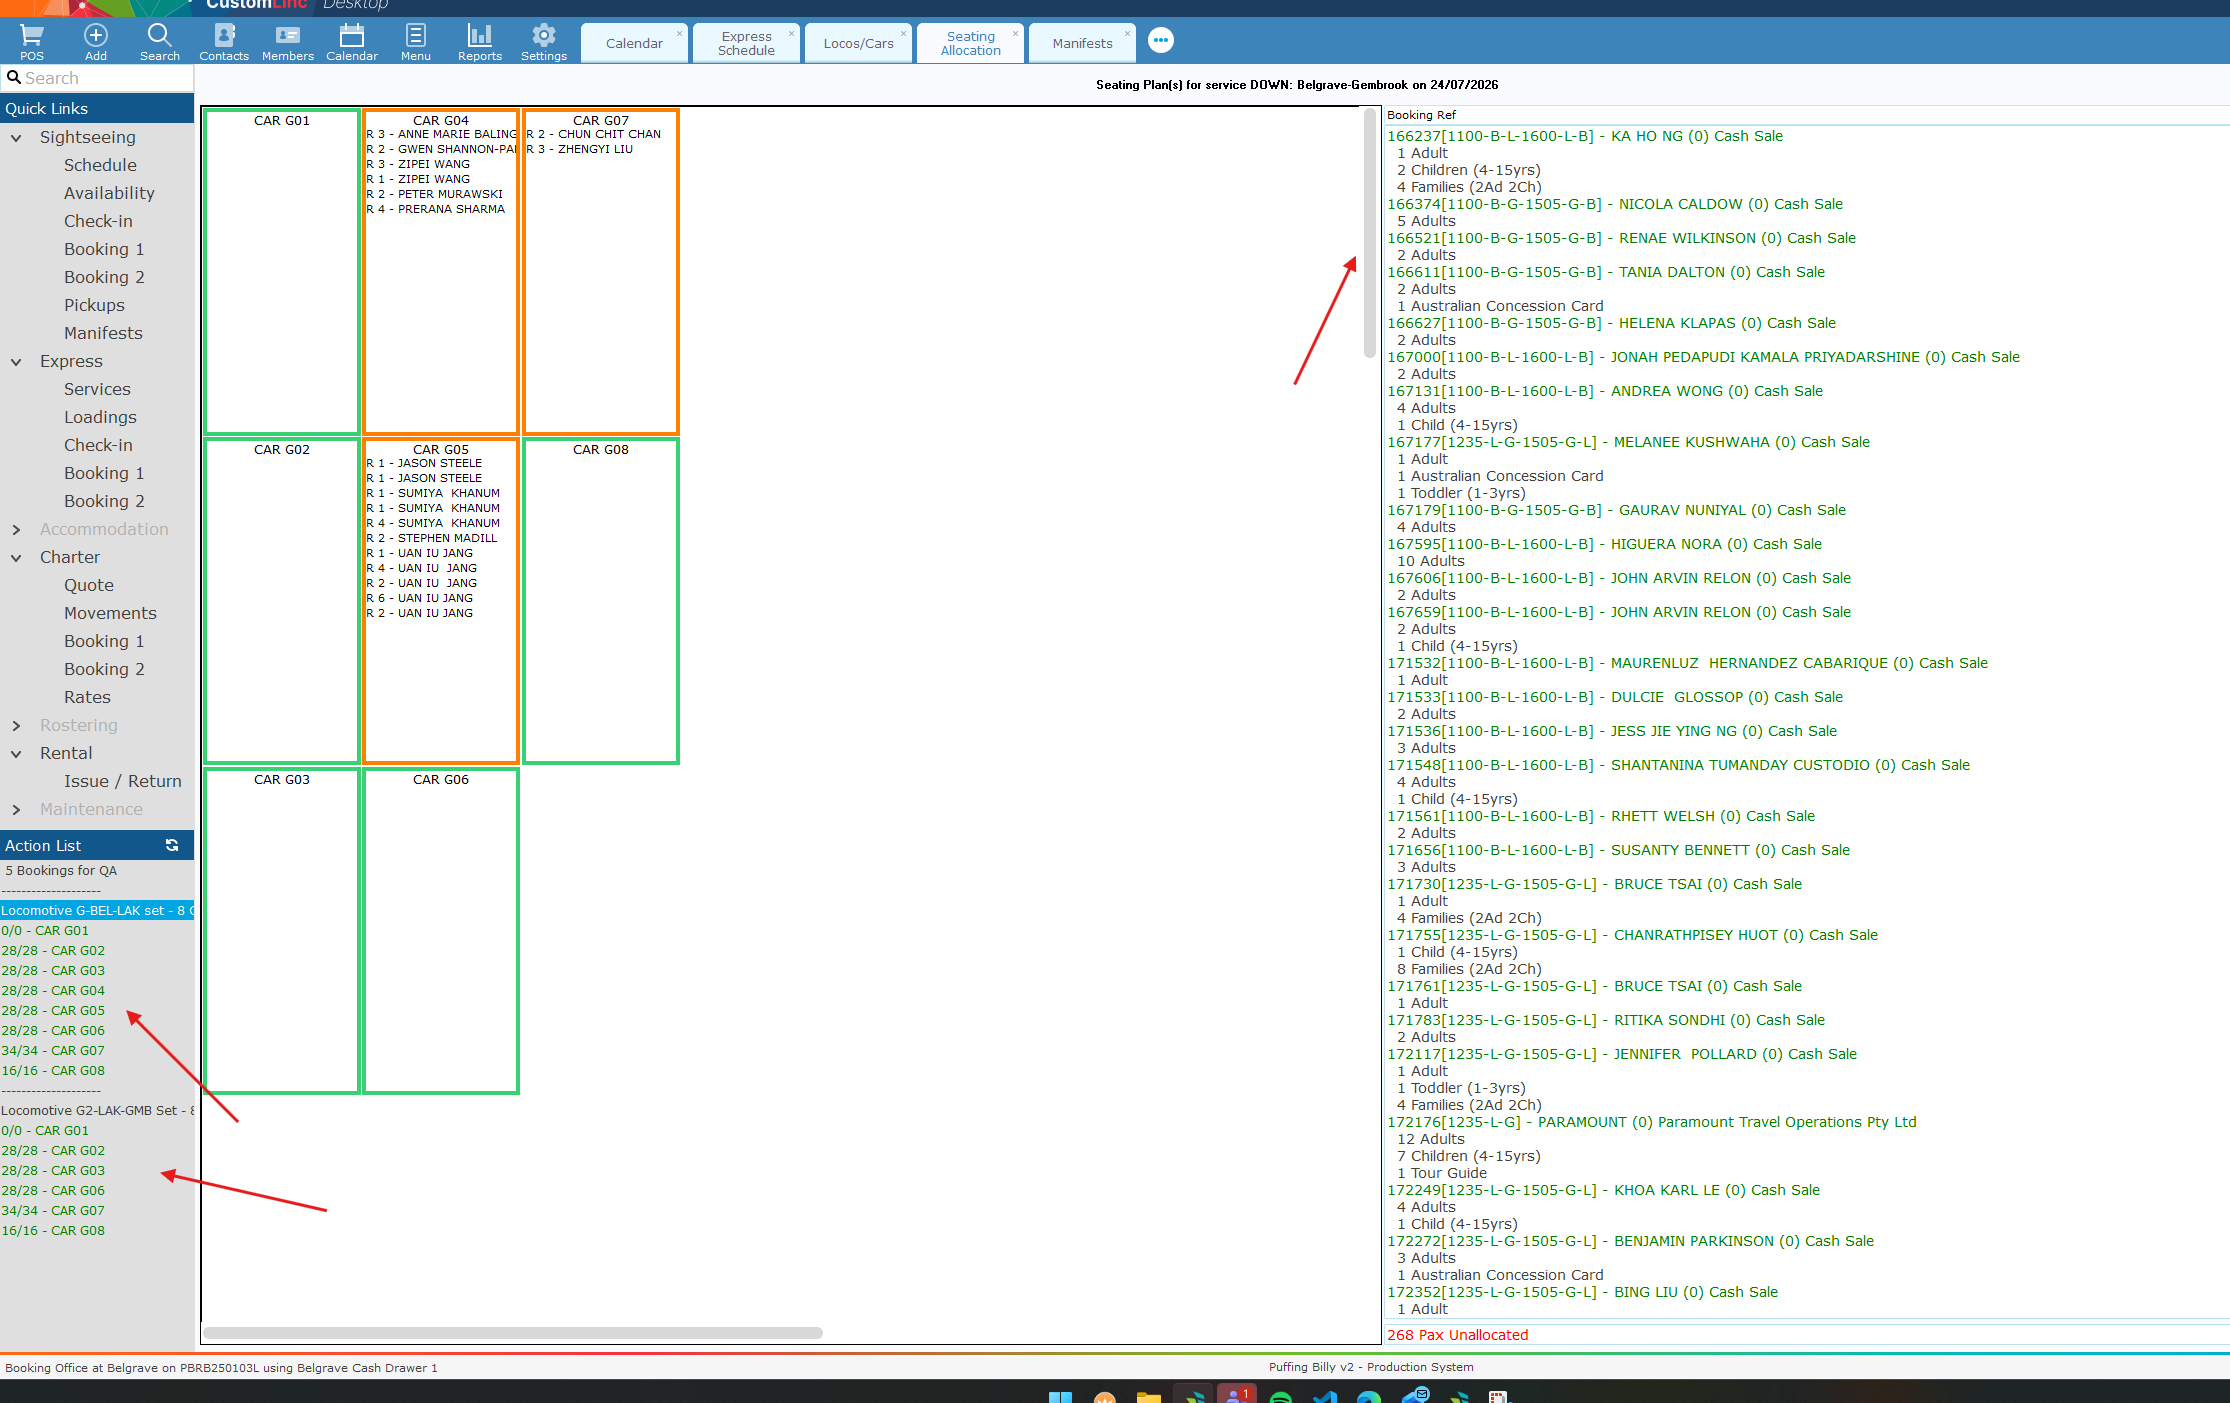
2. If there are multiple seating plans you will see them in the left corner. You can traverse to see the other ones in your window by using the scroll wheel or navigation scroll in the middle of the page.
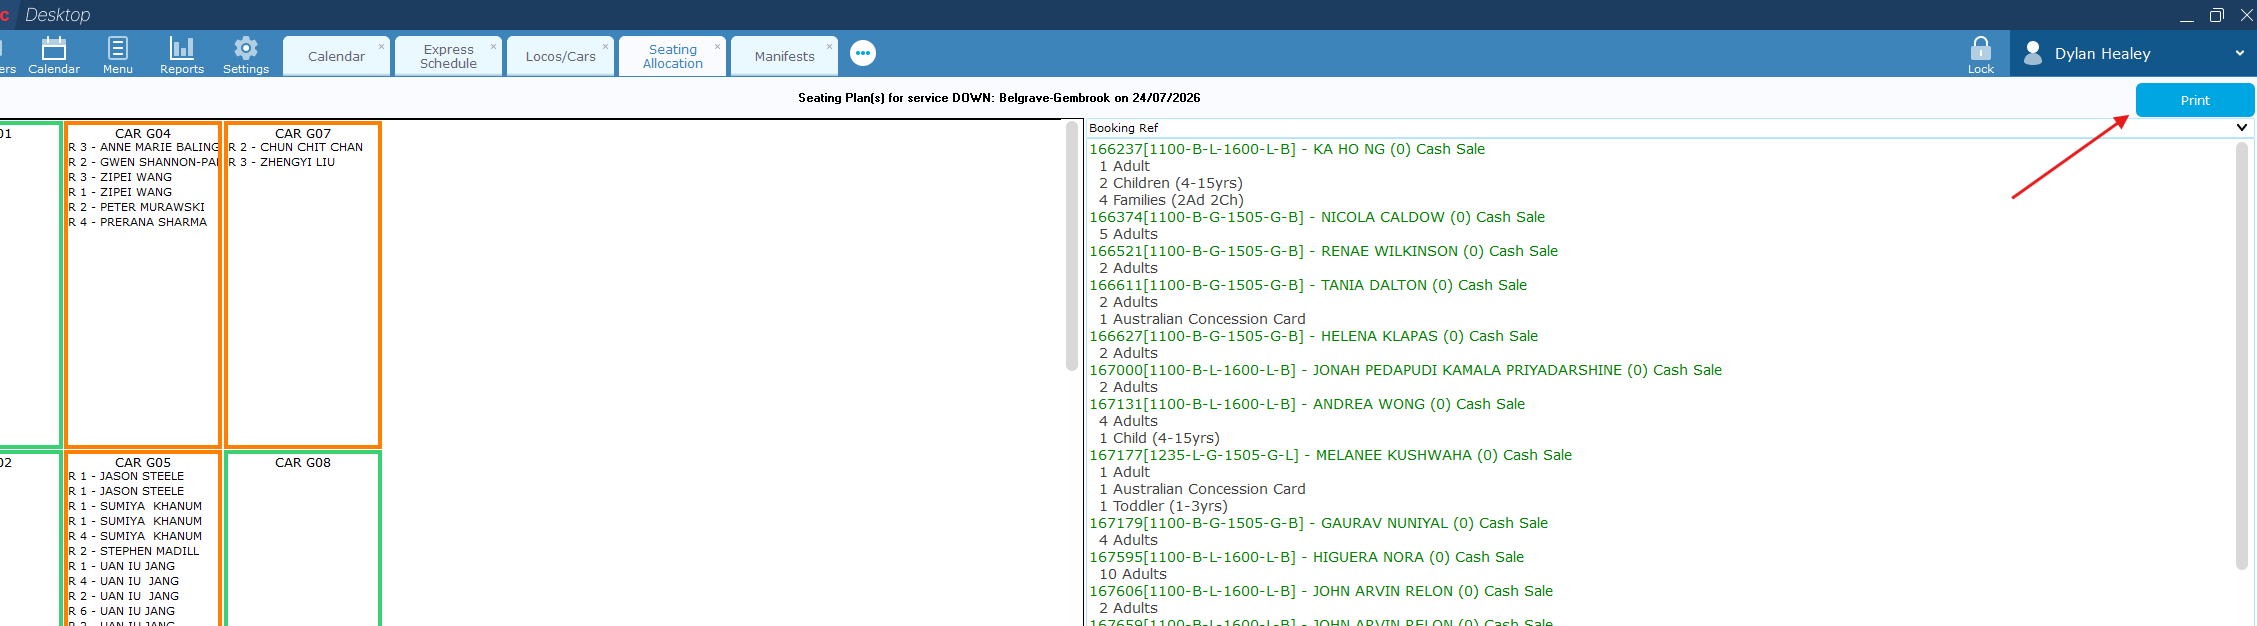
3. In the top right click Print.
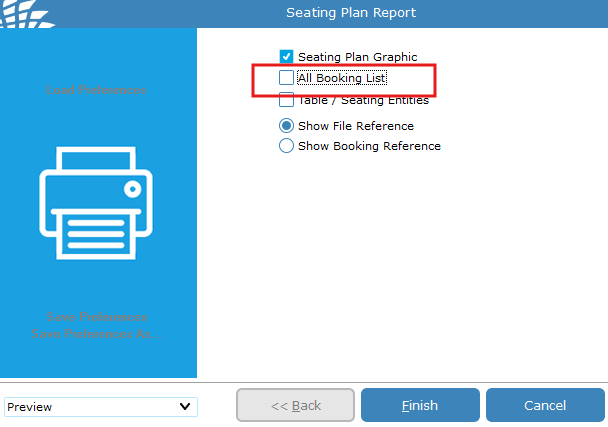
4. Deselect ALL Booking List & click Finish
5. The first seating plan will be on first page. You can traverse to other seating plans using the NextPage button in the top left.
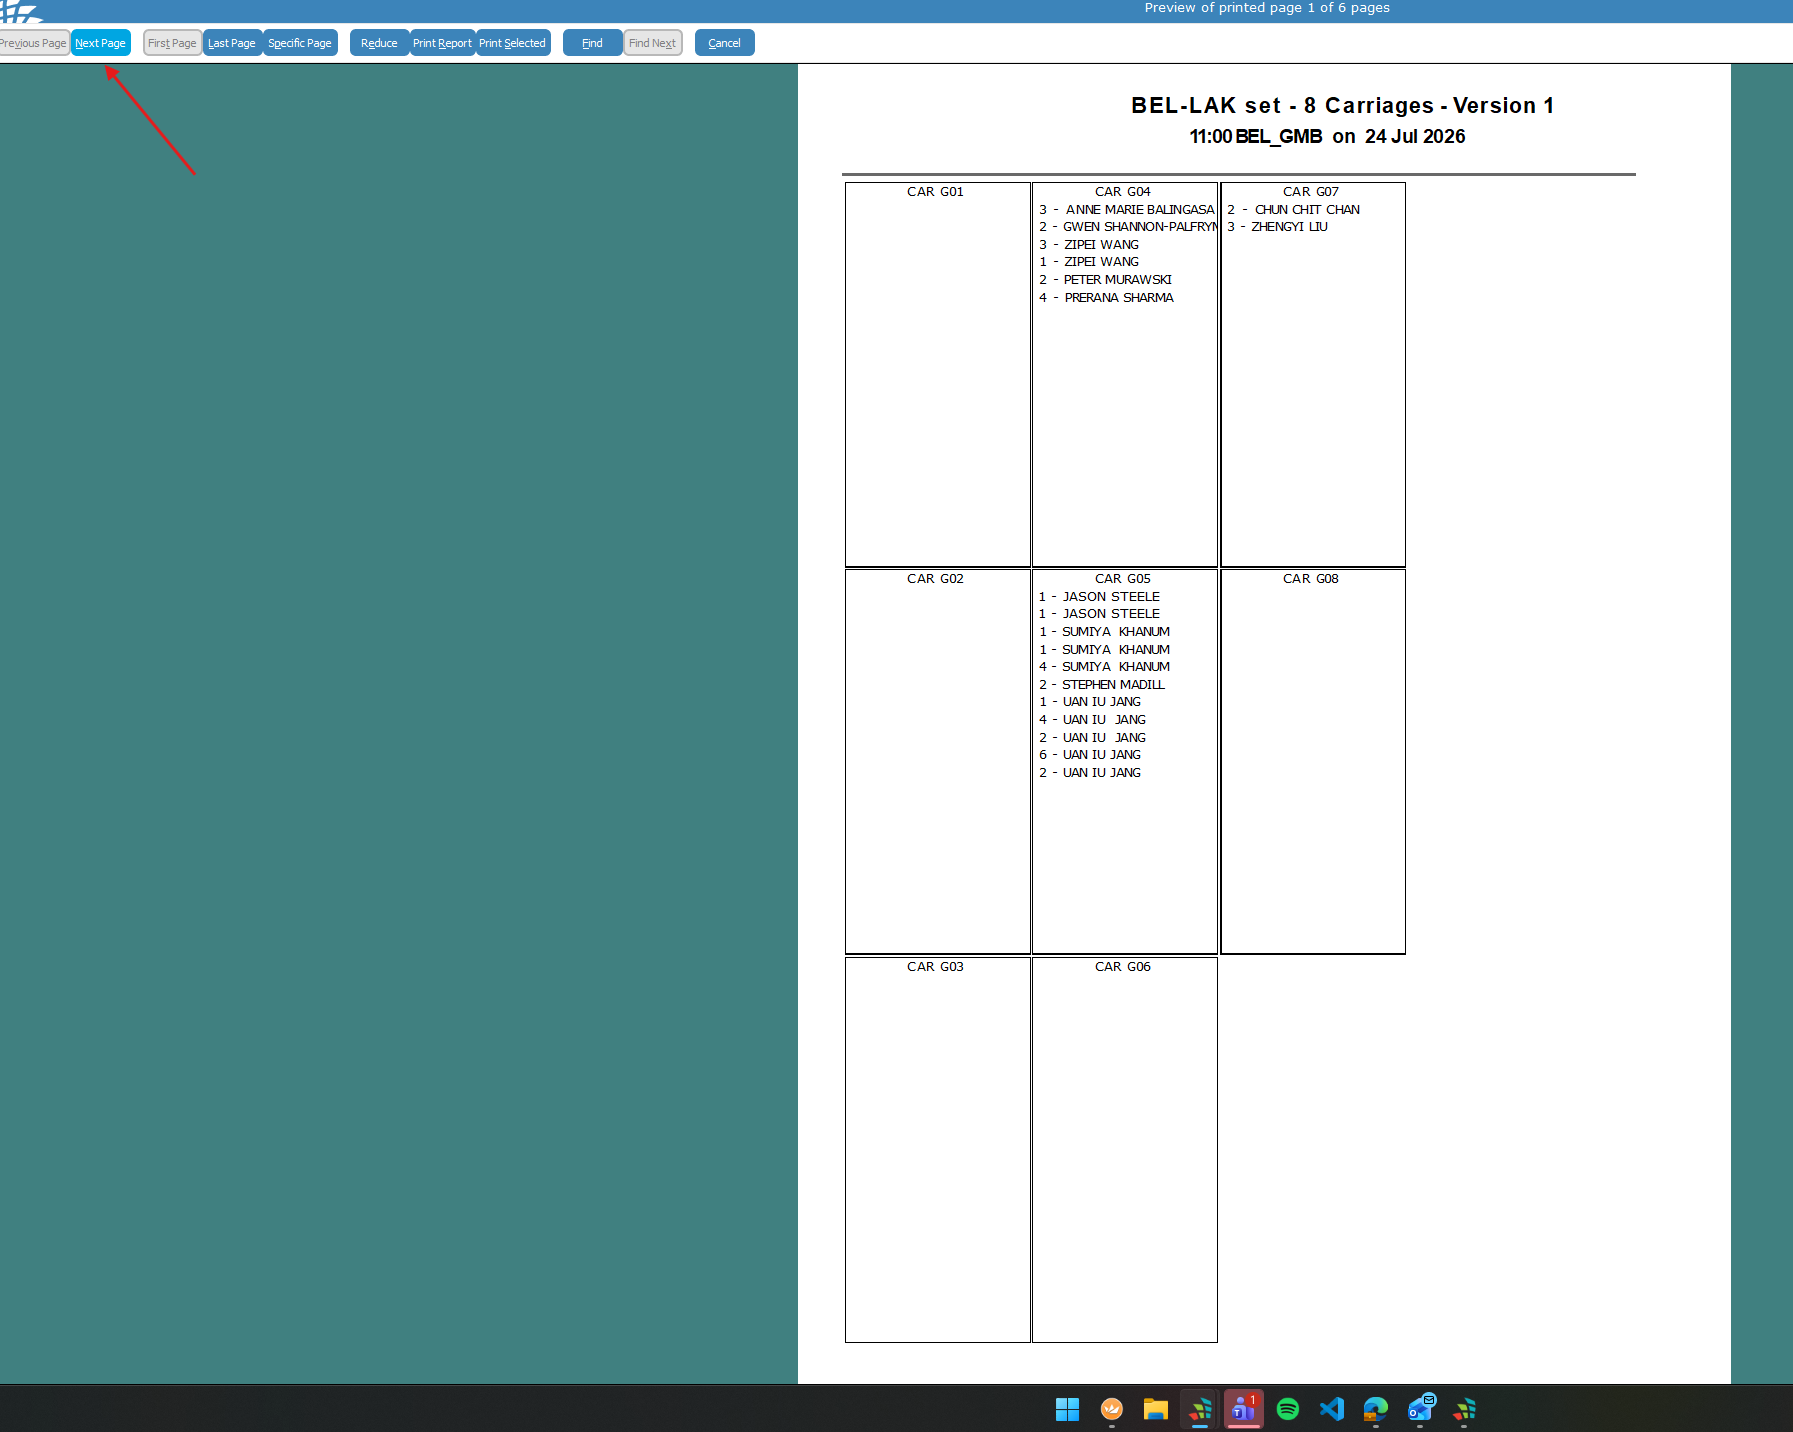
6. Click Print Report.
You will then print out both seating plans.