Agent Management/CRM
Everything related to management of Agent users. Including Schools.
- Agent Contact Management
- How to: Assign or Remove Contacts/Agent to Contact Group(s)
- How to: Create or Remove a Contact Group
- How to: Add Contact details to a contact (Agent).
- How to: Export a list of emails from a Contact Group
- How to: Create a New Agent in CustomLinc
- Agent Portal
Agent Contact Management
How to: Assign or Remove Contacts/Agent to Contact Group(s)
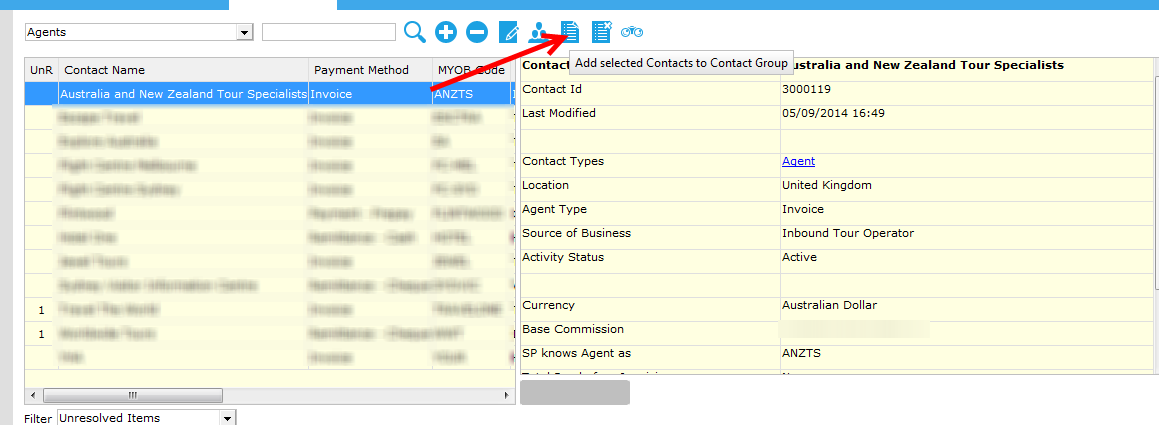
- Find the Contact you wish to allocate to a Contact group
- Select the
 icon
icon
-

- This will pop up the list of Contact Groups that can be allocated, double click on the one you wish to add
- Repeat until you have added all the Contact Groups you wish to.
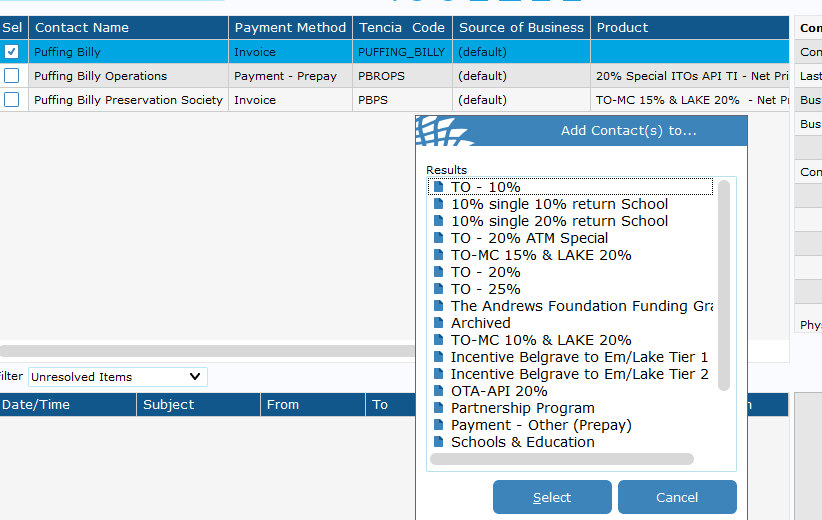
You can add multiple Contacts (agents) to a Contact Group at the same time. However, you cannot add multiple Groups to a Contact, this has to be done one at a time.
To remove a contact group from a contact
- Right click on the Contact Group you wish to remove
- Select Delete

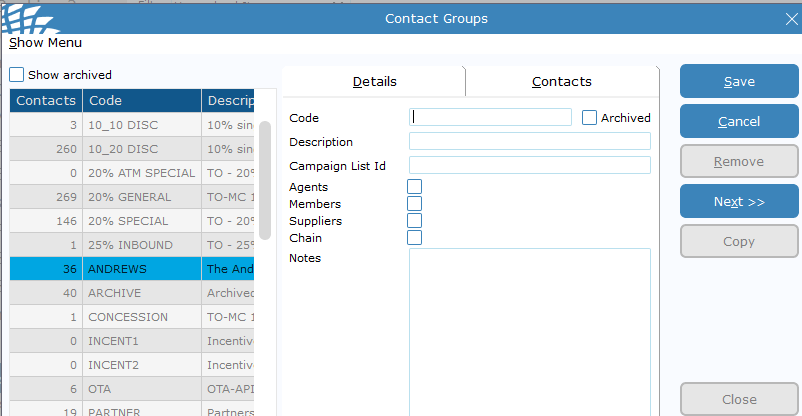
How to: Create or Remove a Contact Group
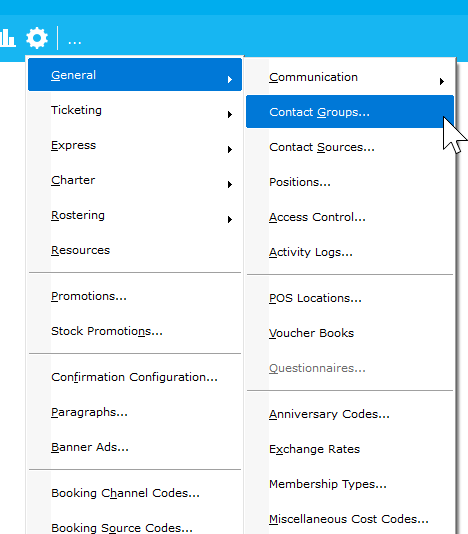
- Go to Settings > General > Contact Groups

- Select ADD > fill in template > SAVE

You can also edit existing templates by selecting - You cannot ad or remove Contacts from the group here. Please refer to How to: Assign or Remo... | BookStack
How to: Add Contact details to a contact (Agent).
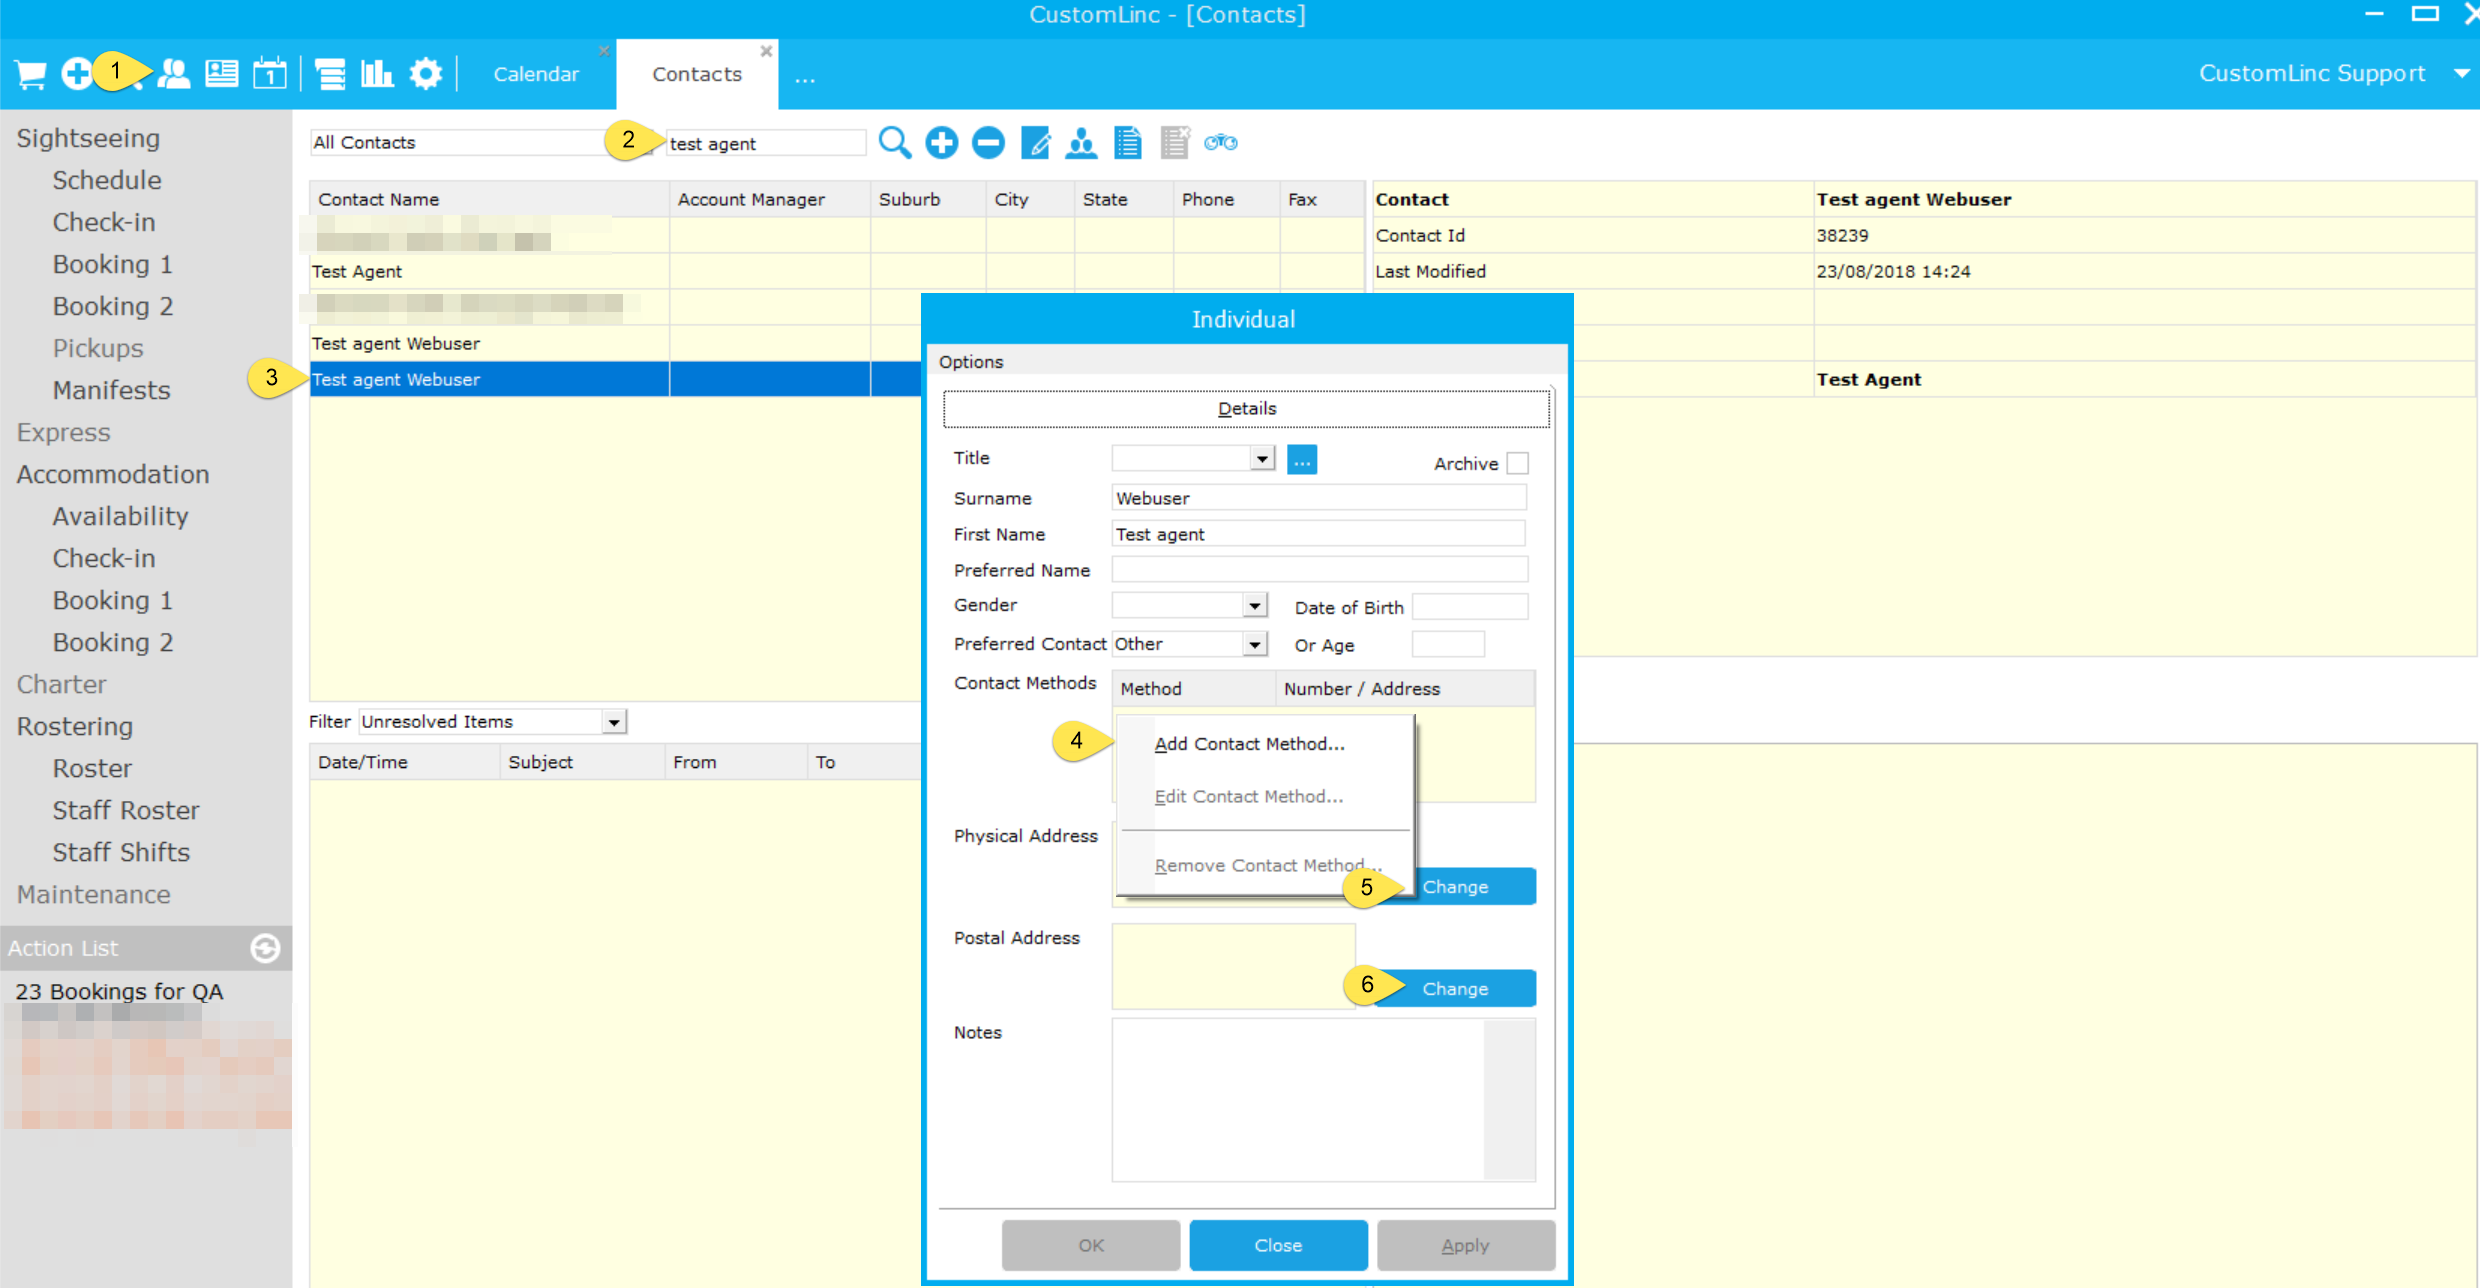
- Contacts screen
- Search for Contact
- Double-click on Contact
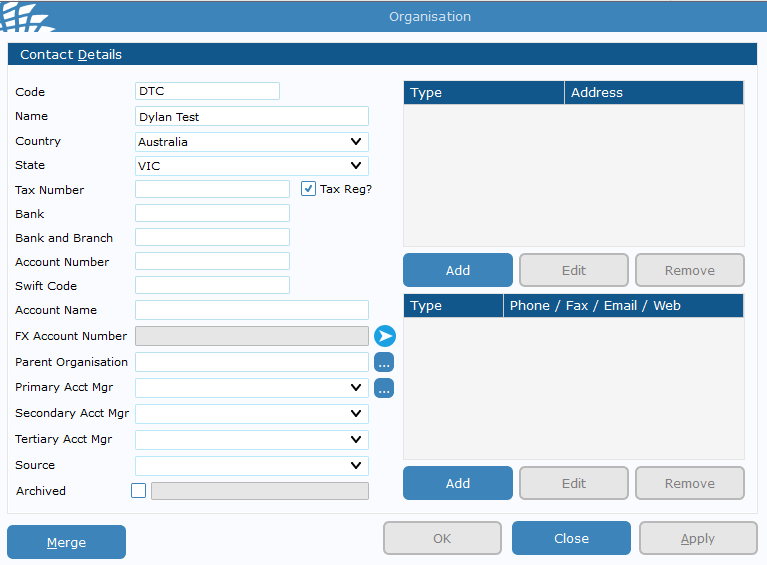
Organisation -
Select Add to add Postal and Physical addresses
-
Select Add to add Email, Phone, Fax, Facebook, Twitter and website
Individual
4. Right-click under Contact Methods and select Add Contact Method... to add Email, Phone, Fax, Facebook, Twitter and website
5. Select Change to add/edit a Physical Address
6. Select Change to add/edit a Postal Address
Changing existing Contact Methods on a Contact
Existing Contact Methods will appear on the right of the screen when the Contact is selected as at 1 below as an example.- Double-click on the Contact Method
- Change details as required and select OK
How to: Export a list of emails from a Contact Group
- Go to Contacts

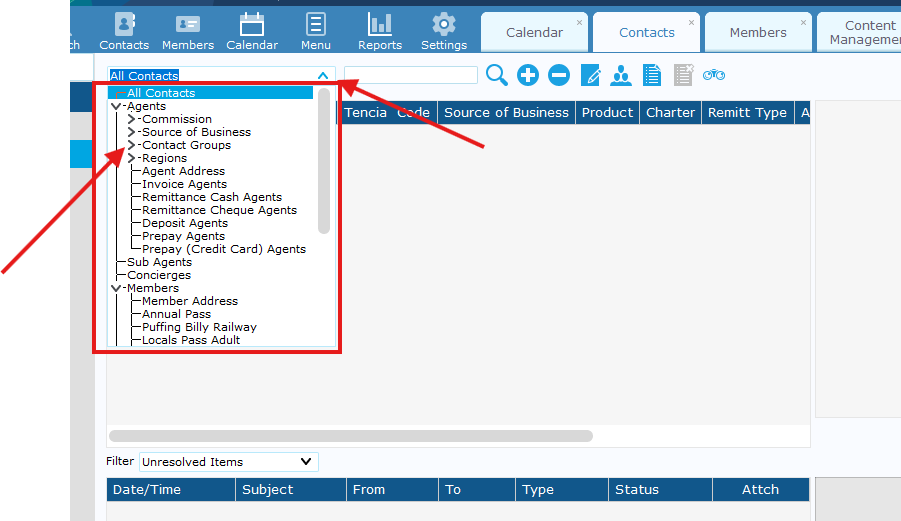
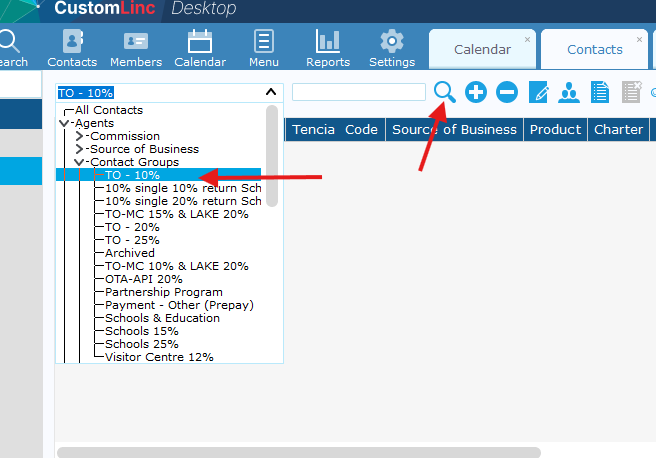
- Select the Contacts drop down to search for a contact filter.
- From here you can click the arrows to expand the filters, the following are examples.
- Contact Groups are managed on a per agent basis - an Agent (contact) can have multiple Contact Groups associated.
- Commission is managed per Agent under contract an agent will only have one active commission at a time.

- From here you can click the arrows to expand the filters, the following are examples.
- Select a filter and click search (Magnifying Glass)

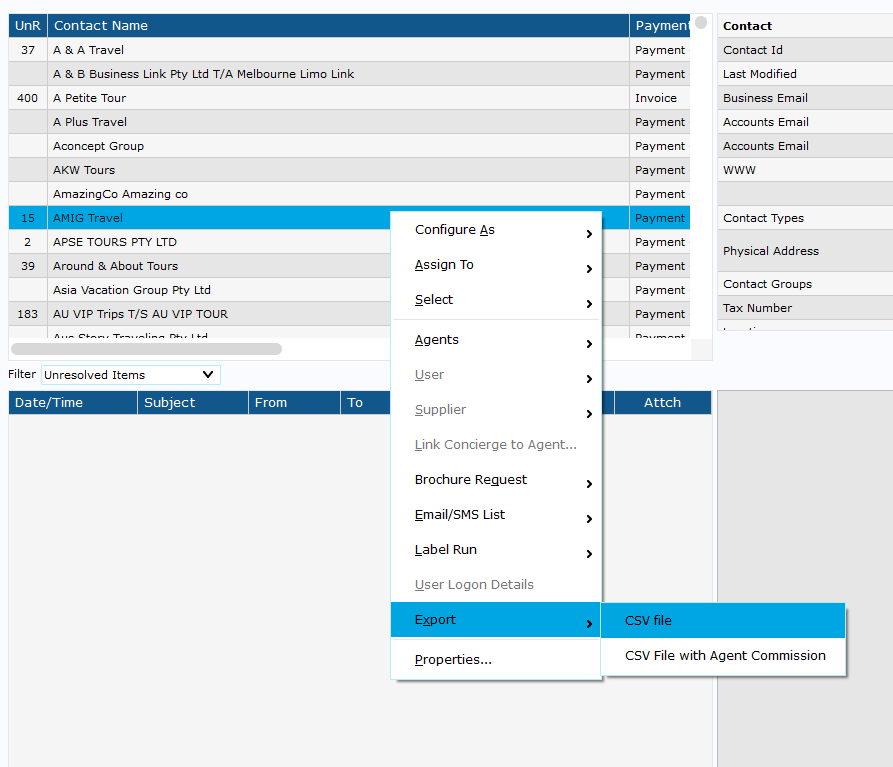
- Once all agents are loaded, right click any agent on the left side, select Export > CSV file

- It will ask you to select a save locations, then it should automatically open up.
In the CSV you will find an EmailBusiness header - This is the primary contact for each agent. -
You can highlight all cells email cells then copy & paste these into the To section in Outlook.
How to: Create a New Agent in CustomLinc
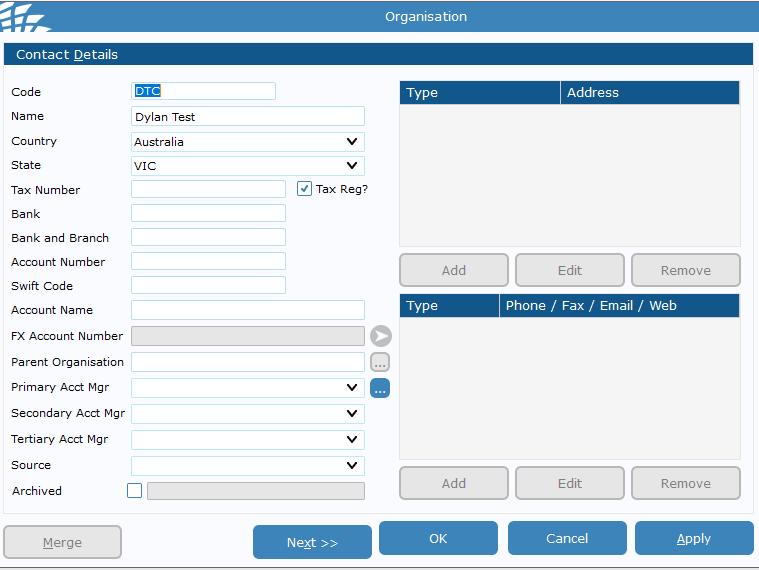
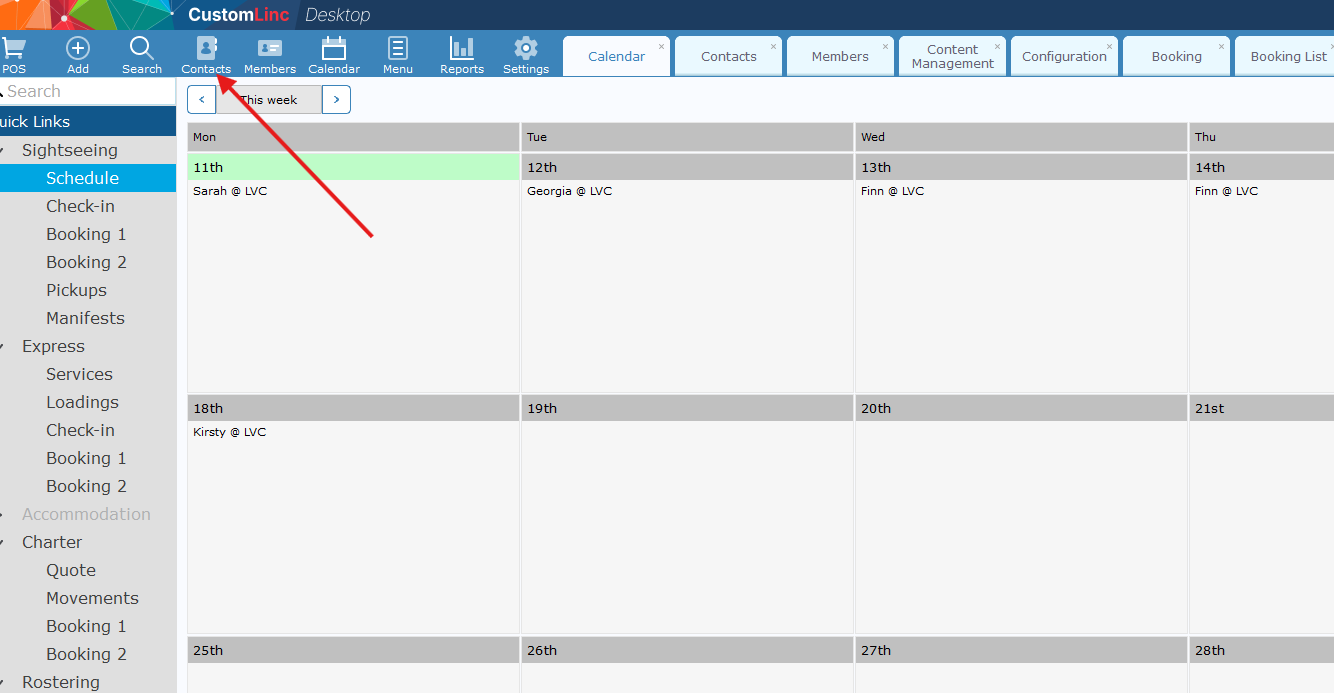
- Go to Contacts > Add Contact (+) > Click Organisation
- Fill in the Name & any other relevant data on the left side - A code is required but is not used unless they are on account.
We would recommend doing some sort of Business initials like PBR or PBRB for example. > Hit Apply
You will fill in Business Address and Contact Email in step 5.

- Select "Agent" > Click Okay
- Select Apply, and close the windows to get back into the contact page

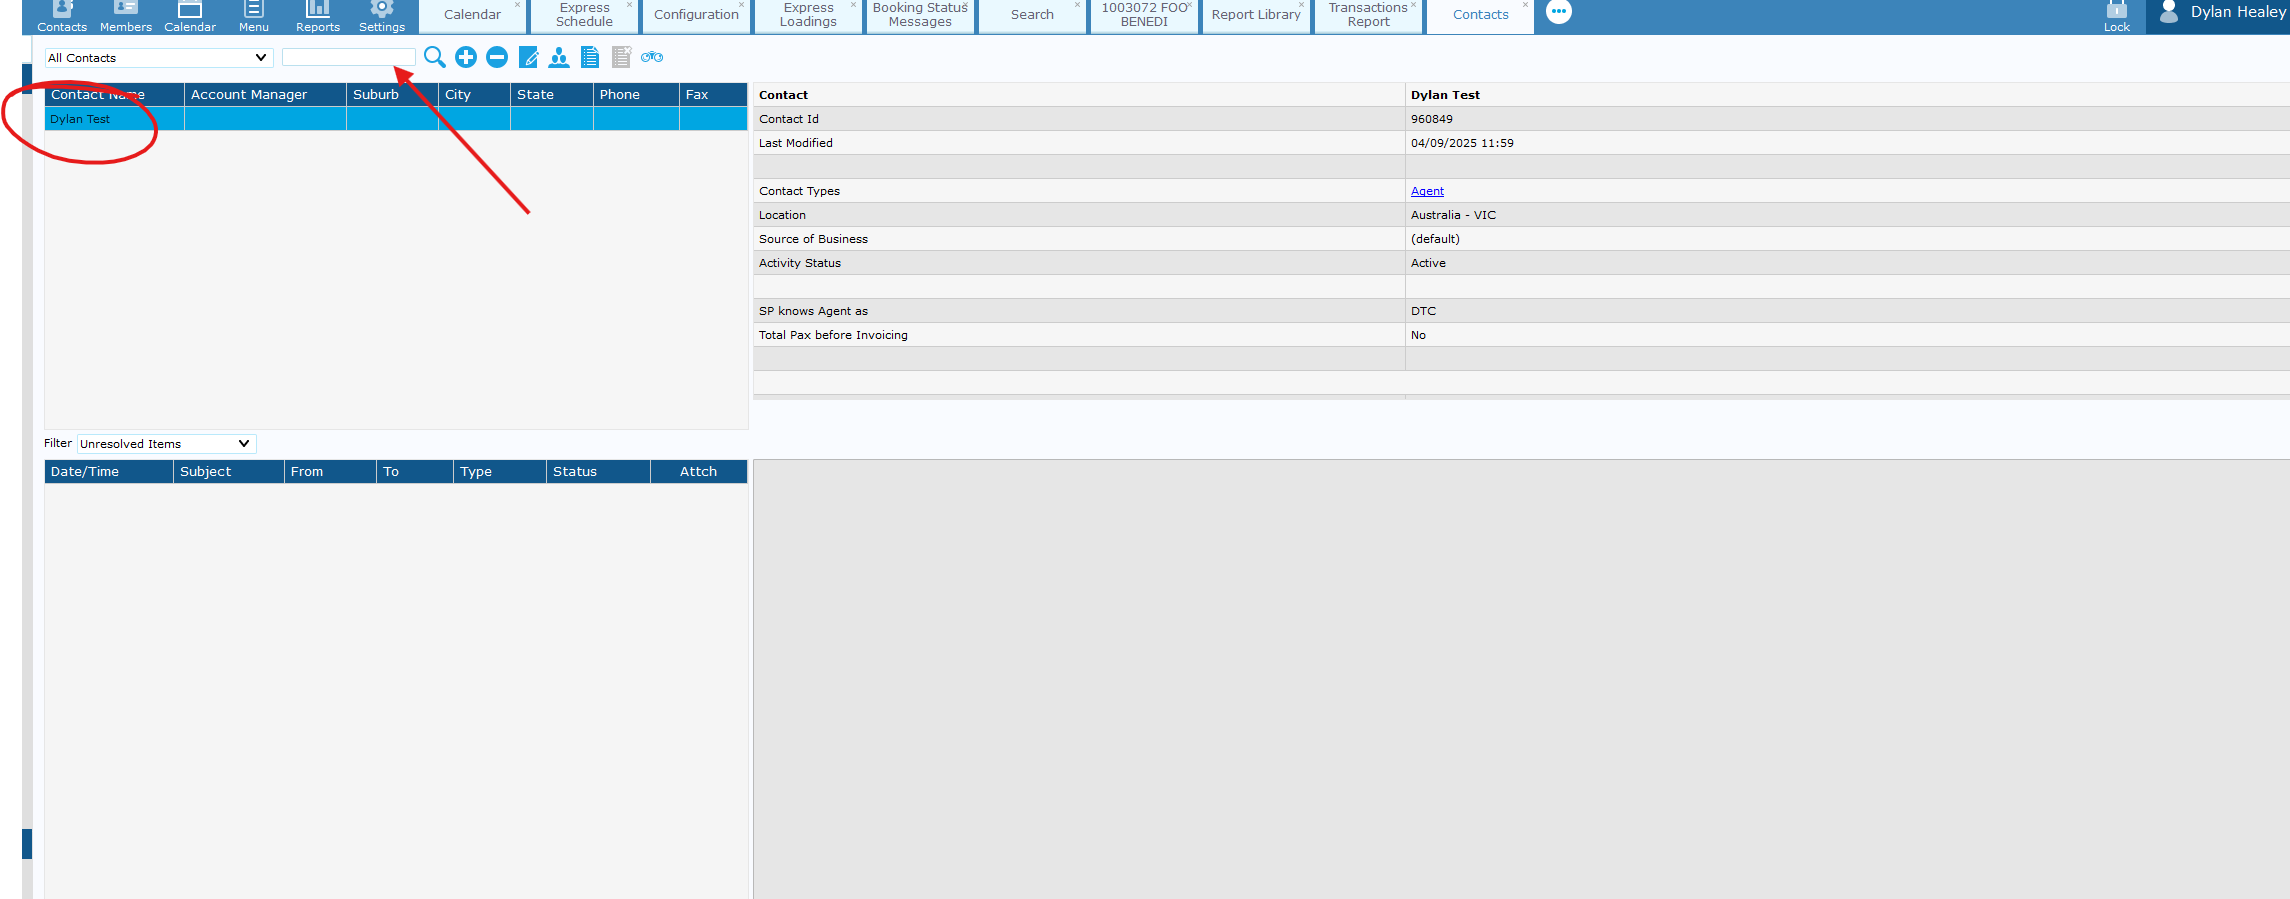
- You should see the user on the left-hand side - double click and fill in contact details such as address and email contact.


-
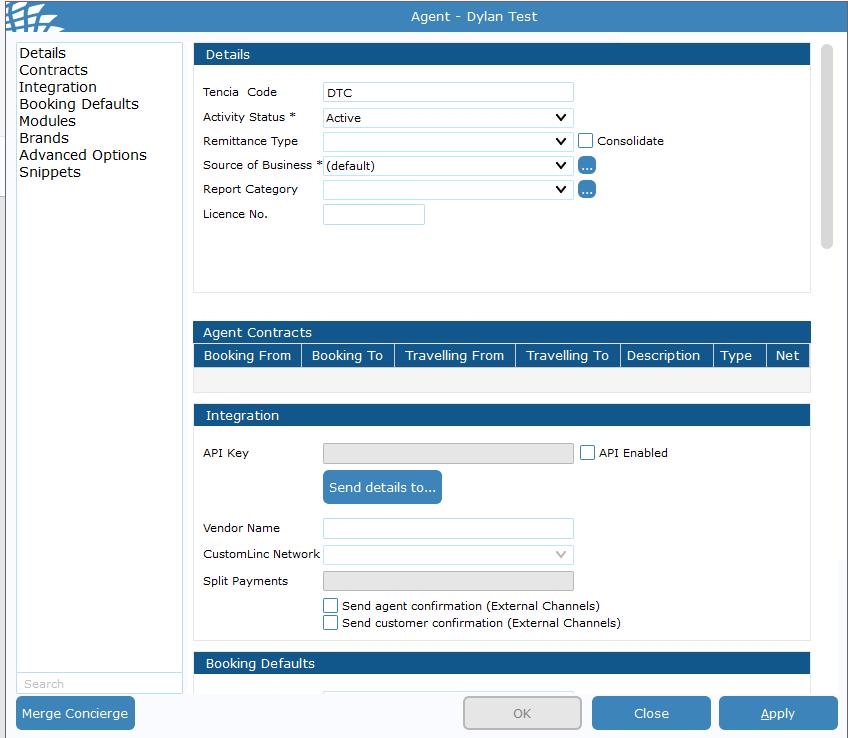
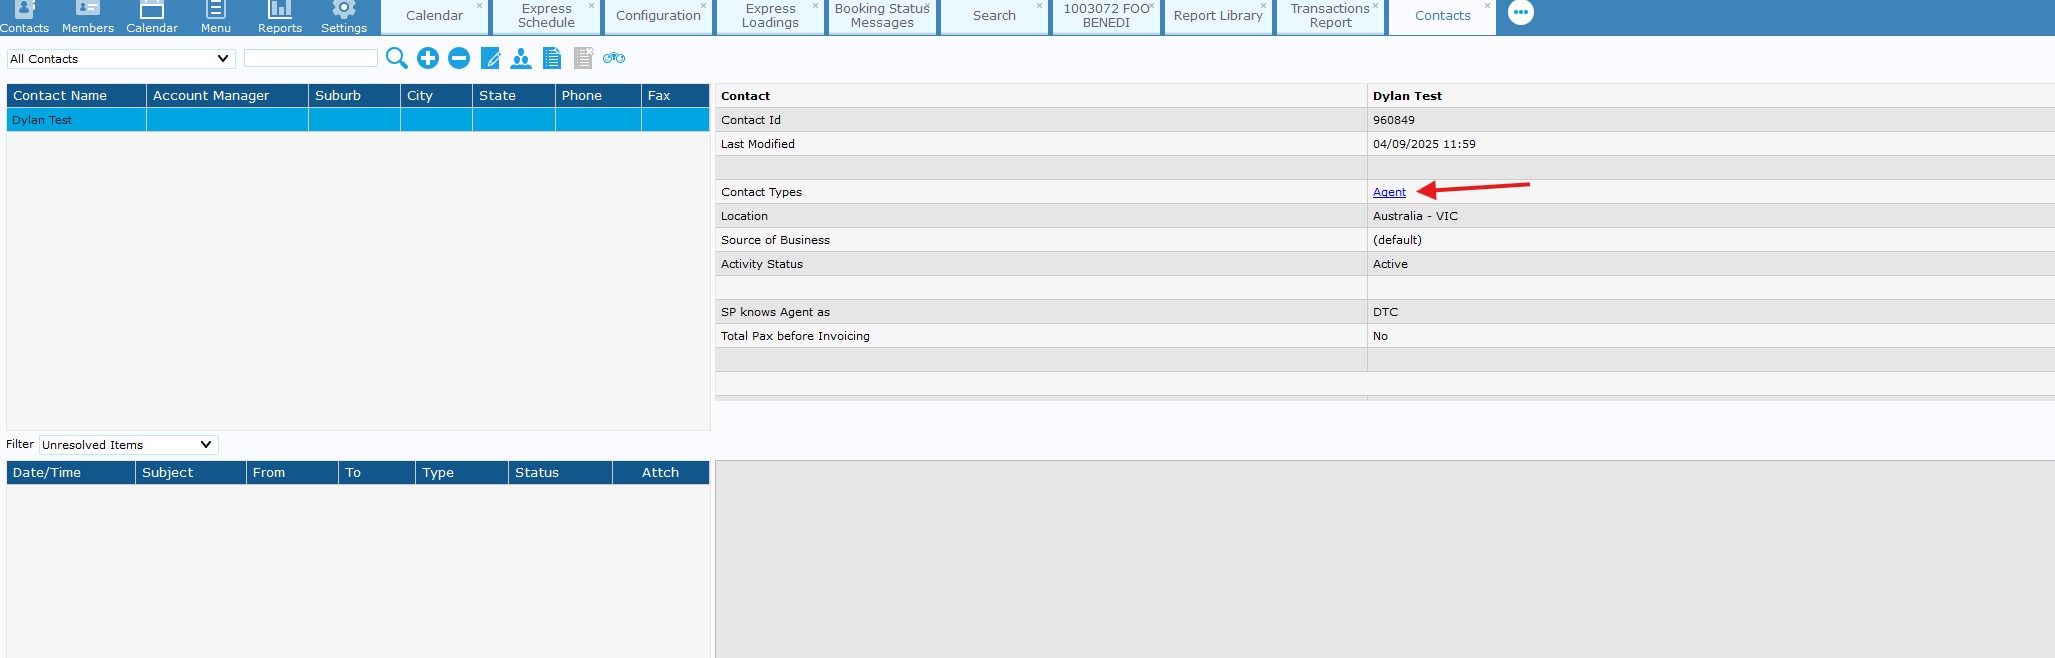
Apply & close this window > Double Click "Agent" in the contact type tab.

-
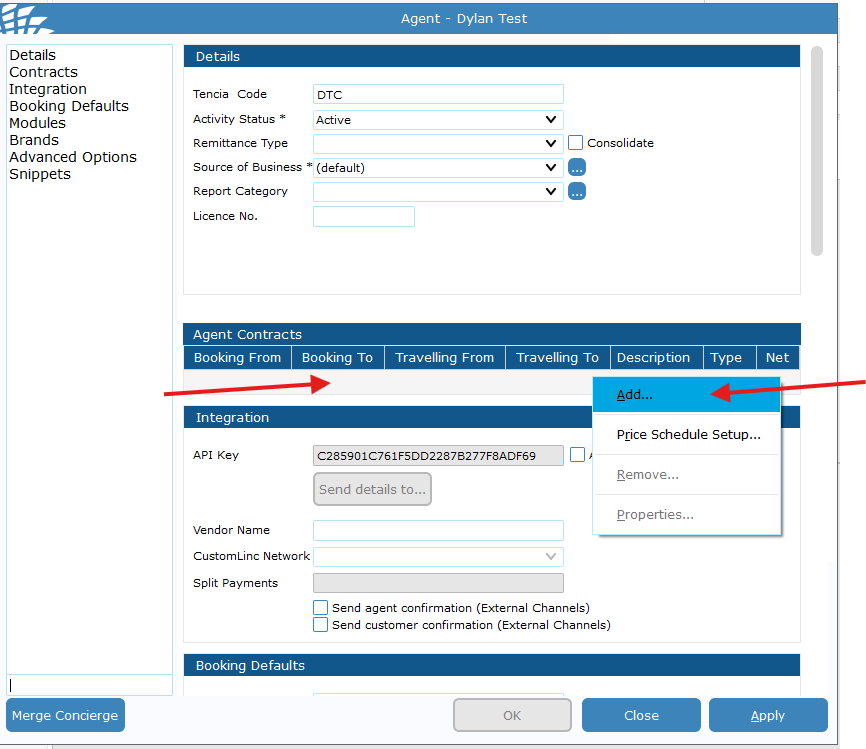
Go to the contracts area> Right click the grey space > Click Add

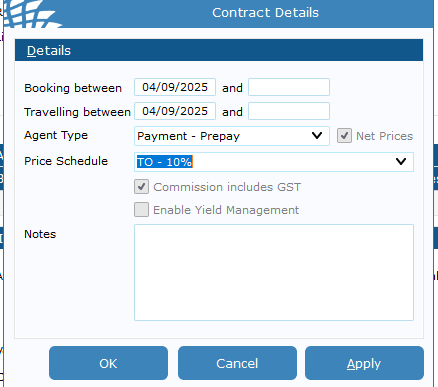
- Fill in details:
- Booking Between - Usually set day after request to prevent any issues with any bookings made that day;
- Travelling between Usually set day after request to prevent any issues with any bookings made that day ;
- Agent type is the payment process the agent uses (Invoice or Prepaid);
- Price schedule is their commission rate.
If an end date is put into this field the contract will be removed after that date.

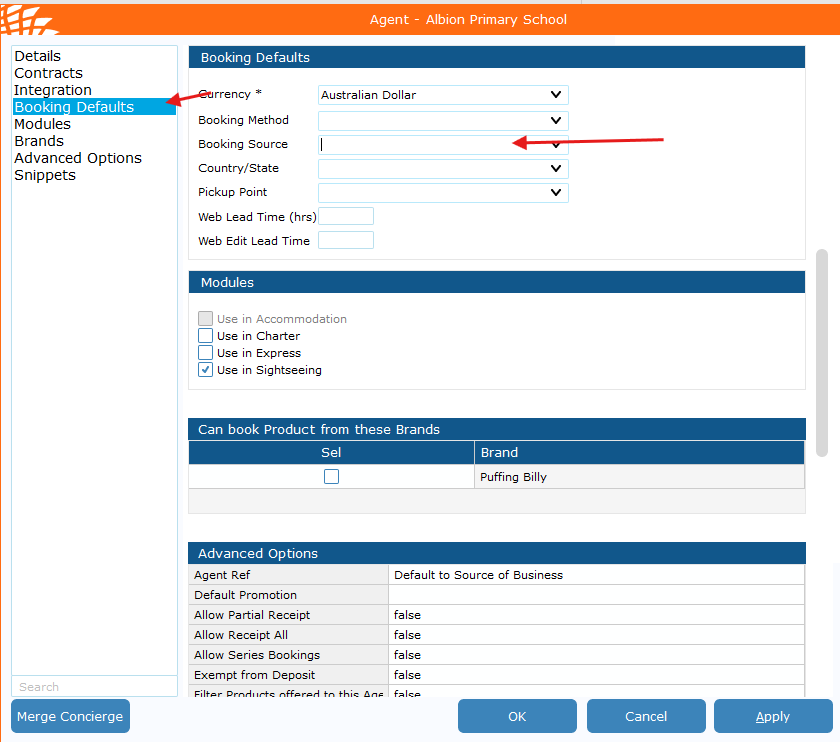
- If the Agent is a school, you also need to go to Booking Defaults > Booking Source and set it to School.

-
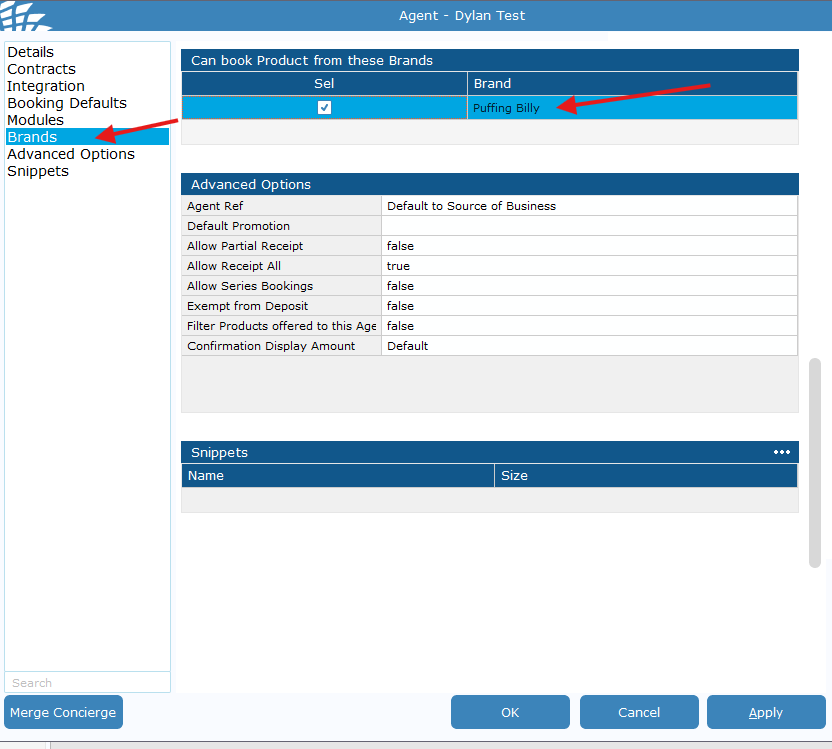
Finally go to brands and make sure Puffing Billy is ticked for the agent. > click Apply then close.